(This pouch by Sheila Snowsell, my instructor)
I have taken many sewing classes but I think I am finally getting more confident. This week I learned how to sew a zipper with my machine. It was pretty exciting since I have never even had the zipper foot out of the package it came in. I made this cute little pouch. I messed up on sewing the corners inside the pouch (I sewed across too low on one side) but my 3 year old thinks it is perfect and since I made it for her, that is all that matters. She asked me if I told the people in my class that I was making this for my little girl and she found it extra special when I answered, "Yes". She was giddy and ran to show Daddy.
You can make one of these, too. You will need a small piece of fabric and a 7" zipper.
How to Make a Zippered Pouch (in less than two hours)
By Tiffany Teske

1. Cut a piece of fabric 12 3/8" by 8 1/2". This project uses a 1/4" seam allowance. I used a cotton print. Another person in my class used a tapestry fabric.
2. Cut a piece of interfacing the same size. Iron on to the wrong side (back side) of fabric.

3. Fold the fabric in half, interfacing size out. Sew the two sides together at the top right hand corner, front & back stitching, for about an inch, using a 1/4" seam allowance.

4. Fold back the two edges, to the stitching, and all the way down, then iron open. Remember not to iron on the exposed interfacing.

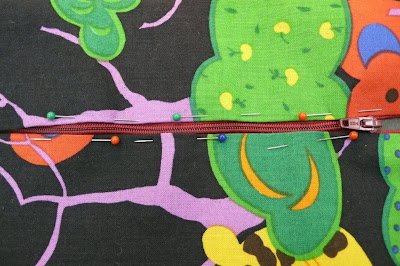
5. With the stitched part at the bottom, line the zipper up with the top of the open fabric and pin the fabric close to the edges of the zipper teeth.

Pin the other side the same way.

6. Using your zipper foot, sew very close to the edge of your fabric, beside the zipper. Be careful not to hit the actual zipper teeth, that is too close ;) It gets a bit tricky when you get to the bottom of the zipper but just stitch straight across the bottom and back up the other side, taking care not to stitch anything together that you shouldn't have.

7. Now you should have a open ended tube with a zipper in it. As you can see, my straight lines along my zipper are a bit wonky when I am not being guided by my regular foot. Whoops! Compare with the first photo in this post of the pouch made by my teacher...

8. To make a strap, cut it to the length and width you want, fold in two, wrong sides together, and sew a straight stitch up the edge. Turn the tube right side out.


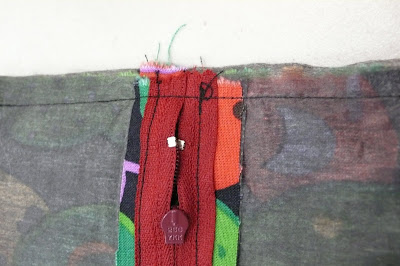
9. Straight stitch up the edges of your large pouch tube, laying your small handle tube inside, flat, so your stitching will go over the edges of the handle, securing it while closing the entire end. (I think this is confusing when I put it into words... I apologize for not getting a photo of this step...). The two photos above are of the same step. You should now have a closed tube.


10. Holding the corners, flatten the into triangles and sew across the triangle about 1" down. This makes your pouch square instead of flat. This is where my pouch got wonky because I sewed across by sight and measuring each side against the other, instead of measuring, marking, pinning, then sewing. Take care with this step. Do it to all four corners. Now you are done!

11. Turn your pouch inside out and ta-da!
No comments:
Post a Comment