Showing posts with label DIY. Show all posts

Saturday, November 14, 2009

As Promised, The Final DIY Polaroid Framing Project


Phew, after all the fun of Polaroid Week, all the blog posting, and the opening of my current solo exhibit, I needed to take a break. But, I promised one more Polaroid framing craft. Here it is... a couple of days late...
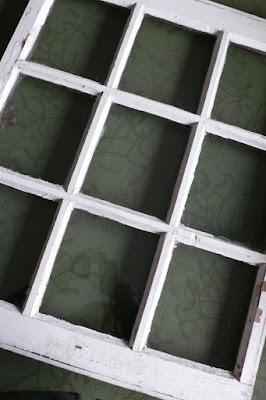

My neighbor recently opened a hair salon and she needed art. She came over one night to flip through my MANY Polaroid transfers and made a pile of the ones she liked. We started talking about how she wanted to display them... matted? Framed? Something creative? She remembered she had an old multi pane window she had brought home from the family farm. I own a mat cutter, I custom cut all of my mats, and I have PLENTY of scrap mat. I aim to use recycled items in my work so I was excited to create a unique photo gallery out of scrap mat and an old window. I love working on new projects and am confident enough to jump in with both feet even when I am not sure what to do. It all worked out this time and what I learned I will now pass along to you...


How-to Turn an Old Window Frame into a Polaroid Transfer Photo Gallery

What you will need:
- Polaroid transfers or Polaroids or whatever photos you want to use
- Archival mat board
- An old window frame
- UV resistant spray
- Newspaper
- Boot/Shoe tray (optional)
- Photo mounting tape or corners for affixing the images to the mat or you can use low tack masking tape if you don't care about it being archival. You will also need masking tape for taping the mats into the frames.
- Old wallpaper
- Spray glue (I use 3M Super 77 Multipurpose Spray Adhesive)
- Two screw eyes
- Wood glue
- Picture framing wire

1. Select your images. Lay them out on the boot/shoe tray on newspaper and spray them with UV Resistant spray (I use Kryon Gloss) according to the instructions on the can.


2. Clean your window frame to the extent you would like to. We liked that our frame was rustic and worn so aside from a quick wash we used it as is. In the end even the old paint splotches on some of the panes of glass enhanced the over all look of things.

3. Cut the outside of your mats to fit in the window panes and cut the mat window to the correct dimensions for the transfer. I would love to give an online tutorial on mat cutting but since it completely depends on what type of mat cutter you own, I can't. Cut your mat according to how you mat cutter works or Google "How to Cut a Window Mat" and you will find some information on how to do it simply with an Exacto knife and ruler. I use archival mats as other types will eventually ruin your images, since the acid will eat away the parts it touches, sometimes within mere months.


4. Using photo tape, or corners, or masking tape, tape your images onto your mat. (I used masking tape, which is not archival, because my friend may remove the images at some point. She didn't want me to use a permanent method to affix them but wanted to make sure they would stay put in the frame. Sometimes photo tape loses its grip and images can shift out of the photo corners...)


5. Fit your mats into the panes so they rest flat against the glass. Using masking tape, tape the mat into the frame. It is ok for the masking tape to be on the mat, even though it is not archival. Continue taping row by row, checking the front from time to time to see how things look.


6. I like to give the back of the frame a nice finish by covering it with old wallpaper I buy it at the thrift store. It is another way to reduce, reuse, and recycle. I used spray glue to attach it to the back of the frame (and I always try to spray this glue outside). This stuff is STICKY so if you don't have someone to help you you can put clothespins on the bottom edge of your wallpaper, hold the top edge with one hand and hold the spray can in other.


7. In order to hang your frame, measure out and mark where you want the screw eyes to be inserted. For added strength, I like to put wood glue on the threaded ends of the screw eyes before screwing them in. You do not need to drill holes first, just take the pointed end of the screw eye and start screwing it in. If your wood is very hard you can tap on the head of the screw eye with a hammer to get it set into the wood before turning.


8. Measure out your picture framing wire, leaving enough extra so that you can wrap the ends around the wire, after passing it through the screw eye head. For added strength, you can thread the wire through the screw eye head twice, by looping the end back through after the initial pass. Wrap the loose ends back on each other.


Et voila! You are now ready to hang your photo gallery on the wall. Whoot whoot!


Done and hanging on the B-Towne Salon wall. Thanks to Brooke for the chance to display my work in a new way.

Wednesday, November 4, 2009

Polaroid Week - Day Three's Image PLUS a DIY Polaroid Framing Craft


Here is my third contribution to Polaroid Week. I decided yesterday that I wanted to photograph my little gem of a camera which is impossible without a mirror. So, I got out my vintage French Ivory hand held looking glass today and started experimenting. For anyone who has never tried to hold a Polaroid camera with one hand and take a picture, they may not understand why I feel triumphant about this blurry pic. Polaroid cameras as like clunky tanks, and they really need two hands. But, I like this a lot. And I dig the camera. It has the most amazing Polaroid sound. So loud. Not what we are used to with digital. Of all my Polaroid cameras this one is the loudest. On another note, I love that this image is capturing the moment right before the camera spit out the film.


Ok, I promised two DIY projects for framing your Polaroids this week. The first one will probably appeal best to Polaroid enthusiasts who like and own the little black packs that the film comes in. Back when Polaroid made film, they allowed people to mail these back so they could recycle them. I never did this and I now have over 200 of them for 669 film, and just a few of the square type 80 I am using here. I am happy to be able to reuse these as frames. I framed this image that I made especially for my friend, Kim. I made it this spring, when I passed the Mayberry store in Grindrod, British Columbia. It is a double exposure of the store and another store, covered in hubcaps, next door. Kim's last name is Mayberry. Since it was recently her birthday it was time to frame this image up and give it to her.

How to Frame Your Polaroid Image Using a Polaroid Film Pack
By Tiffany Teske


What You Will Need:
~ Empty Polaroid Film Pack
~ Polaroid
~ Picture Hanging Wire


This is the back of a Polaroid 669 pack.


Hold your film pack so the window is facing down. With your left hand, squeeze in the sides of the pack that have the window, and with your right hand remove the backside of the pack (I am right handed). Lift one side off first, then it will come apart easily. This is difficult to describe but easy to feel once you are doing it. It is not fragile so even if it feels like you might break it, you won't.


Now you will have three pieces.


Flip over the piece in the middle in the photo above (the solid piece). Lay your Polaroid on it. You can secure the image with photo tape on the back but it is not necessary.


Take the piece with the window and set it on top.


Put the third piece back on the pack in a reverse of how you took it off, one side then the other. Make sure it clicks together.


Take a length of picture wire that is appropriate for the frame size. Knot both ends. Pull up one of the tabs on the back side of the pack. Slide the knot in. Let the tab fall back into place and the knot will be secure. Do the same on the other side.


Ta-da!


You can put a business card in the back of the pack just secure it with some double sided tape.


I wrote a message on the frame with a silver paint pen. I packaged Kim's gift with recycled tissue paper, a take home food container, and recycle ribbon. Easy peasy and she was pleased as punch!

Sunday, October 25, 2009

A Visit to the (Stuffed) Animal Hospital


There was a time, before I cared so much for our environment, before I had the skills I do, and before children, that I threw away anything broken or that threatened to be becoming worn. I hate to say it, but I was raised that way. My Baby Boomer parents who were able to provide very well for us in a disposable society. I am happy to say that I can hardly remember my wasteful days. I am now happy to repair the things I own and look for challenging situations to try to solve. The way I see it, if I can fix it, wonderful, and if not, well then I can take the parts and create something or as a last resort, I can throw it away. It is important for me to teach my kids to be resourceful and to use their imaginations to come up with solutions. It is the way my grandparents were brought up to think. It is fun to use your brain and even more fun to fix something! The one drawback I find to all of this can be finding the time. I tend to throw fix-it projects into a bag or pile, especially anything that needs a needle and thread, and to fix it all at once.


This brings me to a recent challenge, the likes of which I had never tackled. Quin's ballerina angel bunny lost her head. Frankly, if you could see the plethora of stuffies in my house, you would think I would thank my lucky stars to have a reason to chuck one on the garbage. You are right, THEY ARE EVERYWHERE in my house, but there is this thing that happens when your kid comes to you with something they love, something that is broken, and they look at you with tears in their eyes, and they expect you to be able to fix it. This bunny was one of the first things my mom gave Quin, she has always had this bunny. I must admit even I am quite fond of her creamy fur, her sage satin leotard, and glitter covered wings. Yes, I had to perform surgery on this headless bunny, STAT! The hope and faith in Quin's eyes made me contemplate completing a task that until this day I had never considered starting.


How to Repair a Headless Stuffed Bunny

What you will need:
- Embroidery floss (6 strands) in a color similar to the animal's fur
- A curved tapestry needle
- Scissors


1) Start with less thread than you think you might need. You can always use more, and if you use too much at once it may get knotted while you are sewing. Thread your needle. Knot the end.


2) There is no need to hid the knot on your first stitch, but if you want to, start with your needle inside the "neck" of the animal, coming out.


3) Make a "normal" hand sewing stitch, I guess it would be a running stitch, start stitching. If you think you will need the strength you can use a back stitch. Pull each stitch tight, then keep on stitching the head to the neck all the way around. Do not worry much about whether or not the stitches will show because as you pull down tightly on each stitch you will see that the fur is going to nicely cover your stitches and that the floss will blend in.


4) Once you are all the way around, tie off your thread in a knot. Once again, you don't need to worry too much about hiding the knot.


5) Survey your work and pat yourself on the back. Hand to bunny to your child and wait for them to smile and hug you (my favorite part!).


I felt really good when Bunny had her head back and Quinny had her smile back. One of the things I like best about being a mother is the challenges that I can face and concur, and how that helps me to learn and grow. And that allows me to be able to teach my daughter. I also like that my daughter thinks I can do anything, so it inspires me to try. And come on, just look at that smile...

Tuesday, October 13, 2009

Alberta Art Days - DIY with Linda Bodo at the Banff Public Library


I have a four month old baby. She is the most laid back little angel you ever could meet. Her big sis was much the opposite as a baby, although at the time, her being my first, I had no idea. However, I now know how different one baby can be from the next. I nursed both kids on demand. With Quin, I spent most of my time sitting down and nursing. I could not leave her with my husband even to grocery shop. I nursed her for 2 years and 3 months. Elle on the other hand put herself on about a 3 hour schedule from the get go. If she eats more often than that she spits it up. So, aside from growth spurs and occasional cluster feeding, I can leave Elle with Andre and Quin and from time to time I get to experience a bit of art and craft making outside of the house.


During the weekend of Alberta Art Days I took part in a FREE DIY workshop at the Banff Public Library (they offer all of their programming and library membership for FREE). The instructor, Linda Bodo, is from Edmonton. She has been compare to Martha Stewart but she had a reduce, reuse, recycle mentality. Her motto is "Repurpose, Recycle and Redefine your Leisure Time.” The projects she presented to us were mainly for the garden and entertaining (lots of good ideas for using wine corks!!). The project that we made during the class was a beautiful moss-lined hanging basket.


I wish I could find this project for you online. Linda has a great website that does offer many of her projects on it. Check it out for some inspiration. She gave each of us a copy of the spring 2009 issue of Enjoy Gardening, which has the hanging basket project on page 93. It may also be in her new book, Enjoy Life Outside, which features 15 of her outdoor projects.


I was so happy with my basket that I look forward to making some more in the spring to hang in our little back patio/garden. I will write a tutorial then, along with photos, but if you have any questions about it in the meantime feel free to leave a comment here or I would urge you to contact Bodo through her website. She is very approachable. I had a wonderful time at her workshop and hope to see her in Banff again. Or maybe on her estate, I hear it is gorgeous... I am sure it would be an awesome place for me, a photographer who loves flowers...

Tuesday, April 7, 2009

My Ongoing Effort to Organize My Studio Part 1

My Wall O Shelves BEFORE:


My Wall O Shelves AFTER:


I got these curtains, 6 panels in fact, from someone I know on FreeCycle. I used four of them here, they were pretty sheer, so I doubled them up. They were too long, with an unfinished edge, and I hemmed them with Pellon. You can see my other post about hemming with Pellon here. Ahhhh, so nice to have some of the mess hidden behind a wall of shocking pink...

Sunday, April 5, 2009

Hemming Sheer Curtains Using Pellon OR How-to Easily Hem Ikea Curtains


Yes, I will admit it. I am one of those people who bought Ikea curtains, but could not be bothered to hem them to the right length. In this case, it was mostly because they are sheers, and I was completely terrified that they would get caught in my sewing machine. Need I remind you, I can sew, but my confidence it not very high. So, for the past 3 years or more, I have tried all manor of things to get away with not hemming these curtains. In the first of four houses we have lived in while owning these curtains, I tried tying them in large knots at the sides of my windows, which completely ruined the effect of the lovely pattern, was a pain when I wanted to shut them, and just plain looked bad. Then, in our newest house, after they had been packed away in the last two houses, I just hung dark curtains, then draped the sheers over the top of them, pulling the extra fabric half way down the back side of the curtain, so I could see the nice fabric on the room side but it was totally impractical and visually unsatisfying. The other day I had finally had enough. I decided to go to the fabric store to see what type of hemming tape or item I could use to fix them. The nice woman at the store said I should use Mistyfuse, since they are sheers, as other products would melt through the fabric. I THOUGHT I already had a roll of Mistyfuse at home.... turns out it is Pellon.... but was not about to let that stop me, damn it, it was time to do something!!


So, I got out the Pellon, ruled out out some strips with my old school wooden ruler, and cut it out. As you can see above, I also heated up my ANCIENT flat iron which I bought awhile back on Ebay, so I could use it to melt beeswax on mixed media pieces (no annoying holes to clog with wax like modern irons). I LOVE everything about my iron. I especially love the clicking noises it makes when heating. It is like a symphony of clicks... I should record it. Very nice. Plus, I love how it looks. Never mind that I need to put it on a baker's cooling rack so it doesn't melt a hole in my counter top...


Back to the curtains... I measured them on the curtain rod for length, pinned them, cut off the access fabric, pressed along the bottom so I had a line to use for lining up the pellon strip, and then rolled the top edge and pressed so it would stay nicely in place, once the Pellon was in place and ready to iron.


I laid down the Pellon strip, texture side down and pressed along the length of it.


Then, I peeled away the paper backing.


Next, I put the pressed fabric back over the Pellon strip, then placed a damp cloth over that and pressed for about 10 seconds, then took off cloth and pressed again. The Pellon did melt through a very little bit, so stuck to the cloth below, but pulled right off.


I hung the curtains on a rod above the curtain rod for the brown curtains, since I want the fabric to be on top of those, rather than against the window. When I want just the sheers against the window I pull back the brown curtains to the sides. Easy-peasy. So, if you, like me, have been afraid to work on your curtains, give it a try!! I believe it cost me about $1.75 in Pellon and it took me about 1 1/2 hours, which included hanging the curtain rod and measuring, then hanging the curtains.