
Monday, December 27, 2010
Happy Holidays to All!
Friday, December 17, 2010
365 Days With Kiddos - #20 - Make Gingerbread Cookies

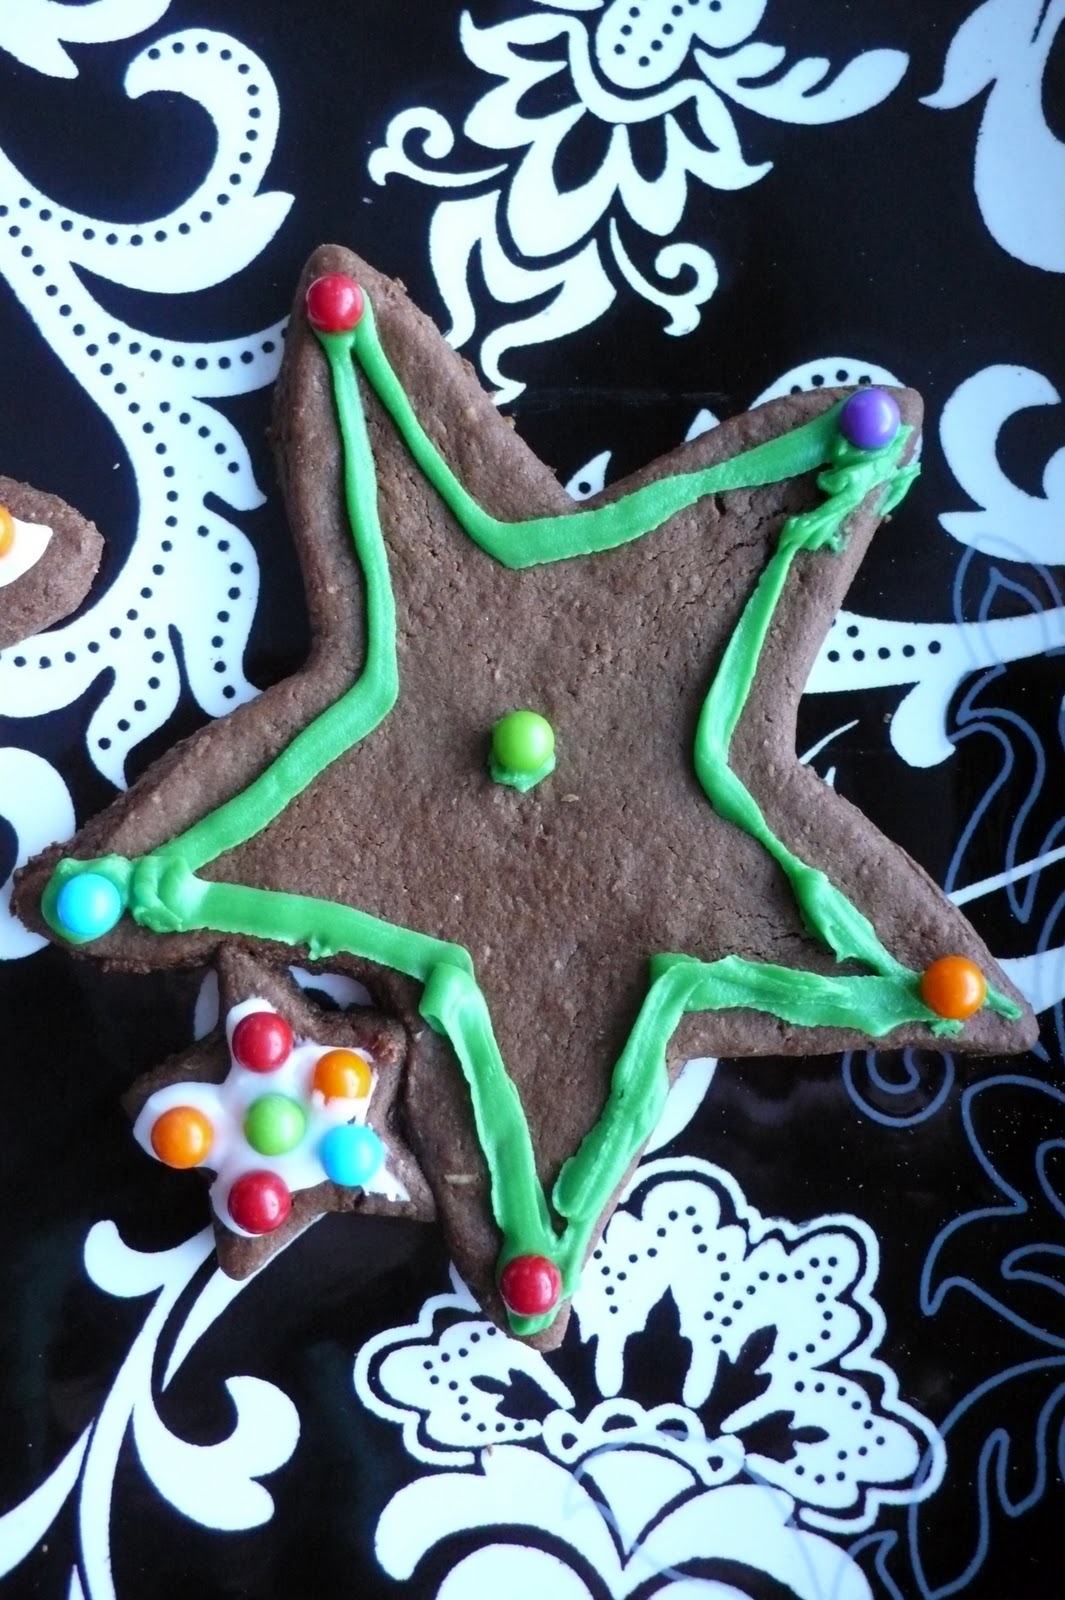
Making gingerbread cookies is a great way for kids to help in the kitchen during the holidays. They can measure the ingredients and mix the dough, as well as roll it out. Their imaginations can run wild by picking and using cookie cutters, as well as decorating the cookies. This year we had everything from connected rows of stars, to fairies, to mommy and baby stars, to simple circles (which were nice blank canvases for elaborate decoration). Premade icing is available but I wrote about a simple vanilla buttercream recipe that can be dyed any color you like, here. If you don't have a piping bag you cab fill a ziploc bag with icing, then cut of the tip of one of the bottom corners. We also used sprinkles and little round hard candies. The sky is the limit and half of the fun is chosing what to use. If you would like to make the connected cookies we did, just make sure your dough cut outs are touching each other on the cookie sheet before you place them in the oven.

I found this recipe on a card in my jumbo sized recipe box that I don't look in often enough. It has good ingredients that I replaced with organic versions. It is a very easy recipe to put together and I love all the spices that are used. The cookies are crisp and delicious. The dough should be chilled before rolling it out or it will be very sticky. I made half of the batch one evening and left the dough in the fridge overnight and baked the rest the next day. You can freeze this dough for 4-6 weeks by double wrapping it plastic wrap. Defrost it by placing it in the fridge for several hours. The baked cookies can be frozen for 3-4 weeks by double wrapping the same as with dough. When you want to eat them just let them sit out until they are room temperature or pop them in the microwave for 20-30 seconds. Be sure to make extras so you can share them. We saved some of ours for a family that is hosting an upcoming open house...

Ingredients
1/2 cup butter
3/4 cup brown sugar (or 1/2 cup honey)
1/2 cup molasses
1 tsp cinnamon
1 tsp ground ginger
1/2 tsp ground allspice
1/2 tsp ground cloves
1/2 tsp ground nutmeg
1 1/2 cups whole wheat pastry flour
1 1/2 cups unbleached white flour
2 tsp baking soda
1/4 cup water (1/8 if using honey)

Directions
1) In a large bowl with a hand or stand mixer, cream together butter with sugar or honey, molasses and spices. In a medium bowl combine flours and baking soda.
2) Add flour mix to butter mix and stir well. Mix in water. The dough should be stiff (I use my hands to combine everything). Chill for several hours. You can put in the freezer for 30 minutes if you are rushed for time.

3) Preheat oven to 350 degrees F. Roll out the dough on a lightly floured board or your counter to a thickness of 1/4" to 1/3".

4) Cut cookies using cookie cutters. Bake on a greased cookie sheet for 10 - 15 minutes.

5) Let cool on the pan for a minute or two, then transfer to wire cooling racks.

6) Decorate!


Thursday, December 16, 2010
New Work - "Good News"
I have been meaning to post some of my newest work. I will do that in a couple of posts since I am badly in need of my bed...
 Good News (Full View)
Mixed Media Collage by Tiffany Teske
8x8"
About Good News
My mother-in-law recently sent me some family photographs, including the one of the women in this piece. They were blueberry picking. I loved the sisterhood I felt from the photo and the nostalgia I felt for the days I used to go blueberry picking while living in Maine. I decided to collage the photograph onto one of my own photographs. The background photograph is an image I originally shot on Polaroid Spectra film, of a field in Alberta where I now live (although I live in the mountains). I scanned the image, saturated the colors, and printed it onto regular photo paper. I then hand sewed the vintage buttons onto the piece, in bunches, to resemble balloons, but also to symbolize memories of the past, being carried on the wind. I like how some of the threads of the different bunches are intertwined, like the lives of these women. And how one woman doesn't have any balloons... The birds are images that I love to use in my work, for their beauty and freedom. The fortune cookie fortune "Good news will come to you from far away" speaks to the future, but also of the distance of the past. The primary color palette is cheerful. The photograph has scalloped edges to go with the vintage theme and it is mounted onto a sewing pattern on canvas. It is 8x8".
 Good News (Detail)
 Good News (Detail)

Mixed Media Collage by Tiffany Teske
8x8"
About Good News
My mother-in-law recently sent me some family photographs, including the one of the women in this piece. They were blueberry picking. I loved the sisterhood I felt from the photo and the nostalgia I felt for the days I used to go blueberry picking while living in Maine. I decided to collage the photograph onto one of my own photographs. The background photograph is an image I originally shot on Polaroid Spectra film, of a field in Alberta where I now live (although I live in the mountains). I scanned the image, saturated the colors, and printed it onto regular photo paper. I then hand sewed the vintage buttons onto the piece, in bunches, to resemble balloons, but also to symbolize memories of the past, being carried on the wind. I like how some of the threads of the different bunches are intertwined, like the lives of these women. And how one woman doesn't have any balloons... The birds are images that I love to use in my work, for their beauty and freedom. The fortune cookie fortune "Good news will come to you from far away" speaks to the future, but also of the distance of the past. The primary color palette is cheerful. The photograph has scalloped edges to go with the vintage theme and it is mounted onto a sewing pattern on canvas. It is 8x8".


Monday, December 6, 2010
Weekly Recipe - Banana Wheat Germ Muffins

MMMMMM! Banana muffins. I like them plain. I like them with peanut butter. I like them with chocolate chips. I was recently playing around with different flours and created a pretty darn good and healthier version than I normally make.
When making banana muffins I always try to use black bananas, the riper the better, for flavor and moisture. In this recipe I used two thawed frozen bananas, that I had put in the freezer when they were super ripe. I also added one yellow banana.
Wheat germ is named as one of the top ten foods by the Mayo Clinic. With 23 nutrients it has more nutrients per ounce than any other grain or vegetable. It is easy to put on cereal, in pancakes, on yogurt, in smoothies, or in muffins. My kids love to sprinkle it on all kinds of things.
Banana Wheat Germ Muffins
By Tiffany Teske
12 standard muffins
Ingredients
~ 1/2 cup rye flour
~ 1/2 cup barley flour
~ 1/2 cup whole wheat pastry flour
~ 1 cup wheat germ
~ 1/2 cup brown sugar
~ 1 tsp baking powder
~ 1 tsp baking soda
~ 1/2 tsp salt
~ 1 cup mashed banana (2-3 bananas)
~ 1/2 milk (you can use soy, almond, rice, cow)
~ 2 tsp lemon juice
~ 1/4 cup vegetable or canola oil
~ 2 Free Range eggs
Directions
1. Preheat oven to 375 degrees and grease muffin pan(s).
2. Combine dry ingredients and mix well.
3. In another bowl combine the wet ingredients and mix well.
4. Add the banana mix to the dry mix and stir until just blended. Do not over mix, which makes muffins dense and heavy.
5. Spoon into pan. Bake 20-25 minutes.
Sunday, December 5, 2010
Weekly Recipe - Pumpkin Nutella Snack Cake Plus How To Make Fresh Pumpkin Puree - A Week of Recipes Coming Up

I haven't posted a recipe is soooooo long, that I decided this week I will only post recipes, so if you like to cook and eat, stay tuned...
My newest creation was inspired by the name of someone else's recipe. It piqued my interested but when I read it there was WAY too much sugar and only white flour in it. I tweeked it and ended up with a moist, amazing, and healthier cake. It is delicious without any frosting.
One of the reasons I stumbled on the other recipe was that I had some leftover pumpkin I wanted to try to puree, so I am also including instructions on how to puree fresh pumpkin, although this cake is also good, and quicker and easier, if you use canned pumpkin.

How to Make Fresh Pumpkin Puree
by Tiffany Teske
The average pie pumpkin (which is kind a funny thing to say since they are all different) makes about 3 cups of puree. I used half a pumpkin and indeed I had 1.5 cups.
1. Wash and dry your pumpkin. Preheat your oven to 400 degrees.
2. Cut the top off your pumpkin and discard it. Now cut your pumpkin in half, remove the seeds (which you can roast) by scrapping with a metal spoon, then cut each half in half again.
3. Place your pumpkin quarters on a cookie sheet, cut side down. You can cover them with foil (I did this in my toaster oven and didn't cover them, which worked fine). Bake for 35 - 45 minutes, until the meat can easily be scraped from the shell.
4. Let the pumpkin cool. Scrap the meat from the shell.
5. Put the meat into your food processor and puree. If it is thick you can slowly add a teaspoon or so of water at a time. Mine was very wet without any additional water. Mine looks a bit like applesauce but the color will vary.

I wish I had a picture of this cake but I made it at night, wanted to photograph it in daylight, then we ate a bunch and took the rest to friends, and I never got a photo... I think that is a first!
Pumpkin Nutella Snack Cake
By Tiffany Teske
1 c unbleached all-purpose flour
1 c whole wheat pastry flour (this is finer than whole wheat flour so not as heavy)
1 tsp baking soda
1/2 tsp sea salt
1 tsp of cinnamon
1/4 tsp nutmeg
1/2 tsp ginger
1/2 lb (or 2 sticks or 8 oz or 1 c) butter, at room temperature
1/2 c granulated sugar
1/2 c packed brown sugar
1 large egg
1 t real vanilla extract
1 1/2 c canned or fresh pumpkin puree
1/2 c Nutella
1. Preheat oven to 350 degrees. Spray a 9-by-13-inch baking pan with cooking spray.
2. In a medium bowl, whisk together flour, baking soda, salt and spices.
3. In the bowl of a stand mixer, cream butter and sugars until smooth. Beat in the egg and vanilla until well blended. Add the pumpkin puree and Nutella. Reduce speed to low, and mix in the flour mixture until just combined.
4. Spread batter evenly into the prepared pan.
5. Bake for about 35-40 minutes or until the sides pull away from the pan and a toothpick comes out clean. Place cake on a wire rack and cool completely.
Bon appetit!
Tuesday, November 30, 2010
Another CSN Store Giveaway - What Would YOU Do With $50 to Spend On Whatever You Want?
For those of you who didn't win my first CSN Stores giveaway or who missed out on the opportunity to win, you have another chance! With the holidays coming up I know that you could use a little extra spending money and maybe some inspiration...
Have you seen CSN Stores? They have over 250 online stores that carry everything from kids backpacks to patio furniture. And not just a couple of items, oh no, they offer hundreds to thousands of items in some categories. If you don't want to leave your home to shop, try CSN. I had fun shopping for kids play kitchen items. I also was looking for a backpack for my daughter...

Skip Hop Zoo Pack Owl Backpack

Sassafras The Little Cook Chef's Hat

ferm LIVING Apron

Early Childhood Resources 4 Piece Kitchen Set

Guidecraft Play Kitchen Wooden International Foods Products

Le Toy Van Honeybake Breakfast Play Set

KidKraft Cupcake Stand Set

KidKraft Primary Colors Baking Set

Guidecraft Retro Racers Table & Chair Set
Now are you ready for the giveaway? To be eligible you must:
- Live in the US or Canada. I am very sorry to my international friends, but I will try to have a giveaway that you can be a part of soon...
- Become a "follower" of my blog. Just click on the follow button to the right of this post. If you're already a "follower" you're already eligible but you need to leave comment telling me you are already a follower.
- Leave a comment on this post telling me you are a new or previous follower for one entry in the giveaway. If you tell me at least one item from CSN Stores you would use your certificate on you will get a second entry.
Would you like even more chances to win? Then you can...
- Tweet or Retweet this post.
- Link back to this giveaway on your blog.
- Join my Facebook page.
If you chose to do any of these additional things, please be sure to mention it in your comment.
I will announce the winner chosen by random number generator on Tuesday, December 7th. Please leave all comments by Monday, December 6th at 11:59 pm. Good luck!
If you are interested in finding out about more blog giveaways, you should check out Giveaway Scout. They have information about many many giveaways, all in one place. You can even submit your own giveaway...
Friday, November 26, 2010
Just for Fun - Old Photos, Friends, and What I am Grateful for on Thanksgiving
It has been a week since my last post. I was busy celebrating my birthday, playing in the ton of snow that dumped on us last week, and working on a little project... This project didn't even start out as a project. I was simply trying to make a couple of old friends from high school laugh. I posted two photographs of them, from the place where we used to work, on Facebook. I had to scan the photos to do this, and while I had the scanner out, I decided to do more, and more, and then more.
 My Mom & I
I started wanting to be a photographer at the age of 7, and once I was taught how to use a darkroom in high school I started to record my daily life. This means I amassed a lot of photographs. And back in the day I was more than happy to also pose for the camera, so I often handed it over to whomever wanted to use it.
 Me with a drawing I made of Madonna
I have dragged this collection of negatives and prints around with me all over North America. I grew up in Minneapolis, and then lived in Arizona, Florida, Fisher's Island New York, & Maine. And then they came with me to Ontario, Quebec, and now Alberta. Why? Because I appreciate photography and because they represented my life.
 Me as Madonna, but this is not a costume
I create a lot of mixed media art now, and both it and my photography center around themes of memory and nostalgia. I originally became interested in photography because I spent hours pouring over old family photo albums. My high school images are my early recordings of my history, to live on for others in my family to look at and wonder about.
 One of my favorite photos from high school
So, as I started scanning, I began posting these images, made in the late 80s and early 90s, on Facebook. I do have many of the people in the photos as friends on Facebook. And a funny thing started to happen as each day as I posted about ten more. These people started commenting. And talking to one another in the posts. Everyone was laughing and having fun reminiscing. Soon someone said it was like having a high school reunion without having one. And this coming year will be the 19th and 20th reunions for many of us. I was getting tons of wall posts each day and many private messages. The private messages all said how much everyone appreciated that I had posted these images from an almost forgotten time. Everyone was enjoying thinking about the old days. Another person said, "I still think of you all just like this," just as we are in these old photographs.
 A Friend & I in a typical old thyme photo from a theme park
All of a sudden it dawned on me. I had been enjoying these photographs for years and had completely taken for granted that my friends didn't have any photographs like this. Of course they had family photographs but many of these images were taken in the school hallways, in classrooms, and in our teenage rooms, most of them in black and white. They didn't have photographs like this. Other images were the typical school photos taken for the yearbook, but many of us had not seen ours let alone our friends' in years.
 Me - 8th Grade
 Me - 9th Grade
 Me - 10th Grade
My old friends couldn't believe that I still had these images. They have frozen us in time. And the, in some cases, bad quality of the images (I never really dusted my negs so the prints have lots of dust, and in some cases I didn't process them properly so they are starting to fade or change color) only enhances the feeling that they are from the past. One this, American Thanksgiving (in Canada we have Thanksgiving on the first Monday in October) I am grateful that I took and kept these images and that I can share them with my lifelong friends.
 My 16th Birthday

I started wanting to be a photographer at the age of 7, and once I was taught how to use a darkroom in high school I started to record my daily life. This means I amassed a lot of photographs. And back in the day I was more than happy to also pose for the camera, so I often handed it over to whomever wanted to use it.

I have dragged this collection of negatives and prints around with me all over North America. I grew up in Minneapolis, and then lived in Arizona, Florida, Fisher's Island New York, & Maine. And then they came with me to Ontario, Quebec, and now Alberta. Why? Because I appreciate photography and because they represented my life.

I create a lot of mixed media art now, and both it and my photography center around themes of memory and nostalgia. I originally became interested in photography because I spent hours pouring over old family photo albums. My high school images are my early recordings of my history, to live on for others in my family to look at and wonder about.

So, as I started scanning, I began posting these images, made in the late 80s and early 90s, on Facebook. I do have many of the people in the photos as friends on Facebook. And a funny thing started to happen as each day as I posted about ten more. These people started commenting. And talking to one another in the posts. Everyone was laughing and having fun reminiscing. Soon someone said it was like having a high school reunion without having one. And this coming year will be the 19th and 20th reunions for many of us. I was getting tons of wall posts each day and many private messages. The private messages all said how much everyone appreciated that I had posted these images from an almost forgotten time. Everyone was enjoying thinking about the old days. Another person said, "I still think of you all just like this," just as we are in these old photographs.

All of a sudden it dawned on me. I had been enjoying these photographs for years and had completely taken for granted that my friends didn't have any photographs like this. Of course they had family photographs but many of these images were taken in the school hallways, in classrooms, and in our teenage rooms, most of them in black and white. They didn't have photographs like this. Other images were the typical school photos taken for the yearbook, but many of us had not seen ours let alone our friends' in years.


My old friends couldn't believe that I still had these images. They have frozen us in time. And the, in some cases, bad quality of the images (I never really dusted my negs so the prints have lots of dust, and in some cases I didn't process them properly so they are starting to fade or change color) only enhances the feeling that they are from the past. One this, American Thanksgiving (in Canada we have Thanksgiving on the first Monday in October) I am grateful that I took and kept these images and that I can share them with my lifelong friends.

Friday, November 19, 2010
365 Days with Kiddos - #19 - Celebrate National Child Day (Canada)

Did you know that November 20th is National Child Day in Canada? Our community is hosting a wonderful free Kid's Karnival at the local YWCA. There will be face painting, circus themed fun, crafts, and more. My kiddos and I can't wait to go. Check out what it available in your community. Since this year it falls on a Saturday there is likely to be something bigger than usual. Enjoy!
About Canada's national "Child Day"
(Taken from this website)
Canada's national "Child Day" is held November 20th each year as enacted in Bill C-371, otherwise known as the Child Day Act, by the Parliament of Canada in 1993.
It commemorates the United Nations adoption of two landmark documents concerned with the human rights of all children and youths.
On "Child Day", Canadians honour our children and The United Nations Declaration on the Rights of The Child on November 20th, 1959, and the The United Nations Convention on the Rights of the Child on November 20th, 1989.
The Convention spells out the basic human rights to which children (under the age of 18) everywhere are entitled.
The purpose of Child Day is to promote awareness about the Convention to Canadians .
It is also a day to support Canadian children's rights by voicing your concerns about Canadian children's rights violations to the politicians of Canada and to educate our children about their rights and responsibilities.

Images by Tiffany Teske
I took these images of children in Haiti. Their smiles are so bright. When I wanted images to represent the spirit of children, I thought of these right away...
Tuesday, November 16, 2010
365 Days with Kiddos - #18 - Record Your Child's Stories

We have all wished we had written down something sweet or funny that our child said. We thought we would remember, but then it was gone. Time flies and in the hustle bustle things get lost. Today's post is simple. It just requires a little quality time, a pen, pencil, or crayon, and some paper. Sit down with your child and ask them to tell you a story. We like to do this at bed time, after we have read some stories, but it can be done anytime. At first your child may only have one or two lines but if you do this regularily they will get better and better at making up stories and become eager to share them with you. I would suggest dedicating a whole journal to these stories. You could start out by making a creativity journal from recycled paper and books. Or, if you prefer to film or record these little story sessions and have the necessary equipment, by all means, do that. As your child grows and changes, so will the stories. In the future you will be able to see the growth of your child and to recall memories of the things going on in their lives by each story, kind of like when you look through a photo albums and the photos jog your memory. These memories will be something you will look back on and be oh so very happy that you took the time to record.
Tuesday, November 9, 2010
365 Days with Kiddos - #17 - Make Creativity Journals Using Recycled Paper & Books

If you have kids you probably have them... books that have wrecked bindings, ripped or missing pages, or maybe so much doodling on some pages that they are ready to be tossed. Instead of tossing them you can use them for many projects, including for making creativity journals. This is a simple project that along with other paper destined for recycle bin is a great way to save paper.
Creativity Journals
By Tiffany Teske
Materials
- Delapidated book
- Paper that needs to be recycled, like printer paper that is printed on one side, old notebook paper or filler paper, drawing or construction paper from mostly used books, your child's art work, etc
- A cover for your book, either a soft book cover or cardboard from packaging
- Scissors or paper cutter
- Office type comb binding punch machine for use with wire or plastic comb bindings
- Wire or plastic comb binding that fits your punch
*For a variation
- Three ring binder punch
- hinged key chain rings if using a three hole punch

Directions
1. Trim down paper to a size that fits in your binding machine. All of your pages do not need to be the same size as long as the largest size fits in your punch. Lay out your book whatever way you like with smaller pages contained inside large ones. Once you have your book the way you want it, use binder clips to hold the "spine" in place.
2. Put your book into your punch all at once or in sections.
3. Put your comb binding into the machine and make your book.
*Variation
Instead of using an comb binding machine you can three hole punch your book and then used hinged key chain rings to hold the book together. There are many many ways a book can be bound. If you are looking for other ways just google "book binding".

In the book shown we used all-purpose kid's craft paper from a book we found partially used at the thrift store, and an old book that had come apart. We put a piece of paper, then a book page, then paper, then a book page. I made this book before we headed out for a summer plane trip. It was a good way to combine a book to read with paper for drawing in a way that was compact and contained. We also brought along crayon cakes, which will not roll off a plane tray table onto the floor...
Thursday, November 4, 2010
Happy and Healthy - Dry skin? Try an Oatmeal Bath

I have used lotion to ward off dry skin for most of my life. When I got pregnant with my first child I started to look at what goes into my cosmetics as well as my hair and skin care products. Needless to say, I was shocked, and started to look to natural alternatives. We live in a year round dry climate where it can snow at least 6 months out of the year. My kids have never really needed any lotions to keep their skin hydrated. They drink lots of water, bathe every 2 - 3 days, and when their skin gets dry we just add oatmeal to their bath. There is not a simpler, more natural, and cost effect method. It can cost $6 for an 8 pack of commercial oatmeal bath powder. This will cost as much as the oatmeal you use. It is also good for itch relief.
Oatmeal Bath
By Tiffany Teske
Ingredients
~ 1 c Organic old fashioned, quick cooking, or instant oatmeal (They all work just as well)

Directions
Grind your oatmeal in a coffee grinder or food processor. Put in your oats and grind until they are a fine powder. If you would like to make a large batch of powder you can grind in smaller batches and store in a jar with a lid for up to 6 months in a cool place. Add 1/2 - 1 c directly to your bath water or about a 1/3 c to a baby bath and swirl around with your hand. The water will look milky and feel silky. In a powdered form the oats will go down the drain without any problems.
If you don't want to or can't grind your oats you can add 1 - 2 cups whole old fashioned oats to a sock, knot the sock just above the oats so they are snug in the sock, and put it all in your bath for 15 - 20 minutes. Wring out the sock several times. Oatmeal powder will make your tub more slippery than usual, so take care.
Thursday, October 28, 2010
Holiday Fun - Some Halloween Eats - Devilish Deviled Eggs


Today was the first moment I had to finally make some. And since Halloween is just around the corner I decided that not only would we make some deviled eggs but we would make them a little devilish. My four year daughter helped me with each and every step.
Devilish Deviled Eggs
Inspired by Better Homes & Gardens Junior Cookbook
Recipe and devilish decoration adapted by Tiffany Teske
Ingredients
~ 6 Free range eggs
~ 2 Tablespoons olive oil mayonnaise
~ 1 teaspoon prepared yellow mustard
~ 1 teaspoon white vinegar
~ 1/2 teaspoon sea salt
~ 1/4 teaspoon fresh ground black pepper
~ Hungarian paprika to sprinkle on top
~ Sliced canned black olives and fresh red pepper for garnish
Directions
1. Place eggs in saucepan water to cover. Bring to a boil then simmer for 20 minutes.

2. Place eggs in a bowl of cold water to cool. You may need to change the water a couple of times. Using a spoon, crack the eggs shell of each egg and remove. Cut the eggs in half. Scoop or pop out the cooked yolks into a bowl. Put the white aside for the moment. Mash the yolks together.


3. Add the mayo, mustard, vinegar, salt, & pepper. Mix well. Spoon the yolk mixture back into the egg whites. Sprinkle paprika on top.

4. To make your eggs devilish, use sliced black olives and red pepper slices.

My lil' devil eating some of her handiwork!

PS If you are looking for a variation on the theme, why not make deviled egg ghosts?

Subscribe to:
Posts (Atom)