Showing posts with label Polaroid. Show all posts

Monday, February 20, 2012

A Few Photos from the Opening of Jenny Shea & Tiffany Teske: A Mixed Media Collaboration


Jenny Shea with her babe, Myself, and Jo-Annie with her babe 

I am so behind on this but here they are; a couple of photos from the February 3rd opening of my current show at the Banff Public Library. There was a great turn out, considering there were four other major events happening that night in the Bow Valley. Jenny & I were so happy to welcome our friends to see our latest work. We received lots of great feedback and we sold four pieces at the opening. Jenny brought her new little boy, Luka, who was able to meet my friend, Jo-Annie's little girl, Olive. Fun was had by all! If you would still like to see the show, it will hang at the library through February 29th.


Thursday, October 13, 2011

Featured in the Light Leaks Gallery, the LAST Issue, Sniff, Sniff....


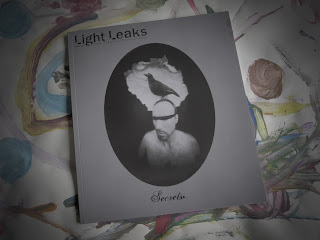
Light Leaks Magazine, Issue 19, Secrets

Light Leaks, Issue #19, arrived in my mailbox yesterday. It was a bittersweet moment, because I knew one of my images was being featured in the gallery, but I also knew it was the last issue ever. Yet another one of my favourite magazines is no longer being printed. Here is what Mike Barnes and his wife, Rachel, had to say about their decision, in an email sent out about 2.5 months ago:

"As you know, we have struggled to keep Light Leaks in print over the past year. We had an excellent plan—with the addition of the Light Leaks Shop and Holgapalooza we felt the financial difficulties could be resolved. Unfortunately those additions required more of our own time. With a growing young family, free time has quickly become our most precious commodity.

While we enjoyed working on Light Leaks over the years, we have come to a point where we must focus on our own careers to support our family. My own interest in toy camera photography has always been a hobby, not a profession. Unfortunately as much as I loved putting together Light Leaks I spent most of my time putting together a magazine about toy cameras, but not actually being able to use those toy cameras myself!

Contributing to each issue of Light Leaks magazine was (I think) an excellent use of my time, and I think all those who contributed will feel the same way. It was always a labour of love for an end product that never lacked in quality. For all of you that have been scoffed at for wielding your beloved low-fi cameras, Light Leaks represented you and why you love what you do.

For current subscribers, you believed in us, and we thank you for that. We would be honoured to have you consider your unfulfilled subscription a donation into helping us pay our final printing payments. We can offer you some of the remaining back issues that we have left, or some of the digital versions we have created (which also includes The Toycam Handbook), however supplies are limited. In addition to creating some revenue from the digital issues, we have had to sell off our entire store inventory to help get this last issue to you.

We will be closing the Light Leaks shop, but keeping www.lightleaks.org open along with links to the digital versions.

We want to thank you all for supporting our humble magazine, and especially to those who contributed over the years, particularly Gary Moyer, Steph Parke, and of course my wife, Rachel who did a lot of the work behind the scenes. Best to you all in your future low-fi photographic adventures!

Mike Barnes (toycamera@rogers.com)"

My little one...

...hamming it up

My image, Talking Walls, is a Holgaroid double exposure, made using a Holga CNF 120 with a Polaroid back. The original image is on chocolate Type 80 film from impossible project, which has shades of brown and pink, but it was printed in black and white for the magazine.
 My photography also appeared in Issue 13, Road Trip and Issue 14, Childhood.
Goodbye, Light Leaks. You were a stellar Canadian publication that toy camera lovers around the world will always remember fondly. Thanks so much!

Thursday, February 18, 2010

February 18th - A Little Collage


I have been working on this collage for a few days. I was inspired to start it because I had lots of book page and sheet music hearts left over from Valentine making. I usually start a collage with a vague idea of what I want but I never plan things out, aside from which materials to use. Once I gather the materials, which probably takes the most time, I lay things out, move things around, then just look at it for awhile before gluing things down. Sometimes, I use 3-D elements, which I did here. It can be difficult to make out everything in my collages, since little bits of text, 3-D elements, and fine details can get lost in photos. My favorite parts about this collage are the Polaroid (of course!), the 3-D hearts, and the two little glittered elements. This called Chorus and it is 8x8".

Saturday, January 2, 2010

Continuing to Balance Family, Friends, Home, & Art Making in the New Year...

The New Year always puts me in a reflective state. It makes me assess my goals for the future and also makes me look at what I have accomplished during the year. I often have things I want to post about that take me a long to time to get to... this is one of those posts.

This summer, I was invited to be part of an exquisite corpse. It is really not as creepy as it sounds. It began as the parlor game "Consequences" and was later used by the Surrealists on the 1920s. The written version involves passing around a sheet of paper upon which each person makes an contribution then folds the paper to conceal part of what is written before passing it to the next person. Later this game was used with both drawing and collage, with the paper being folded in thirds and each person contributing based on seeing very little of what is above or below. Our project was quite different from these examples...


Believe or Wolfwig Dreams of Venice by Alice Helwig

I was asked by Calgary painter, Alice Helwig, to be part of her exquisite corpse. She created the first piece, the collage above, and then sent a color photograph of it to the next artist, who had two weeks to create a work based on what they received. We were also given a theme to work within. The other artists who participated were Simon Wroot, a metalsmith, Barb Fyvie, a painter, Susan Thorpe, a potter, and Susannah Windrum, a metal worker, mixed media painter, and arts administrator. I work mostly with photography and mixed media. A diverse group, to be sure.

I will not post all of the contributing artists' work here, since Alice did an amazing job of explaining our project and showing each piece along with an artist's quote on her blog. I chose to create a collage. Below you can see images of it and read my statement about my process as well as the materials I used.


Title: The Imagined Illusion of Balance
This is the 5th piece in the series.

Process: I thought about the theme, “the joys and difficulties of being an artist”, before I received Simon’s piece, so I must say I was more influenced by it, than by Simon’s amazing work. For me, as the mother of a three year old and four month old daughters, finding the time to make art is always a challenge. A natural night owl, I generally toil in the latest hours of the night or wee hours of the morning, with my youngest child strapped to me, sleeping. I spend my days thinking about when I will be able to make art, while I am cooking, cleaning, caring for my kids, and trying to do a bit of crafting. As any artist, making art is like breathing so I need to do it. I am infinitely happier, as well as more patient, when I have had time to create.


The Imagined Illusion of Balance by Tiffany Teske

I wanted to make something light hearted to convey my thoughts on trying to find balance amongst the important things in my life and my challenge to find the time to make art. I decided to work on a collage, which is usually something I can create in one sitting, however, this one took me several days of thinking, arranging, viewing, rearranging… I usually start with a vague idea of what I want to accomplish and a pile of materials with which to make it all happen. In this case, I started with a small canvas, 6x6”, and a paper napkin that I brought home from a BBQ (I am a bit of a magpie). The paper has a repeating pattern which reminded me of clocks. The color palette of brown, pink, gold, beige, and white is lovely. The ribbon was added to remove some of the business of the background. The Polaroid had to be added because in most of my photography and art I work with Polaroid. It is blank to act as a backdrop to the woman, but also to put her in “the box”. But, as you can see, both her feet and head are not actually in the box, and the way her head is tilted in thought helps to illustrate that she is in fact thinking “outside of the box”. The “balance” text over her eyes makes her more universal, less individual, but also illustrates she is blinded by her constant thoughts of trying to be balanced. The definition of balance is hovering in an unbalanced state over her. The camera is over her heart both because of her love for creating with it but also because her need to use it is like her need to have blood pumping through her heart. The buttons are like bullets in front of items on a list, but are also fasteners, and the list is of things most important to her. The stitching binds her to these things. “Art Making” is hand written to distinguish its special place of importance on the list. I chose the title because this woman seems to have it all together when people look at her, but in reality, it is all an illusion. Like everyone else, she does the best she can, but makes no secret about her inability to find true balance between all that she loves and needs.

Materials:
6x6” Pre stretched canvas, tissue paper, vintage ribbon, buttons, embroidery thread, text and images from a vintage sewing book and dictionary, under exposed Polaroid 669 pack film image

Four of the artists, including myself, met in early October to show our work to one another and to bind the images and text about each piece into a book. I had not met any of these artists in person, so it was great to have known Alice via the web, and then through her to meet these other amazing artists. One of them lives in the next town and she and I plan to work on more projects in the future, hopefully with new artists and artists from this group. The works from our exquisite corpse were on display for the month of November at the Calgary Jewish Academy.

Saturday, December 19, 2009

She's Like a Rainbow - Nimbin Australia


I am involved with a book project with Female Photographers of Etsy (fPOE). We are in the process of voting on the cover image for our book "She's Like a Rainbow". I submitted this Polaroid Transfer of a woman in Nimbin Australia.
Image by Tiffany Teske

Thursday, December 10, 2009

Kickin' It Old School With My New Retro ORANGE Pentax Camera Case!


My dear friend, Kim, and I, like to check out the local thrift stores and rummage sales when we can. And should one of us be out hunting for treasures without the other, we pick up items for each other. Kim recently found an awesome camera bag for me for $4 bucks. Now, that would be a steal for any functional camera bag but this one is ORANGE, which just happens to be my favorite favorite color (although I don't like to discriminate, I like all the colors in one form or another). When she brought it over I was so excited! It is so nice to have a friend who knows something that screams "me" when she sees it. And extra nice that she picks it up for me.


Now, as a professional photographer, I have tons of camera bags, because I have tons of cameras. Only two are digital, my Nikon SLR and my Leica point-and-shoot, and the rest are analog; various 35mm SLRs for film, plenty of Polaroid cameras, a bunch of point-and-shoots for film, a 4x5, an argus, a yashica mat twin-lens reflex, and of course, my Holga with Polaroid back. These all live in various camera bags, some of which were made for them, some of which were not. Case in point, my Holga with Polaroid back, which produces Holgaroids. A Holga is a plastic camera that is so simple and unpredictable that the artistic possibilities are endless. And adding a Polaroid back to a Holga not only increases the fun, it makes the camera a complete tank. Case in point, see the photo above. (Yes, that is green masking tape, all the better to keep the Polaroid back from falling off when I am taking a photo...). If you are interested in checking out some of my Holgaroids, here are some shots on my Flickr.


Soooo, up until now, my Holga was living in a much-too-short-but-wide-enough-to-house-it Polaroid Spectra case. Which meant my Spectra was either naked or living in some other case which didn't suit it. NOW, thanks to this orange case, my Spectra gets her home back, and my Holga AND all of her accessories, which were living in the super small Holga case, can live in luxury in the retro goodness of the Pentax case.


A place for everything and everything in it's place. Ain't life grand? Thanks, Kimmers! Now, I need to get busy making some new camera straps...

Saturday, November 14, 2009

As Promised, The Final DIY Polaroid Framing Project


Phew, after all the fun of Polaroid Week, all the blog posting, and the opening of my current solo exhibit, I needed to take a break. But, I promised one more Polaroid framing craft. Here it is... a couple of days late...


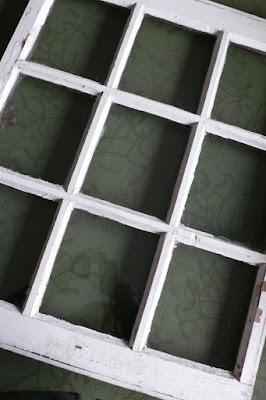
My neighbor recently opened a hair salon and she needed art. She came over one night to flip through my MANY Polaroid transfers and made a pile of the ones she liked. We started talking about how she wanted to display them... matted? Framed? Something creative? She remembered she had an old multi pane window she had brought home from the family farm. I own a mat cutter, I custom cut all of my mats, and I have PLENTY of scrap mat. I aim to use recycled items in my work so I was excited to create a unique photo gallery out of scrap mat and an old window. I love working on new projects and am confident enough to jump in with both feet even when I am not sure what to do. It all worked out this time and what I learned I will now pass along to you...


How-to Turn an Old Window Frame into a Polaroid Transfer Photo Gallery

What you will need:
- Polaroid transfers or Polaroids or whatever photos you want to use
- Archival mat board
- An old window frame
- UV resistant spray
- Newspaper
- Boot/Shoe tray (optional)
- Photo mounting tape or corners for affixing the images to the mat or you can use low tack masking tape if you don't care about it being archival. You will also need masking tape for taping the mats into the frames.
- Old wallpaper
- Spray glue (I use 3M Super 77 Multipurpose Spray Adhesive)
- Two screw eyes
- Wood glue
- Picture framing wire

1. Select your images. Lay them out on the boot/shoe tray on newspaper and spray them with UV Resistant spray (I use Kryon Gloss) according to the instructions on the can.


2. Clean your window frame to the extent you would like to. We liked that our frame was rustic and worn so aside from a quick wash we used it as is. In the end even the old paint splotches on some of the panes of glass enhanced the over all look of things.

3. Cut the outside of your mats to fit in the window panes and cut the mat window to the correct dimensions for the transfer. I would love to give an online tutorial on mat cutting but since it completely depends on what type of mat cutter you own, I can't. Cut your mat according to how you mat cutter works or Google "How to Cut a Window Mat" and you will find some information on how to do it simply with an Exacto knife and ruler. I use archival mats as other types will eventually ruin your images, since the acid will eat away the parts it touches, sometimes within mere months.


4. Using photo tape, or corners, or masking tape, tape your images onto your mat. (I used masking tape, which is not archival, because my friend may remove the images at some point. She didn't want me to use a permanent method to affix them but wanted to make sure they would stay put in the frame. Sometimes photo tape loses its grip and images can shift out of the photo corners...)


5. Fit your mats into the panes so they rest flat against the glass. Using masking tape, tape the mat into the frame. It is ok for the masking tape to be on the mat, even though it is not archival. Continue taping row by row, checking the front from time to time to see how things look.


6. I like to give the back of the frame a nice finish by covering it with old wallpaper I buy it at the thrift store. It is another way to reduce, reuse, and recycle. I used spray glue to attach it to the back of the frame (and I always try to spray this glue outside). This stuff is STICKY so if you don't have someone to help you you can put clothespins on the bottom edge of your wallpaper, hold the top edge with one hand and hold the spray can in other.


7. In order to hang your frame, measure out and mark where you want the screw eyes to be inserted. For added strength, I like to put wood glue on the threaded ends of the screw eyes before screwing them in. You do not need to drill holes first, just take the pointed end of the screw eye and start screwing it in. If your wood is very hard you can tap on the head of the screw eye with a hammer to get it set into the wood before turning.


8. Measure out your picture framing wire, leaving enough extra so that you can wrap the ends around the wire, after passing it through the screw eye head. For added strength, you can thread the wire through the screw eye head twice, by looping the end back through after the initial pass. Wrap the loose ends back on each other.


Et voila! You are now ready to hang your photo gallery on the wall. Whoot whoot!


Done and hanging on the B-Towne Salon wall. Thanks to Brooke for the chance to display my work in a new way.

Saturday, November 7, 2009

All Over The Map - Solo Exhibition at the Banff Public Library

Wow! The month of October was spent getting ready for my show. And the past week has been spent shooting and posting for Polaroid week. And my in laws were here, and now my dad is here. Add play dates and preschool, crafting with friends, hunting treasures, baking and cooking, etc etc etc, man oh man I am tired.

Tomorrow night, Saturday, November 7th, I am having an opening for my latest show at the Banff Public Library from 7-9 PM. If you are local, please come! I am thrilled to have already sold two pieces in the show. And friend and writer Michelle Macullo wrote an awesome article about the show in this week's Rocky Mountain Outlook. She writes about all of the art shows for the library. It was so fun to chat with her and then to see what she would write. She is so sweet, I can't believe she said I give people the same feeling hot chocolate does! Below you will find the article and my artist statement for the show.


Image by Craig Douce of the Rocky Mountain Outlook

Artist all over the map with new exhibition
Published: November 04, 2009 10:00 PM
Updated: November 04, 2009 11:05 PM

MICHELLE MACULLO, BANFF

There’s something remarkable about Banff photographer Tiffany Teske.

Within minutes of sitting down with her, she puts you at ease. She’s that friend who loves you unconditionally, flaws and all – the kind of person who makes you feel the way hot chocolate does.

And while her Twitter page claims she’s “trying to get a handle on all the projects running around in her head,” it’s clear she’s got a gift for getting things done. With more than one blog, various projects on the go and two young daughters, she still manages to pursue her love of photography.

During the month of November, Teske presents All Over the Map – a solo exhibition of previously displayed and new photo-based works at the Banff Library Public Art Gallery. An opening reception with the artist and family in attendance takes place at the library, Saturday (Nov. 7) from 7-9 p.m.

Whether Polaroid transfers, collages or photos embellished with hand-sewn details, the end result is curiously pleasing, inspiring and peaceful. Noteworthy pieces include Wedding Cake from Kiki’s Wedding Series (Polaroid emulsion lift), Tremendous Journey from the Series Wanderlust (mixed media collage on a recycled album jacket) and Amazing Grace (Polaroid Transfer).

Since becoming a mother, Teske’s managed to weave visual arts into her regular routine. With 22 group shows and three solo efforts, there’s little doubt she’s adjusted. While the amount of time she spends on her craft has changed, her love of art hasn’t.

“I have no illusion that I’ve got it all together,” she laughs. “I’m not happy if I’m not creating. I have to feed the need to be creative. So even though I’m not getting into the studio as much as I’d like, I cook more and I bake more.”

And while she’s good at many things, she has no interest in being the best.

“It’s hard to be a perfectionist in art because you stand in your own way,” Teske says.

The transition from straight photography to mixed media has been a natural progression for Teske. Her inspiration is found in family, spirit, recycled objects and creative genius – something old, something new, something borrowed and hand-made glue.

All pieces in the show are for sale either framed or unframed. For additional details, or to contact the artist directly, please e-mail tiffany@oldesage.com.

All Over the Map runs until Nov. 30 at the Banff Public Library Art Gallery.


Metamorphosis
Mixed Media Collage
By Tiffany Teske
SOLD

All Over the Map ~ Mixed Media Works by Tiffany Teske

I have to admit that this exhibition has turned out differently than I originally planned. It makes total sense, in fact, it is truly perfect. Not the work perhaps, but the way it all came together. It is a bit like the way my husband and I travel. We have a map, we have a guidebook, but in the end we hop on some mode of transport and just let the experience take over and dictate where we will go. In the end, we have the most amazing adventures because we are open to not only all good experiences, but also to the occasional mishaps and misadventures. The ups come with some downs and in the end it is absolutely sublime. Like life. Like making art while at the same time mothering my two children.

Maybe someday I will present the body of work I had originally intended to create, a cohesive group of art like I was trained to create while in University. The kind of work I used to be able to create, before I became a mother. However, I am a much different person now and since I just keep changing, as does my life, whatever I plan to make in the future can not be what I had envisioned in would have been in the past. So, I am realising as I write this that what I have created in this retrospective body of work, that is sprinkled with some new pieces, is exactly what I meant to create. All Over the Map is real, it is true, it is me, and how I am creating art right now.

I used to be really good at my life. I looked as if I had it “all together” and truthfully I did. I could juggle dozens of balls in the air without dropping one. I could work on several projects at once and finish what I started in good time. I was not ruthlessly structured, I had a map and would use it, but I would also meander in appropriate ways. I had 24 hours 7 days a week to be me; a wife, a daughter, a friend, an artist, an activist, a traveler, an adventurer. Now, I am also a mother.

Lately, I have taken to calling myself the Artist Currently and Forever Known as Mama. I had no idea what I was in for. I thought for some reason babies would just be extra balls to juggle in the beautiful circus of my life. But, I am pleased to say, that in fact, they are the main attractions upon which my spotlight is permanently fixed. Their beauty transfixes me in a way that I can scarcely take my eyes off of them in order to catch the balls that now fall from time to time, some occasionally rolling away. Now, instead of seamless working on several things at once, I can barely start what I finish artistically because I am too busy relearning the wonder of being a child. It is sublime in a way that I could not have imagined. Yet, I must admit that there is a darker side, that my muse does become cranky, frustrated, and sometimes down right angry when I don’t create but she is appeased by snippets of time that I can spin into art; the art that you see here. In the three and a half years I have been a mother, I have been able to create and to participate in 22 group and three solo shows. All while watching my children grow and while joining them in play. All by learning that perfection is not my goal. I freed myself by truly not caring if others think I have it all together. I can honestly and happily say I don’t. All Over the Map is showcases my current adventure. Thanks for coming along.

Friday, November 6, 2009

Last Image for Polaroid Week


My Father's Footprints
Image by Tiffany Teske

I am going to keep this post simple. It has been a tiring week, and I have the opening for my solo show at the Banff Public Library tomorrow. I did promise a second DIY framing craft for today but it will have to wait until Sunday...

My father is visiting. We are very close and we all look forward to having dad here. This morning when he went out for a walk I made this image of his footprints along with tire tracks in the freshly fallen snow. Something about the fact that his footprints are going away from me make me emotional.

Thursday, November 5, 2009

Polaroid Week Day Four - More Fun with SX-70


Looking Ahead
Image by Tiffany Teske

More contributions to Polaroid Week on Flickr. More fun with expired film. I did check and no, the Sears Special One Step Land Camera does not have a tripod mount...


Global Girl
Image by Tiffany Teske

Wednesday, November 4, 2009

Polaroid Week - Day Three's Image PLUS a DIY Polaroid Framing Craft


Here is my third contribution to Polaroid Week. I decided yesterday that I wanted to photograph my little gem of a camera which is impossible without a mirror. So, I got out my vintage French Ivory hand held looking glass today and started experimenting. For anyone who has never tried to hold a Polaroid camera with one hand and take a picture, they may not understand why I feel triumphant about this blurry pic. Polaroid cameras as like clunky tanks, and they really need two hands. But, I like this a lot. And I dig the camera. It has the most amazing Polaroid sound. So loud. Not what we are used to with digital. Of all my Polaroid cameras this one is the loudest. On another note, I love that this image is capturing the moment right before the camera spit out the film.


Ok, I promised two DIY projects for framing your Polaroids this week. The first one will probably appeal best to Polaroid enthusiasts who like and own the little black packs that the film comes in. Back when Polaroid made film, they allowed people to mail these back so they could recycle them. I never did this and I now have over 200 of them for 669 film, and just a few of the square type 80 I am using here. I am happy to be able to reuse these as frames. I framed this image that I made especially for my friend, Kim. I made it this spring, when I passed the Mayberry store in Grindrod, British Columbia. It is a double exposure of the store and another store, covered in hubcaps, next door. Kim's last name is Mayberry. Since it was recently her birthday it was time to frame this image up and give it to her.

How to Frame Your Polaroid Image Using a Polaroid Film Pack
By Tiffany Teske


What You Will Need:
~ Empty Polaroid Film Pack
~ Polaroid
~ Picture Hanging Wire


This is the back of a Polaroid 669 pack.


Hold your film pack so the window is facing down. With your left hand, squeeze in the sides of the pack that have the window, and with your right hand remove the backside of the pack (I am right handed). Lift one side off first, then it will come apart easily. This is difficult to describe but easy to feel once you are doing it. It is not fragile so even if it feels like you might break it, you won't.


Now you will have three pieces.


Flip over the piece in the middle in the photo above (the solid piece). Lay your Polaroid on it. You can secure the image with photo tape on the back but it is not necessary.


Take the piece with the window and set it on top.


Put the third piece back on the pack in a reverse of how you took it off, one side then the other. Make sure it clicks together.


Take a length of picture wire that is appropriate for the frame size. Knot both ends. Pull up one of the tabs on the back side of the pack. Slide the knot in. Let the tab fall back into place and the knot will be secure. Do the same on the other side.


Ta-da!


You can put a business card in the back of the pack just secure it with some double sided tape.


I wrote a message on the frame with a silver paint pen. I packaged Kim's gift with recycled tissue paper, a take home food container, and recycle ribbon. Easy peasy and she was pleased as punch!