You may like my blog if you like art, photography, crafting, sewing, upcycling, cooking, baking, reading, traveling, thrift store finds, parenting, kid's activities, writing, the environment, natural living, activism, and more... I am dedicated to living an artful & creative life, each & everyday.
Showing posts with label baby food. Show all posts
Tuesday, October 26, 2010
Weekly Recipe - My Illustrated Apple Pecan Cobbler Recipe (and How To Make Unsweetened Applesauce)
Last week, my husband was gifted with TONS of apples. I am not complete clear on the story but one of his clients left three boxes of BC (British Columbia) apples for him and his employees. My hubby manages a ski resort, so I am not really sure of the connection, but, boy were we excited when he brought them home! There are standard Red Delicious, MacIntosh, and I think, Jonagold. The latter are absolutely delicious for eating and are almost gone. The Red Delicious, which was the top variety of apple in the world for decades, but not a favorite of mine, are good for both eating and cooking. MacIntosh, which have been popular since the early 1800s, are great for my toddler when skinned because they are soft, but since I like crisp apples, I prefer to make them into applesauce. Applesauce just might be the easiest thing on the planet to make...
How to Make Applesauce
By Tiffany Teske
The following works for any amount of apples. I often made small batches with one or two apples for my babies but you can also do this with a dozen apples. Just select your saucepan according to the amount of chopped apples you will have.
Ingredients
~ Apples
~ Water
Directions
1. Peel the apples.
2. Chop the apples.
3. Put the apples into a saucepan. Add water until it just covers the apples, and bring to a boil. Reduce heat and simmer until soft (up to 20 minutes).
4. Puree in the blender or with a handmixer or smoothie mixer or food mill. You can also mix or whisk it by hand.
I don't sweeten my applesauce, since I find it unnecessary with Macs.
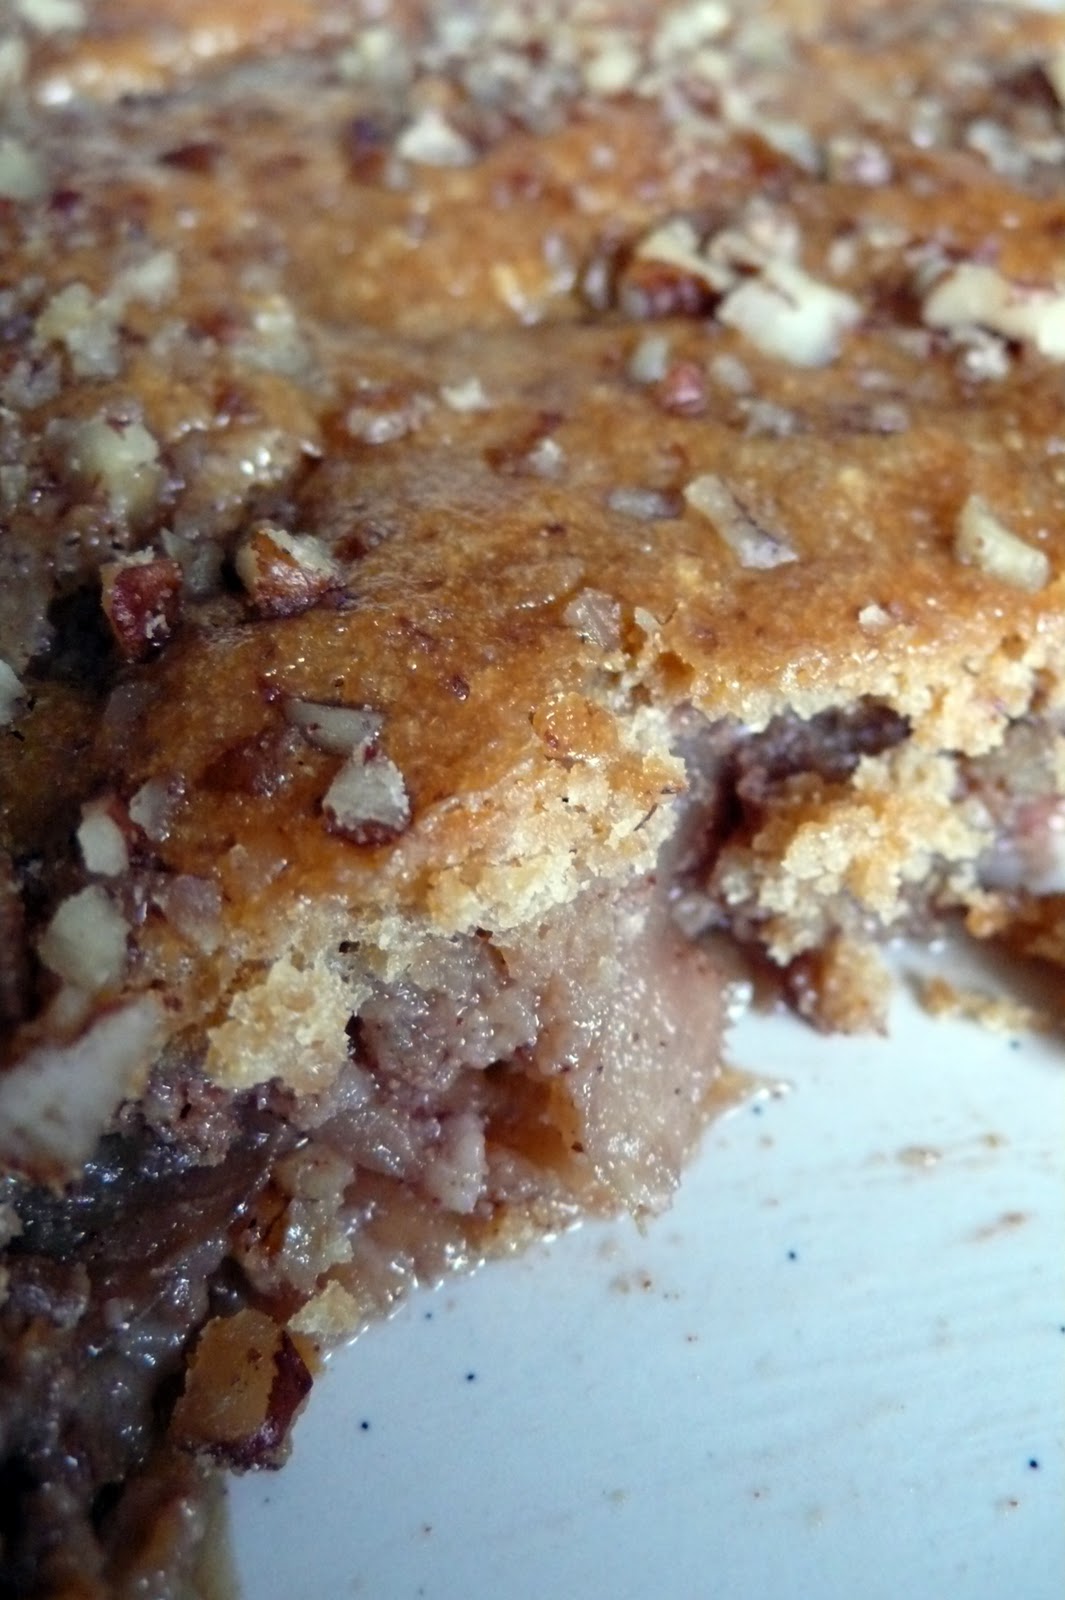
I also decided to use some of our Macs in a dessert. I must confess, I love to have an overabundance of fruit or veggies that I need to figure out a way to use. I get inspired to try something new. In this case, I started with the idea of an apple pecan cobbler, peeked at a couple of recipes, then made this up with what I had on hand.
Apple Pecan Cobbler
By Tiffany Teske
Ingredients
~ 4 cups thinly sliced apples (I used 5 apples)
~ 1/2 c organic raw sugar
~ 1/2 tsp ground cinnamon
~ 1/2 c chopped pecans
~ 1 c whole wheat pastry flour
~ 3/4 c brown sugar
~ 1 tsp baking powder
~ 1/4 tsp sea salt
~ 1 free range egg, beaten
~ 1/2 c evaporated milk
~ 1/3 c organic butter, melted
~ an additional 1/4 c chopped pecans
Directions
1) Preheat oven to 325° F. Generously grease a rectangular baking dish with butter.
2) Arrange apple slices in an even layer (not a single layer, they can cover one another but it should be about even in depth throughout) in baking dish. In a small bowl, mix raw sugar, cinnamon, and 1/2 c pecans. Sprinkle over apples.
3) In a medium bowl, mix flour, brown sugar, baking powder, and salt. In a separate bowl whisk egg, evaporated milk, and melted butter. Add milk mixture all at once to the dry ingredients and stir until smooth. Pour this over apples and sprinkle with the remaining 1/4 pecans.
(It had gotten dark outside by the time I got to this step so this doesn't look quite right in the artifical light...)
4) Bake for 55 - 60 minutes.
This is delicious with a little bit of evaporated milk or cream poured over it. Or you could make this sweet cream ice cream.
To make this recipe even better, why not support a local apple orchard or farm and buy your apples there. Take the kiddos and pick them yourself. For more on apple varieties check out pickyourown.org.
Labels:
baby food,
Dessert recipe,
recipe,
seasonal fruit,
weekly recipe
Saturday, April 10, 2010
Robin Red Breast & Cozy Cave Cake
A couple of days ago I saw a robin red breast land on the freshly fallen snow. It made me smile and roll my eyes at the irony of what is called spring in our area. We seem to have had more snow since the first day of spring than we had all winter.
For my three year old daughter's Easter bunny gift, I bought a cake from my friend, Alannah's, amazing bakery, Cozy Cave Bakehouse. My 10 month old and I walked to town in a spring blizzard to buy it (another spring blizzard, more irony). What I love about Alannah's creations, next to the taste, is how beautiful they look and how much attention to detail she puts in the packaging. I could have bought anything chocolate that day but I bought the cake because we could share it, it was indeed a chocolate egg, and because of the vintage egg shaped box it came in. Thanks to Cozy Cave we have one awesome Easter bunny who comes to our house. He also brought the most delicious iced sugar cookies...
Wednesday, March 31, 2010
How To Make Baby Crackers
We recently had a birthday tea party with a little friend who turned one. We made most of her gifts, including a take out container filled with homemade crackers. It was my first attempt at crackers, although I have been wanting to make them for years. I am not quite sure why I waited so long. They were a snap. They are pretty bland for my taste but great for wee ones.
Rice Oat Crackers
From Simply Natural Baby Food by Cathe Olson
- 1.5 cups rolled oats
- 1 cup brown rice flour or whole wheat flour
- pinch kelp
- 1/4 cup canola or safflower oil
- 1 cup water
Preheat oven to 350 degrees. Oil a baking sheet. Grind oats to a coarse powder in food processor or blender. Mix oats with flour and kelp. Stir in oil until mixture resembles coarse crumbs. Add water and knead lightly until combined.
Roll or press dough to 1/8" thickness on prepared baking sheet. Score into squares and prick with fork. Bake 15 - 20 minutes, until edges are slightly brown. The longer you bake the crispier they will be. Cool before removing from pan. They harden slightly as they cool.
Makes 3 dozen.
In addition to tea we were treated to cupcakes, rainbow chip cupcakes, in fact!
And Baby G was enjoying the blueberries :)
We also gave G a pair of baby leggings I made from a knit scarf. You can make your own from my tutorial here.
The leggings look adorable on G, and look how fast she moves in them, hehe. Or maybe she was grooving to the one gift we didn't make, a Jazz Lullaby CD.

Happy birthday, Baby G! Thanks for the fun tea party!
Monday, February 15, 2010
February 15th - Homemade Vegetarian Alphabet Soup
My daughter loves alphabet soup (what kid doesn't?). I usually buy Amy's Organic at $4 a can. Today, I decided to make some. I was inspired the last time I went to the grocery store and saw that they sell the alphabet pasta. I decided to try this recipe from RecipeZaar.
Healthy Alphabet Soup Recipe #112133
A delicious real alphabet soup which is much more nutritionally sound, as well as tastier, than the canned stuff. Recipe from "Stealth Health" Mar/99. In the ingredients, "Dried Italian herb seasoning is just regular dried Italian herb.
by LUv 2 BaKE
2 hours | 20 min prep
SERVES 6
* 1 cup onion, chopped
* 1 cup carrot, finely chopped
* 4 garlic cloves, minced
* 3 1/2 cups vegetarian chicken broth or chicken broth
* 3 cups water
* 1 cup dried white bean, rinsed (I used canned beans)
* 1 (398 ml) can tomatoes, cut up
* 1 teaspoon dried Italian herb seasoning or dried oregano
* 1/8 teaspoon cayenne
* 1 cup dry alphabet pasta
1. Combine first five ingredients; boil.
2. Add next four ingredients; boil; reduce heat, cover and simmer stirring occasionally for 1 1/2 hours until beans are tender.
3. Using a slotted spoon, remove most of the beans and transfer remaining liquid to a blender; process till smooth.
4. Return mixture and beans back to the pot; Stir in alphabet pasta.
5. Boil then reduce hear; cover and simmer 8 minutes until pasta is tender but firm.
6. Yield: 6 1 1/2 cup servings.
My daughter's initials are QQ....
Labels:
baby food,
cooking with kids,
recipe,
Thing-a-day,
vegetarian recipe
Monday, February 1, 2010
It's February and Time for Thing-A-Day! Day One Vegetarian French Onion Soup
Yes, that is right, I am attempting Thing-A-Day for the second year in a row. I did awesome last year and since I do several creative things each day it should be no sweat this year. Thing-A-Day has moved over to Posterous, and I have got to say, I LOVE IT! They have it set up so you email in your posts, along with attachments, and it instantly goes to my personal Posterous blog (set up for Thing-A-Day), to the Thing-A-Day Group blog, AND I can have it post to this blog. I am blown away by how the internet can link everything. Such a time saver. And for those who don't know, Thing-A-Day requires you to work on a creative project for as little as 20 minutes a day and then post about it. It can be music, writing, art, cooking... the sky is the limit. Registration to participate is now closed, but if you want to grab some inspiration, check it out...
So yesterday was day one. I had a GREAT day! I met up with someone I have been wanting to meet for a long time, and it turns out, we are kindred souls. I am really excited to start collaborating on some projects with this amazing woman. Yippee!! In addition to that, I got to spend a little time, a creative hour, with my good friend, Kim. All this while Quin was happily taking part in her ski lesson. Then, in the evening, I made vegetarian French onion soup. I got the recipe from Craft Daily, by far my most favorite e-newsletter. It is by Shawn Connally and you can get a PDF of the recipe here. I have also written it below, along with my changes... My husband used to serve French onion soup in a crepe restaurant he worked in. He loved this soup and so did our 3 1/2 year old, who ate it two days in a row, but with cheddar instead of Gruyere melted on top.

Vegetarian French onion soup
Makes 5-6 bowls
Ingredients (I used organic where possible)
- 6 yellow onions peeled and thinly sliced
- 1/2 c (one stick of butter)
- 6 cups vegetable stock
- 1/3 cup cooking sherry
- Salt and pepper to taste
- 1/2" thick French bread slices
- Gruyere cheese for melting on top. You could also use provolone, Swiss, or mozzarella.
- Melt the butter in a heavy soup pot. Add the onions and saute until the onions are translucent and soft, about 15 minutes (stir occasionally).
- Once the onions have cooked down, add the broth and sherry. Simmer for half an hour, then season with salt and pepper.
- Preheat the oven to 350˚F. While the soup cooks, toast the slices of bread, and grate or slice the cheese. (I grated and I didn't preheat my oven, see my note below*)
- Ladle soup into oven safe bowls, leaving about half an inch of space at the top. (i don't have soup crocks but do have small square casserole dishes which work. And I put my daughters in a ramekin).
- Place toasted bread on top of soup, then cover generously with cheese, either slices or grated.
- Put the bowls into a preheated oven and bake until the cheese melts, about 5 minutes. You may want to turn the oven to Broil if the top isn’t brown enough for your tastes. Watch the process closely. (*I didn't bake the whole thing for 5 minutes, I just broiled on low for 2 - 3 minutes).
- Eat up! We had this with a salad and a glass of wine.
So yesterday was day one. I had a GREAT day! I met up with someone I have been wanting to meet for a long time, and it turns out, we are kindred souls. I am really excited to start collaborating on some projects with this amazing woman. Yippee!! In addition to that, I got to spend a little time, a creative hour, with my good friend, Kim. All this while Quin was happily taking part in her ski lesson. Then, in the evening, I made vegetarian French onion soup. I got the recipe from Craft Daily, by far my most favorite e-newsletter. It is by Shawn Connally and you can get a PDF of the recipe here. I have also written it below, along with my changes... My husband used to serve French onion soup in a crepe restaurant he worked in. He loved this soup and so did our 3 1/2 year old, who ate it two days in a row, but with cheddar instead of Gruyere melted on top.
Vegetarian French onion soup
Makes 5-6 bowls
Ingredients (I used organic where possible)
- 6 yellow onions peeled and thinly sliced
- 1/2 c (one stick of butter)
- 6 cups vegetable stock
- 1/3 cup cooking sherry
- Salt and pepper to taste
- 1/2" thick French bread slices
- Gruyere cheese for melting on top. You could also use provolone, Swiss, or mozzarella.
- Melt the butter in a heavy soup pot. Add the onions and saute until the onions are translucent and soft, about 15 minutes (stir occasionally).
- Once the onions have cooked down, add the broth and sherry. Simmer for half an hour, then season with salt and pepper.
- Preheat the oven to 350˚F. While the soup cooks, toast the slices of bread, and grate or slice the cheese. (I grated and I didn't preheat my oven, see my note below*)
- Ladle soup into oven safe bowls, leaving about half an inch of space at the top. (i don't have soup crocks but do have small square casserole dishes which work. And I put my daughters in a ramekin).
- Place toasted bread on top of soup, then cover generously with cheese, either slices or grated.
- Put the bowls into a preheated oven and bake until the cheese melts, about 5 minutes. You may want to turn the oven to Broil if the top isn’t brown enough for your tastes. Watch the process closely. (*I didn't bake the whole thing for 5 minutes, I just broiled on low for 2 - 3 minutes).
- Eat up! We had this with a salad and a glass of wine.
Tuesday, December 22, 2009
Hallelujah for the Christmas Cookie Exchange
Who came up with this holiday ritual? I want to thank them from the bottom of my heart. The Christmas cookie exchange is truly the lazy woman's answer for having tins of goodies of all variety over the holidays. I love the concept. And, after having heard of these wondrous events, I can now say I have taken part. And I am hooked!
Ok, I just had to look it up. While the Christmas Cookie Exchange is not credited to one person, it seems to first have appeared in print in the 1963 Betty Crocker's Cooky Book.
"A Party Idea. A popular once-a-year party is the Chrismas cooky swap party. Friends and neighbors gather, each bringing one dozen of her holiday specialty for each woman at the party. Cookies are set out to sample and admire and coffee is served. Afterward each one takes home a wonderful variety of festive cookies." Thank you, foodtimeline.org.
On a side note, did you know that my father's mother was the first female executive at General Mills, and for awhile, she was some of the features on the face of Betty Crocker (who was a composite of several women)? More on that someday...
Back to cookies... on Saturday night, I was part of a cookie exchange. It was just up the road from my house, and I was able to go with a good friend, while her hubby watched our three 1/2 year old daughters, who were incidentally born on the same day. Michelle & I got to hang out with my babe and two other fine ladies, sipping wine, eating Mexican chili (even veggie style for me!), and chatting. In the end, my 4 kinds of treats, turned into 9! And now, I have beautiful tins of baked goods to give away as gifts and to eat. Yum, yum!
I hope to collect some of the other recipes, which included yummy Russian Tea Cakes, delicious oatmeal peanut butter cranberry cookies, and exquisite pistachio lime iced cookies. I can share what I made...
Peanut Blossoms, which I wrote about and posted the recipe for here. My Aunt Jackie used to make these during the holidays and I think of her every time I make them. She taught me how and I used to unwrap and push in the Hershey's Kisses.
Maple Cinnamon Pecans. I got this recipe from my favorite enewsletter, Craft Daily. They are easy to make and the host of the cookie exchange referred to them as "crack", so be prepared to be addicted.
Homemade Chocolate Dipped Marshmallows. The recipe is here. Once again, Craft Daily, and the same wonderful contributor. The cookie exchange host squealed when she saw these! I could not resist attempting these. I don't really like to just eat marshmallows but I thought they would make great gifts next year, along with cocoa mix. I wanted to give them a shot before planning to make bunches and bunches. It was quite easy albeit sticky. I think I got about 5 dozen out of this recipe. I would use more vanilla bean next time and a stand mixer... They are beautiful, delicious, and Quin has fun helping to put the crushed candy cane on. They need to be refrigerated and can be kept for up to one week.
Iced Sugar Cookies. I have to admit that the batter for these was not made my me. The horror... but I wanted to support a friend who was selling buckets of frozen cookie dough as a fundraiser for her son's school. I bought one, thinking how much fun Quin and I would have making them. And we did. And I have a great respect for people who do such a beautiful job of decorating these. The thought of making different colored frosting... eeck. I just made a simple icing from icing sugar, a few drops of water, and a couple drops of lemon juice. Add sprinkles et voila!
Labels:
baby food,
baking,
gifts you can make,
holidays,
recipe
Sunday, December 20, 2009
Making Homemade Baby Food IS Just as Easy as Opening a Jar...
...and tastes oh-so-much better. Trust me on this. With my first child, I bought a lot of organic jarred baby foods. I waited until she was 7 months old before I fed her because she was not very interested in food. In the end, she was not much of an eater until she was close to a year old, she preferred to nurse. I was all geared up to make her homemade baby food, but the few times I did she didn't eat much of it, so I stopped. I had cookbooks, a food mill, and storage containers all ready to go. I held on to it all. I am happy I did because our second little one recently started eating pureed food and she LOVES to eat. She is also nursing but she got to a point where she was so interested in food we actually started her at 5 1/2 months, which is a bit early. She insisted. And now, just a month later she wants to eat food if the rest of us are. So, now I get to make baby food, and I have a babe who can't get enough. I have not bought one jar of canned food. I have only bought organic fruits and vegetables, rice, and oatmeal, and have made it all myself. You can, too. It is truly simple!
A few tips on early feeding:
~ It is best to start with foods which are least likely to be allergenic. These include banana, brown rice cereal, and avocado. My first child started with avocado and my second with brown rice cereal. It is a good idea to avoid feeding acidic foods like berries, citrus, and tomatoes to new eaters as they can be allergenic.
~ There are theories on not starting your child with sweet items first as they might tend to crave them. My second child actually didn't like banana at first, she preferred cereals and vegetables.
~ Don't expect your child to eat a lot at first. Do not force a baby to eat. If they are interested they will open their mouths and if they close them or turn away when you try to feed them, stop. They should still be getting plenty of nourishment from breast milk or formula.
~ Do not save any leftover food from the serving your child has been eating from. Once the spoon has been used and put back in the food, bacteria is in the food and it should be thrown out. For this reason, when you make food, keep it in a larger container and spoon it into a smaller one.
~ Do not microwave your baby's food. I use a regular bowl, filled with hot water, and I put a small glass ramekin (bowl) into the larger bowl and mix the food to warm it up.
~ Most new parents have many questions about introducing food to babies. I can only cover so much here. Please see the resource links below for more information.
So far, Elle has eaten brown rice cereal, oatmeal, avocado, banana, potato, sweet potato, green beans, applesauce, and mango. My best friend gave me a wonderful Kidco food mill (see resources below). It is a super easy way to puree anything. I just put the chunks of food in it, add a bit of water and turn the crank. It is easy enough for my three year old to turn so she is happy to turn the crank and feels she is a part of feeding time. This food mill is really good for fibrous fruits and veggies, since it keeps the fibers, seeds, skin, and even bone beneath the medical grade stainless steel strainer and cutting blade set, which is not at all sharp to the touch. The body of the mill is made from BPA and PHTHALATE FREE plastic. The newer deluxe version has a skid proof bottom and crank, a snap on lid, and a travel case. Once you crank the food it fills the 4 oz feeding cup so you can feed from it. It is a snap to clean, in fact it is dishwasher safe, although I always hand wash mine. They are well worth their affordable price of about $20 Canadian. If you prefer you can also use a food processor or blender but they are more work to clean and you may need to strain the food before serving, depending upon the type.
Here is how I have prepared everything I have made so far.
Banana & Avocado
My daughter doesn't seem to like banana unless it is very ripe. It is easy cut up avocado and banana and to mash it with a fork. You can also put it through the food mill for the smoothest consistency. Because neither banana or avocado keep very well once mashed, I usually use about a 1/3 of the banana or avocado, and eat the rest myself.
Cooked Brown Rice Cereal
This recipe is from the book Simply Natural Baby Food (see resources below).
Place 1/2 cup of brown rice in 3 cups of water. Cover and bring to a boil over high heat. Reduce heat and simmer for one hour.
Rice should be very soft so you can cook it for longer if needed. Water may not be completely absorbed which is fine. You can puree this in the blender, which I actually do, because it is a large batch. I keep about three days worth of feedings in the fridge, and freeze the rest in ice cube trays. I usually have about 24 cubes (see photo below). I take them out of the ice cube trays and store them in freezer safe Pyrex bowls with plastic lids. I keep the cereal that I store in the fridge quite thick, and I add boiling water to each serving to warm it up and thin it out when it is time to eat. For the frozen cubes I usually put two in a hot water bath, letting them thaw, and then put them through the food mill. They hold their shape as they thaw and they absorb enough water that they usually come out of the mill the perfect consistency.
Oatmeal
We like to put oatmeal powder in our bath water to guard against dry skin. I have an electric coffee grinder that I use just for grinding oatmeal and other grains. I spoon a few teaspoons of the powder into a small glass bowl and I add hot water. As it cools the cereal thickens so I add water once more right before I serve it so it is the desired thickness. It ends up about one part cereal to three parts water. You can also powder the oatmeal in a blender or food processor, a few cups at a time, and store it in a jar with a lid.
Potato, Sweet Potato, & Apple
Peel the potato or apple. Cut it into small pieces. Put in saucepan with enough water to cover, bring to a boil, then simmer on low until they are soft enough to puree, usually about 15 minutes.
Mango
I cut it into small chunks and put it through the food mill.
Green Beans
I cut the beans into small pieces then over cook them in boiling water. Once they are very soft I put some of the cooking water and the beans in the mill to make a smooth puree.
Resources
Food Mill
Kidco, Inc
Websites
~ wholesomebabyfood.com
~ HomemadeBabyFoodRecipes.com
~ Mothering Magazine Online
Books
~ New Vegetarian Baby by Sharon K. Yntema
~ Simply Natural Baby Food: Easy Recipes for Delicous Meals Your Infant and Toddler Will Love by Cathe Olson
I would love to hear your recipes for baby food and am always looking for good resources. Please leave me a comment if you have something to share.
If you are wondering where I got this adorable handmade bib, it is from Christine, at Barnyard Baby on Etsy. She gave it to me as one of the Etsy Virtual Baby Shower gifts I received back in June, after Emmanuelle was born. It is well made, beautiful, and washes up well. I love it!
Tuesday, September 23, 2008
30 Things in 30 Days - #14 - Farmer's Markets
In our part of the country, winter is just around the corner, but there is still time to buy locally from area farmer's markets. Squash, pumpkin, arugula, cabbage, spinach, bush beans, beets, and broccoli should all still be available. Many Farmer's Markets carry organic produce but not all do so ask questions. And it is always fun to try something new, so check out what is available. Support your local farmers and save on the energy that is used to ship items from afar.
I seem to have pumpkins on the brain so here is a recipe for Mexican Pumpkin Soup:
4 cups vegetable broth
2 cups mashed or pureed pumpkin
1 16-ounce can chili beans
1 tablespoons oregano
pinch of cayenne or other red pepper
1/2 teaspoon cumin
4-5 cloves of garlic, peeled and finely chopped
5 red potatoes, diced into 1/2 inch cubes
1 large onion chopped
1 tbsp. seeded diced jalapeño
1/3 cup soy milk
cilantro or parsley
Heat a large pot. Sauté most of the onions (reserve a few for garnish) and the garlic over medium heat for about 1 minute. Add in the broth, pumpkin, chili beans, jalapeño, and potatoes. Stir in the oregano, cayenne, and cumin. Bring to a boil and then turn down to a simmer.
Simmer for about 30 minutes or until potatoes are tender. Remove from heat and let cool for 5 minutes. Stir in the soy milk and serve immediately garnished with cilantro or parsley and onion (and extra diced jalapeño, if desired).
Check here from some more healthy pumpkin recipes.
I seem to have pumpkins on the brain so here is a recipe for Mexican Pumpkin Soup:
4 cups vegetable broth
2 cups mashed or pureed pumpkin
1 16-ounce can chili beans
1 tablespoons oregano
pinch of cayenne or other red pepper
1/2 teaspoon cumin
4-5 cloves of garlic, peeled and finely chopped
5 red potatoes, diced into 1/2 inch cubes
1 large onion chopped
1 tbsp. seeded diced jalapeño
1/3 cup soy milk
cilantro or parsley
Heat a large pot. Sauté most of the onions (reserve a few for garnish) and the garlic over medium heat for about 1 minute. Add in the broth, pumpkin, chili beans, jalapeño, and potatoes. Stir in the oregano, cayenne, and cumin. Bring to a boil and then turn down to a simmer.
Simmer for about 30 minutes or until potatoes are tender. Remove from heat and let cool for 5 minutes. Stir in the soy milk and serve immediately garnished with cilantro or parsley and onion (and extra diced jalapeño, if desired).
Check here from some more healthy pumpkin recipes.
Subscribe to:
Posts (Atom)