You may like my blog if you like art, photography, crafting, sewing, upcycling, cooking, baking, reading, traveling, thrift store finds, parenting, kid's activities, writing, the environment, natural living, activism, and more... I am dedicated to living an artful & creative life, each & everyday.
Showing posts with label baking. Show all posts
Friday, December 17, 2010
365 Days With Kiddos - #20 - Make Gingerbread Cookies
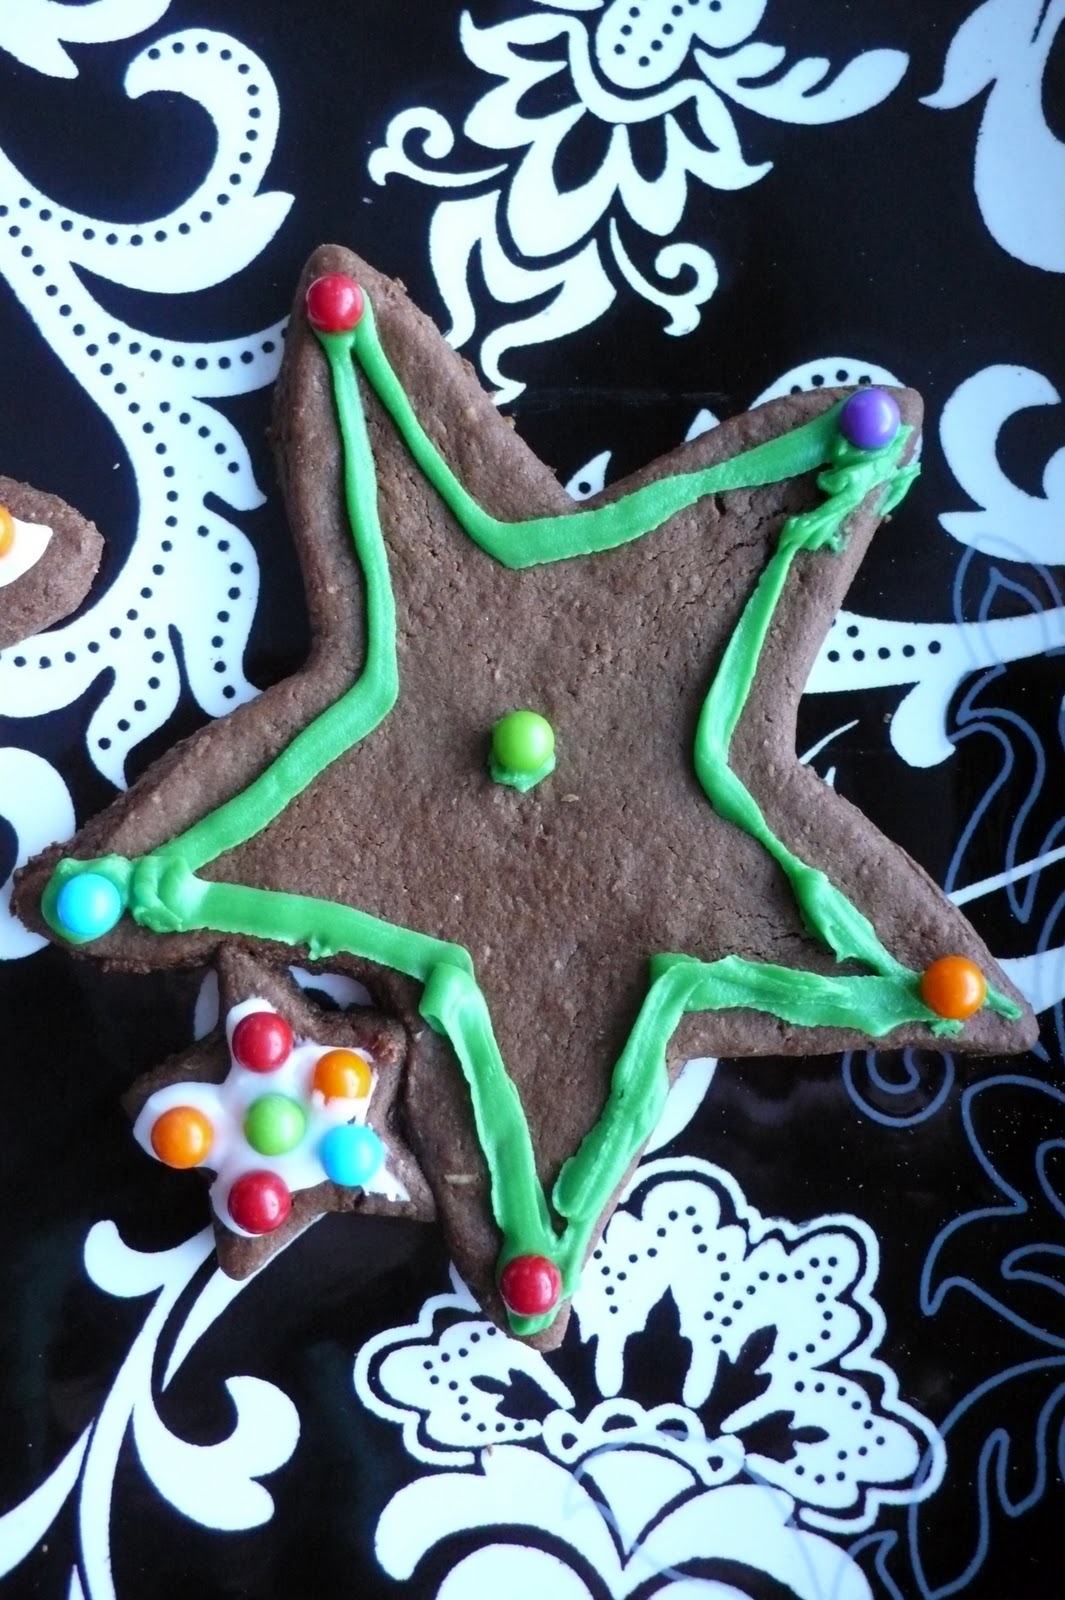
Making gingerbread cookies is a great way for kids to help in the kitchen during the holidays. They can measure the ingredients and mix the dough, as well as roll it out. Their imaginations can run wild by picking and using cookie cutters, as well as decorating the cookies. This year we had everything from connected rows of stars, to fairies, to mommy and baby stars, to simple circles (which were nice blank canvases for elaborate decoration). Premade icing is available but I wrote about a simple vanilla buttercream recipe that can be dyed any color you like, here. If you don't have a piping bag you cab fill a ziploc bag with icing, then cut of the tip of one of the bottom corners. We also used sprinkles and little round hard candies. The sky is the limit and half of the fun is chosing what to use. If you would like to make the connected cookies we did, just make sure your dough cut outs are touching each other on the cookie sheet before you place them in the oven.
I found this recipe on a card in my jumbo sized recipe box that I don't look in often enough. It has good ingredients that I replaced with organic versions. It is a very easy recipe to put together and I love all the spices that are used. The cookies are crisp and delicious. The dough should be chilled before rolling it out or it will be very sticky. I made half of the batch one evening and left the dough in the fridge overnight and baked the rest the next day. You can freeze this dough for 4-6 weeks by double wrapping it plastic wrap. Defrost it by placing it in the fridge for several hours. The baked cookies can be frozen for 3-4 weeks by double wrapping the same as with dough. When you want to eat them just let them sit out until they are room temperature or pop them in the microwave for 20-30 seconds. Be sure to make extras so you can share them. We saved some of ours for a family that is hosting an upcoming open house...
Yummy Organic Gingerbread Cookies
Ingredients
1/2 cup butter
3/4 cup brown sugar (or 1/2 cup honey)
1/2 cup molasses
1 tsp cinnamon
1 tsp ground ginger
1/2 tsp ground allspice
1/2 tsp ground cloves
1/2 tsp ground nutmeg
1 1/2 cups whole wheat pastry flour
1 1/2 cups unbleached white flour
2 tsp baking soda
1/4 cup water (1/8 if using honey)
Directions
1) In a large bowl with a hand or stand mixer, cream together butter with sugar or honey, molasses and spices. In a medium bowl combine flours and baking soda.
2) Add flour mix to butter mix and stir well. Mix in water. The dough should be stiff (I use my hands to combine everything). Chill for several hours. You can put in the freezer for 30 minutes if you are rushed for time.
3) Preheat oven to 350 degrees F. Roll out the dough on a lightly floured board or your counter to a thickness of 1/4" to 1/3".
4) Cut cookies using cookie cutters. Bake on a greased cookie sheet for 10 - 15 minutes.
5) Let cool on the pan for a minute or two, then transfer to wire cooling racks.
6) Decorate!
Labels:
baking,
cooking with kids,
Holiday fun,
kids in the kitchen
Monday, September 13, 2010
Weekly Recipe - Pineapple Rhubarb Crisp
I realize that it is getting a bit late in the season for this (even here in Banff where the growing season is late and short). Rhubarb can be found in the freezer section year round in some places. This recipe makes it worth checking out. I am a huge fan of any kind of crisp, especially when I can make homemade sweet cream ice cream to put on top. I had never thought of the combination of rhubarb and fresh pineapple... it is awesome! The sweet and tart go so well together. The heading of the recipe, from a free thrifted copy of Homemakes Magazine states "Consider this dessert a study in North-South dialogue: a blending of rich tropical sweetness with cool climate tartness". On a side note, old magazines abound, usually for free, so if you are ever in need of a new recipe, aside from the internet, or your cookbook collection, just pick up some free magazines, flip through, and pick out a something new to try...
Pineapple Rhubard Crisp
Homemakers Magazine
Ingredients
Makes 6-8 serving
4 cups/1 L chopped rhubarb
3 cups/750 ml chopped fresh pineapple
3 Tbsp/45ml granulated sugar (I use organic raw)
1 Tbsp/15 ml cornstarch
1 cup/250 ml all-purpose flour (I used organic whole wheat pastry flour)
2/3 cup/150 ml packed brown sugar
1 tsp/5 ml finely grated orange rind
1 tsp/5 ml ground ginger
1/4 tsp/1 ml EACH cinnamon and nutmeg
pinch cayenne pepper
1/3 cup/75 ml salted butter, melted
Directions
Toss together rhubard, pineappple, granulated sugar, and cornstarch; place in buttered 8 inch/20 cm square baking dish. Whisk together flour, brown sugar, orange rind, ginger, cinnamon, nutmeg, and cayenne until throughly combined. Drizzle with butter; stir until in small crumbs. Spread over fruit mixture. Bake in centre of 350 degree F/ 180 degree C oven until fruit is bubbling and topping is crisp, 50 -60 minutes.
Sweet Cream Base
By Ben & Jerry's
Ingredients
Makes 1 Liter
2 eggs
3/4 cup sugar
2 cups whipping cream
1 cup milk
Directions
Beat eggs, using a wire whisk, until frothy, 1-2 minutes. Add sugar a little at a time, beating about 1 minute. Add cream and milk and whisk to combine. Freeze according to your ice cream maker's directions.
Labels:
baking,
cooking,
Dessert recipe,
food,
recipe
Monday, July 19, 2010
Healthy Homemade Fruit Thin Bars (Think Fig Newtons...)
I am always on the look out for healthy homemade snacks and luckily I have lots of friends who are willing to share their recipes. My friend, Jane & I swap cookbooks, which is a really nice way to gain some new recipes, complete with feedback from someone you trust.
Our new favorite in this house are fruit thins. They are a fruit filled cookie that literally have tons of possible fillings. This recipe is from a very old out of print cookbook about baking.
Fruit Thins
Makes 24 to 32 cookies
Ingredients
- 1 1/2 cups Brazil nuts or walnuts (I used walnuts)
- 1 cup coconut (I used unsweetened shredded)
- 2 cups quick oats (I used organic)
- 1/2 cup whole wheat pastry flour
- 1 teaspoon salt (I used sea salt)
- 1/4 cup honey, warmed (although if you use liquid honey you don't need to warm it)
- 1/2 cup water
- Filling: use 1/2 cup water with a, b, c
a: 2 cups raisins, 1 cup dates
b: 1 cup each dates, raisins, and dried cranberries
c: 1 cup dried apricots, 1 cup dried pineapples pieces, and 1 cup golden raisins
NOTE: I used organic raspberry jam in my thins because I had it on hand.
Method
1. Blend coconut and oatmeal two minutes in food processor and place in bowl.
2. Blend nuts, flour, and salt for 30 seconds. Mix in bowl with coconut/oatmeal mixture. Add honey and water and stir together until pie-dough-like mixture is formed. Divide into two balls.
3. Filling: use a, b, or c from ingredient list; place in food processor with water and whiz, adding extra water if needed to make a thick speadable paste. (If dates or dried pineapple are hard, soften them in the water in microwave or on stove top before processing).
If using jam you do not need to prep it. Here is where things get a bit tricky...
4. Roll out first crust using two large pieces of plastic bag material or Bake Magic sheets. Place dough ball between sheets and rool, readjusting plastic if dough begins to press out as you roll. (Dampen counter slightly to keep the sheets from slipping around on the counter as you roll them. You will transfering everything to a cookie sheet with a lip, so roll it out to that size and shape.
5. Spread driend fruit mixture or jam over the surface.
6. Roll out the other ball of dough and place over the top of the other rolled out dough with filling and transfer to a cookie sheet. Place the plastic sheet on top and roll filmly to merge the layers together.
7. Score (press knife, don't drag). Bake at 350 degrees F for 25 minutes or until golden brown on edges and bottom.
These smell delicious while baking. Best wishes not having the whole family eat them on the first day...
Labels:
baking,
cookies,
cooking with kids,
Dessert,
food,
vegetarian recipe
Wednesday, June 2, 2010
A Week of Birthday Posts - #1 - My Strawberry Banana Baby's First Birthday Cake
"A whole cake?! What is going on here? Do you REALLY want me to eat this?!"
Both of my daughters and my husband have birthdays in the same week (lucky me, I am in November). This means there was a lot of cooking, baking, crafting, and party throwing going on last week. I will be posting some photos, how-tos, and recipes to share with you during the coming week.
Emmanuelle, our baby, turned ONE last week! A very exciting time which has included three new teeth (bringing the total to 7), walking her first steps, and surprising us with new skills every time we turn around. For her first birthday cake, I wanted something that was healthy or at least healthier than something from a big store. Our oldest daughter was given a super sugary, very blue frostinged cake for her first, by my mother, and Andre and I were smuggly thrilled when she wouldn't eat it. For Emmanuelle, who is a big eater, I wanted something delicious and free from colorings. I decided that a strawberry banana cake would be awesome. I searched the internet and was surprised that I could find reference to a couple of them, but no recipes... I decided to cobble together several recipes and try to make my own. I decided to make a banana honey cake and to frost it with a cream cheese butter strawberry frosting. It was a hit! ESPECIALLY with ME. YUM YUM... This cake is amazingly moist and soooooo delicious.
Banana Honey Cake with Strawberry Cream Cheese Frosting - Baby's First Birthday Cake
by Tiffany Teske
Banana Honey Cake
Makes 2 8" square cakes
Ingredients
~ 1 c honey
~ 1 tsp soda
~ 1 c organic oatmeal, uncooked (quick or old-fashioned)
~ 3/4 c organic unsalted butter (omit sea sale below if using salted butter)
~ 1/2 c natural sugar
~ 2 organic eggs
~ 1 c mashed bananas (I used 4, three that were pretty ripe, one frozen one that was thawed, the riper the better)
~ 1 1/2 c whole wheat pastry flour
~ 3/4 tsp baking powder
~ 3/4 tsp sea salt
Directions
1. Bring honey to a boil in medium-sized saucepan. Add oats, the pour 1/2 teaspoon
of the soda over oats and stir to combine. Cover and let stand 10
minutes.
2. Beat butter until creamy. Gradually add sugar, beating until fluffy.
Blend in eggs. Add oats mixture and bananas then blend well. Sift together
flour, remaining 1/2 teaspoon soda, baking powder and salt. Add to
creamed mixture and blend well.
3. Pour batter into 2 greased 8-inch square cake pans. Bake in preheated 350 F degree oven for 35 to 40 minutes. Cool on wire rack about 10 minutes. Remove from pans and let cool. Frost.
Quin blowing out her sister's birthday candles...
Strawberry Cream Cheese Frosting
Approx 2 cups
Ingredients
~ 6 ounces cream cheese, softened
~ 1/4 cup organic butter, unsalted, softened
~ 1 cup icing sugar (For the baby cake I only used 1/4 c icing sugar)
~ 1/2 cup mashed drained fresh strawberries
Directions
1. Blend together the cream cheese and butter using an electric mixer on low speed until combined.
2. Add sugar, gradually, and the mashed strawberries; blend frosting again on low speed until the sugar is incorporated, 1 minute.
3. Increase mixer speed to medium and blend frosting until fluffy, 30-45 seconds more. You can add as much sugar as you like for the spreading consistency you want.

Emmanuelle, loving her first birthday cake... (No, she didn't eat it all, she ate less than 1/4 of it, which is a lot for a babe!
Labels:
babies,
baking,
birthdays,
Breakfast recipe,
Dessert recipe,
family
Sunday, May 23, 2010
My New Favorite Cookbook - Super Natural Cooking by Heidi Swanson
Peanut Butter Krispy Treats from the Cookbook Super Natural Cooking by Heidi Swanson
My friend, Jane, and I have been having fun exchanging cookbooks. It is a great way to find some new recipes and to check out cookbooks I might want to buy. The library is good for this, too, but when I exchange with Jane I get the added benefit of hand written notes and recipe recommendations based on what Jane has tried. My new favorite cookbook is Super Natural Cooking by Heidi Swanson. I can hardly begin to tell you why because I love everything about it from the writing style of Swanson to her use of obscure ingredients like agar agar, which I happen to have in my cupboard. It is the vegab marshmallow replacer in the peanut butter krispy treats recipe, seen on Heidi's blog, with pistachios included! We made these treats to take to Quin's friend's house the other day. The kids like them, but mom's LOVE them!
I have also made the Banana Espresso Muffins, which are amazing. I used decaf espresso so that my kids could eat them. The mini muffin version I made along with the regular sized muffins were a bit rubbery... sometimes, living in the mountains wrecks havoc on my baking... but the ones I made in the standard muffin cups were wonderful.
Banana Espresso Muffins
I will make everything I have made again, including the spring asparagus puree which can be used like traditional basil pesto. I am truly happy to know this recipe, since I am not a huge fan of jarred pesto, and I never have access to piles of fresh basil. I will be making this a lot.
Spring Asparagus Puree with pasta
I am so happy that Jane lent it to me Super Natural Cooking. I must get my hands on my own copy, as I want to try all the recipes. Also, it has so much valuable information about different flours as well as recipes for basic things like making your own aluminum-free baking powder and a good vegetable stock. I could go on and on. If you are the type of person, like I am, to curl up on the couch with a cookbook, and you love natural foods, you will appreciate Swanson's newest cookbook!
PS You can also subscribe to her blog, 101 Cookbooks, and she will send you a recipe a week! And if you want to look at this book online I found it here on Google Books!
Sunday, February 21, 2010
February 21st - Chocolate Peanut Butter Brownies TO DIE FOR
I will forever be grateful to my friend, Kirstin, for forwarding this recipe to me. I am a huge fan of peanut butter and chocolate. And brownies, I love them! I haven't made brownies from a box since I was a kid because they really are easy to make from scratch and taste so good. I did 1 and a half of the recipe below and used a 9x13" pan and baked it for 45 minutes. Do not make theses unless you are prepared to eat half the pan... they are that good!
Peanut Butter Swirl Brownies
by Kim D. RecipeZaar
* 1/2 cup butter or margarine, softened
* 2/3 cup sugar
* 1/2 cup packed brown sugar
* 2 eggs
* 2 tablespoons milk
* 3/4 cup all-purpose flour
* 1/2 teaspoon baking powder
* 1/4 teaspoon salt
* 1/4 cup creamy peanut butter
* 1/3 cup peanut butter chip
* 1/3 cup cocoa powder
* 1/2 cup semi-sweet chocolate chips
1. In a mixing bowl, combine butter and sugars.
2. Add eggs and milk; mix well.
3. Combine flour, baking powder, and salt; add to creamed mixture and mix well.
4. Divide batter in half.
5. To one portion, add peanut butter and peanut butter chips.
6. To the other portion, add cocoa and chocolate chips; mix well.
7. In a greased 9-inch square pan, spoon chocolate batter into 8 mounds in a checker board pattern.
8. Spoon 8 mounds of peanut butter batter in between the chocolate batter.
9. Cut through batter with a knife to swirl.
10. Bake at 350F for 25-30 minutes or until toothpick inserted near the center comes out clean.
11. Cool on a wire rack.
Now eat! Yum!
And watch for smiles...
Labels:
baking,
cooking with kids,
Dessert recipe,
food,
recipe,
Thing-a-day,
vegetarian recipe
Thursday, January 28, 2010
Pumpkin Cookies... Good Enough For Breakfast
My friend, Michelle, came over for dinner one Sunday evening with her kiddos. She arrived with fresh baked cookies. How she managed to make them with her two active kids (3 year old girl with energy to burn and 1 year old boy who has been walking since 9 months) I don't know. I know, I know, people ask me the same thing, but at least for now, my babe doesn't walk. Her son walks, runs, AND climbs! You can't take your eye off of him for a second. She never even sat down while eating my lasagna, she ate her whole plate while keeping him from near disaster. I am telling you all of this in the lead up to this cookie recipe so you know that you CAN find the time to make them. The day after Michelle's visit, while eating the last few cookies, Quin looked at me and said, "You should get this recipe from Michelle." Wise child...
These cookies are cakey and light. They have a nice combination of ingredients that you might normally not think about putting together. They are great for an energy pick-me-up. I have added them to my list of good nibblies to make for new nursing moms, who often can only grab quick, simple things to eat when their energy is waning...
Sweet Pumpkin Cookies
Adapted from Moosewood Restaurant New Classics
I use organic ingredients wherever possible
1 c. butter
1 c. natural cane sugar
1 c. pumpkin puree
1 egg
1 tsp pure vanilla
2 c. whole wheat pastry flour
1 tsp baking powder
1/2 tsp baking soda
1 tsp ground cinnamon
1/4 tsp ground allspice
1/2 tsp salt
1 c. toasted peanuts
1 c. raisins (I use CURRENTS)
1 c. chocolate chips (optional)
Preheat the oven to 375.
Cream together the butter and sugar, and then add the pumpkin, egg and vanilla. Mix until well blended. Sift together the flour, baking powder, baking soda, cinnamon, allspice and salt and then add to the mixing bowl. Stir well to form a soft batter. Stir in nuts, raisins and chocolate chips. Drop by rounded spoonfuls onto a cookie sheet, and bake for 10-15 min.
Labels:
baking,
cookies,
Dessert recipe,
food,
nursing,
vegetarian recipe
Friday, January 15, 2010
A Little French Canadian History Lesson - Pouding Chômeur Recipe
My husband is French Canadian. He is from outside of Ottawa, so he is Franco-Ontarian, but we did live in Quebec for awhile. In fact, our eldest daughter was born there, so she is actually Quebecois on paper. I was born in Minneapolis but my great grandfather on my father's side was French Canadian... you don't have to be French Canadian to enjoy this recipe, although if you aren't, you may have never heard of it. Read on for a brief history...
Pouding chômeur means pudding of the unemployed or poor man's pudding. Or as my husband's family calls it, which may or may not be politically correct, welfare pudding. It was created by Quebecois women, factory workers, in 1929, during the Great Depression. It used cheap, common ingredients, like flour, brown sugar, and water.
I must say this version is less than cheap with real maple syrup and a ton of butter. We used to live in Eastern Canada, where real maple syrup was cheap and available everywhere. In recent years there have been bad seasons and the price has gone up because it is more scarce. But, not as scarce and expensive as it is now that we live in Eastern Canada. An $8 can, 540 ml, is about $12 here. If you buy 12 cans in the East they are as little as $4.50 a can but here you can't buy in bulk. The cans weigh a ton, so having family ship them to us would be a bit ridiculous. So, we have come up with a way to ensure we never have to resort to Aunt Jemima. When friend or family come to stay with us, they bring use cans of syrup. It is their "toll" for staying with us, if you will. And we always buy 10 cans when we go home for a visit. It has worked well so far, I have only had to sell my blood twice to buy it here... ok, I am only kidding... but I probably would...
All this about syrup being scarce brings me to why I made pouding chômeur for the FIRST TIME the other night. To ration our syrup supply, we usually only use it on homemade crepes, pancakes, waffles, french toast, and with blueberries on our porridge. However, we have family coming this week! I checked our "stash" and since we still have 6 cans, I decided I felt ready to use some of our precious syrup in a recipe. In fact, the recipe ON the can. I don't usually try the recipes on the sides of boxes or cans, but I figured the maple people must have a good recipe for this French Canadian favorite. Plus, it is pretty darn easy. I was able to throw it together while cooking dinner, and it baked while we ate. I can't tell you how amazing the smell of maple syrup baking is. YUMMY! And you would have thought it was Andre's 5th birthday. He was giddy with anticipation. His mom called just before we took it out of the oven and he told her what I was making while practically beaming with pride. She wanted to know if it was her recipe... I will have to get it but she agreed the one on the can would probably be good. Andre took the pouding out of the oven and said it smelled and looked perfect. And it tasted amazing. Andre ate helpings that would not be considered healthy. And I just ate the last one while writing this. Trust me, this is worth trying. And PLEASE do not substitute fake maple flavored syrup (I don't think it would withstand the 5 minutes of boiling that is called for). If you don't have the real stuff, do a google search for a recipe that uses brown sugar. I used organic sugar, butter, and milk and unbleached flour.
Pouding chômeur de Grand-Mere Elmina
Off the side of a Quebecois can of maple syrup
Ingredients
- 1 1/2 c REAL maple syrup
- 3/4 c water
- 1 c sugar
- 2 c flour
- 1 c melted butter
- 2 tsp baking powder
- 1 c milk
Mix maple syrup with water and boil for 5 minutes. Combine flour, sugar, and baking powder with milk and butter. Spread dough into a tube or bundt pan (you can use a square or rectangular pan but the syrup may boil over while baking). Pour boiling syrup over dough. When the dough floats to the top of the syrup (about 5 minutes), place in 350 degree oven and bake until golden and toothpick in the center comes out clean (about 30 minutes).
Labels:
baking,
Dessert recipe,
food,
recipe,
vegetarian recipe
Monday, December 28, 2009
Book Recommendation - Christmas Cookies Bite Sized Holiday Lessons

I have decided I might as well post about the holidays until the new year. I guess most people would have done it all during the lead up to the holidays, but I am one of those people who doesn't really think about the holidays until the week before, then I cram all the fun into that week and on into the new year. Maybe that is why I haven't even received the Christmas cards I ordered to send out to people yet... I don't really get hung up on all of that, and I think it bothers some of the more organized people I know. But, I feel the only people I am accountable to are my hubby and kiddos, and well, they actually end up having more holiday fun because we are not stressed. We hang the lights, put up the tree, bake cookies, decorate with things we have made, read holiday books, have a little holiday photo shoot for our cards, go see Santa, hang with friends, do a little shopping, play in the snow, gather items for Santa's Anonymous, invite friends over for meals, go to holiday parties, connect with loved ones via cards, email, & phone, sit by the fire, cuddle... there are so many important things to fill our time.
One of our favorite holiday books, one of the only ones I keep on the book shelf all year round, is Christmas Cookies Bites-Size Holiday Lessons by Amy Krouse Rosenthal and Illustrated by Jane Dyer. It is a charming book that includes small children and their live animal friends making and sharing cookies. Each page teaches the definition of a word, by using an example based on baking the cookies. For example, " Aniticipation means, I've been thinking all day about making the cookies. I'm so excited. I can't wait." or "Responsible means, you asked me to put away the cookie cutters, and you can count on me to do it." My aunt bought Quin this book and we all enjoy it. The last page even has a Christmas sugar cookie recipe. A beautiful book that teaches children the joys of sharing the holidays with others. Check it out at the library or buy your own copy to enjoy and pass along someday.
Labels:
baking,
Book Recommendation,
children's book,
holidays
Tuesday, December 22, 2009
Hallelujah for the Christmas Cookie Exchange
Who came up with this holiday ritual? I want to thank them from the bottom of my heart. The Christmas cookie exchange is truly the lazy woman's answer for having tins of goodies of all variety over the holidays. I love the concept. And, after having heard of these wondrous events, I can now say I have taken part. And I am hooked!
Ok, I just had to look it up. While the Christmas Cookie Exchange is not credited to one person, it seems to first have appeared in print in the 1963 Betty Crocker's Cooky Book.
"A Party Idea. A popular once-a-year party is the Chrismas cooky swap party. Friends and neighbors gather, each bringing one dozen of her holiday specialty for each woman at the party. Cookies are set out to sample and admire and coffee is served. Afterward each one takes home a wonderful variety of festive cookies." Thank you, foodtimeline.org.
On a side note, did you know that my father's mother was the first female executive at General Mills, and for awhile, she was some of the features on the face of Betty Crocker (who was a composite of several women)? More on that someday...
Back to cookies... on Saturday night, I was part of a cookie exchange. It was just up the road from my house, and I was able to go with a good friend, while her hubby watched our three 1/2 year old daughters, who were incidentally born on the same day. Michelle & I got to hang out with my babe and two other fine ladies, sipping wine, eating Mexican chili (even veggie style for me!), and chatting. In the end, my 4 kinds of treats, turned into 9! And now, I have beautiful tins of baked goods to give away as gifts and to eat. Yum, yum!
I hope to collect some of the other recipes, which included yummy Russian Tea Cakes, delicious oatmeal peanut butter cranberry cookies, and exquisite pistachio lime iced cookies. I can share what I made...
Peanut Blossoms, which I wrote about and posted the recipe for here. My Aunt Jackie used to make these during the holidays and I think of her every time I make them. She taught me how and I used to unwrap and push in the Hershey's Kisses.
Maple Cinnamon Pecans. I got this recipe from my favorite enewsletter, Craft Daily. They are easy to make and the host of the cookie exchange referred to them as "crack", so be prepared to be addicted.
Homemade Chocolate Dipped Marshmallows. The recipe is here. Once again, Craft Daily, and the same wonderful contributor. The cookie exchange host squealed when she saw these! I could not resist attempting these. I don't really like to just eat marshmallows but I thought they would make great gifts next year, along with cocoa mix. I wanted to give them a shot before planning to make bunches and bunches. It was quite easy albeit sticky. I think I got about 5 dozen out of this recipe. I would use more vanilla bean next time and a stand mixer... They are beautiful, delicious, and Quin has fun helping to put the crushed candy cane on. They need to be refrigerated and can be kept for up to one week.
Iced Sugar Cookies. I have to admit that the batter for these was not made my me. The horror... but I wanted to support a friend who was selling buckets of frozen cookie dough as a fundraiser for her son's school. I bought one, thinking how much fun Quin and I would have making them. And we did. And I have a great respect for people who do such a beautiful job of decorating these. The thought of making different colored frosting... eeck. I just made a simple icing from icing sugar, a few drops of water, and a couple drops of lemon juice. Add sprinkles et voila!
Labels:
baby food,
baking,
gifts you can make,
holidays,
recipe
Thursday, December 17, 2009
Vegan Ginger Orange Muffins Using Crystallized Ginger
BEFORE
My friend, Cheryl, came over on Sunday. It was an extremely chilly day, something like -25 below and she WALKED to my house. I like to drink warm beverages and eat goodies with my friends, especially if I have not seen them in awhile. What better way to catch up? I had not seen Cheryl since BEFORE my almost 7 month old baby was born, and we live in the same town! I used to teach the recycled craft projects at the kid's program she works with. So, after Cheryl shed her layers, I handed her some mint tea and we proceeded to eat these delicious vegan muffins. Cheryl has been a vegan for 6 months. They are moist, delicious, and sweet without any refined sugar (although I guess that would depend on which brand of marmalade you select). I love that the recipe calls for both marmalade and crystallized ginger. They are extra delicious warmed up and slathered with almond butter. YUM!
AFTER
I found this recipe on a site called Cat Tea Corner and you can click on this link to get the recipe. I will not type it out here since the copyright info clearly says their recipes may be printed out for personal use but may not be reproduced in any other form. Once you have clicked on the link above you are in the desserts, breads, and beverages section so you can scroll down to Gingery Orange Muffins and click on it. There is a large list of over 400 vegan recipes here. I can't wait to check out more of their recipes.
Sunday, October 25, 2009
Almond Flour Scones - Passing on the Pleasure
My friend, Cindy, brought over a batch of these amazing scones the week I gave birth to Emmanuelle. They gave me the much needed energy that was necessary for nursing a newborn and for regaining my strength. Plus they tasted amazing! I asked her for the recipe and for some reason JUST got around to making them. I have no idea why I didn't make them sooner, they are truly EASY PEASY. To somewhat start a tradition I made them for a friend who recently had her third child... We brought them over along with a batch of soft pretzels from a local bakery. The intention was to eat the pretzels with cream cheese and to leaving the scones for them to eat but instead I think everything were gone by the time we went home. There were three women and six children after all...
I wrote the recipe below as I made them but I put additional options in parenthesis. This is a great recipe for people who can't have gluten or grain flours. The egg can also be replaced with flax seed emulsion and the honey replaced with agave or maple syrup to make this recipe vegan.
Almond Flour Scones
8 servings
2 cups blanched almonds, ground (you can grind your own or buy them ground into meal for the same price as whole at Nutter's. Go on 20% off day and buy a large bag, you can freeze it.)
1/2 tsp baking soda
1 large free range egg (1/4 cup flax seed emulsion can be used in place of egg, see below *)
1/4 cup honey (or maple syrup)
1/2 cup organic cooking dates, chopped to about raisin size (can use raisins... see variations below)
1 tsp pure vanilla extract
1/2 tsp ground cardamom
Grind almonds to a fine powder in a blender or coffe grinder (I just use the course almond meal AS IS from Nutter's, our local bulk health food store). Mix in baking soda well, rubbing into the almonds with your fingers to combine. Add cardamom and set aside. Whisk eggs or flax seed emulsion with honey or maple syrup and vanilla. Stir whisked egg and syrup into almond flour and stir in dates. Let batter sit for about 5 minutes to thicken. Drop onto oiled cookie sheet and bake at 350 F for about 8-10 minutes. Let cool before removing from tray (or they may break apart).
Variations
- 1/2 cup grain sweetened dairy free or regular chocolate chips and a pinch of cinnamon
- 1/2 cup frozen blueberries and a tsp or organic lemon zest
- 1/2 cup chopped frozen cranberries and a tsp or organic orange zest
- a dollop of fruit sweetened jam in the middle of each unbaked scone
*Flax Seed Emulsion
Combine 3 part ground flax seeds with one part water. Store in a jar in the fridge for up to one week.
Please feel free to leave a comment with more suggestions on variations. Also, leave me a link to your favorite gluten free recipe. Cheers!
Labels:
baking,
food,
friends,
gluten free recipe,
new baby,
recipe vegan,
vegetarian recipe
Tuesday, June 16, 2009
Cinnamon Walnut Scones
My first activity, after one week of resting up and having a babymoon with my family, was to make these scones. Big sis helped me. They are very simple to make so even though it was the longest time I had spent standing in a week, it was very manageable.

Cinnamon Walnut Scones
1 3/4 cups all-purpose flour (I use unbleached)
1/4 cup finely chopped walnuts
4 1/2 teaspoons sugar
2 1/4 teaspoons baking powder
1/2 teaspoon salt
1/2 teaspoon ground cinnamon
1/4 cup cold butter
2 eggs 1/3 cup whipping cream
1/4 cup buttermilk

In a bowl, combine the first six ingredients; cut butter until the mixture resembles coarse crumbs. Combine eggs and cream; stir in dry ingredients just until moistened. Turn onto a floured surface; gently pat into a 7-inch circle, 3/4 inch thick. Cut into 8 wedges. Separate wedges; place on a lightly greased baking sheet. Brush tops with buttermilk. Let rest 15 minutes. Bake at 450 degrees for 14 - 16 minutes or until golden brown.


I suggest making whipped cream to put on these, although if I had had any mascarpone kicking around I would have made devonshire cream... my recipe for homemade whipped cream can be found in this post. In one of the generous food packages at friend dropped off was a jar of homemade strawberry jam which was JUST PERFECT on the scones. I need to make some jam, I had forgotten how amazing it is when it is homemade. These scones are delicious enough to eat plain but why?

Cinnamon Walnut Scones
1 3/4 cups all-purpose flour (I use unbleached)
1/4 cup finely chopped walnuts
4 1/2 teaspoons sugar
2 1/4 teaspoons baking powder
1/2 teaspoon salt
1/2 teaspoon ground cinnamon
1/4 cup cold butter
2 eggs 1/3 cup whipping cream
1/4 cup buttermilk
In a bowl, combine the first six ingredients; cut butter until the mixture resembles coarse crumbs. Combine eggs and cream; stir in dry ingredients just until moistened. Turn onto a floured surface; gently pat into a 7-inch circle, 3/4 inch thick. Cut into 8 wedges. Separate wedges; place on a lightly greased baking sheet. Brush tops with buttermilk. Let rest 15 minutes. Bake at 450 degrees for 14 - 16 minutes or until golden brown.
I suggest making whipped cream to put on these, although if I had had any mascarpone kicking around I would have made devonshire cream... my recipe for homemade whipped cream can be found in this post. In one of the generous food packages at friend dropped off was a jar of homemade strawberry jam which was JUST PERFECT on the scones. I need to make some jam, I had forgotten how amazing it is when it is homemade. These scones are delicious enough to eat plain but why?
Subscribe to:
Posts (Atom)