Showing posts with label food. Show all posts

Monday, June 27, 2011

365 Days With Kiddos - #34 - Arrange a Neighbourhood or Community Pot Luck

MMMMMMMMMM, baby pancakes...

Yesterday was a day of food, friends, & family. We started out the day with silver dollar pancakes at the diner down the street in the company of friends who were visiting from out of town. With only four adults to five kids aged six and under, we were definitely out numbered. The kiddos were great, and the bonus was that their pancakes were free! The daddies finished their meals early and took the kids outside to play, while the mommies had a few peaceful moments to chat.

An adorable crew! E is going through a phase where she is practicing getting dressed AND undressed...

For dinner, we went to the new community centre to the second community pot luck that has been hosted there. Over 80 people were in attendance, and while sausages and desserts were provided, community members were encouraged to bring a dish from their cultural background.

Part of our new community centre during a "global" pot luck...

I brought Pouding Chômeur, or welfare pudding, which is a part of our family's French Canadian heritage. I wrote a bit about its history and shared the recipe in this post. Because it was the only homemade dessert, and probably because it was soaked in maple syrup, it was gobbled up in about 10 minutes...

E is pleased with her meal...

Pot lucks can be great experiences for kids and adults. What better way to not only eat a variety of types of food, but it is always a good way to try new things. My husband and I like to try new things, and our kids follow suit. We also like to socialize, to get out and be a part of our community, and these pot lucks are a fun way to do that. Check and see if something like this goes on in your community and if not, why not arrange a pot luck with your neighbours or with some family friends. You can come up with a theme or make something that your grandmother used to make. In our community people are encouraged to bring their own plates, cutlery, and cups, to be more environmentally friendly. We were given a picnic basket for our wedding that we use all the time. I would love to read your comments about different ideas for pot lucks.

Q finished up the evening with some coloring fun she named "The Rainbow Blowup Fish"

Tuesday, January 25, 2011

Weekly Recipe - Heidi Swanson's Multigrain Waffles


Yum, yum, yum, yum, yum, yum... that pretty much sums up these waffles. We eat these whenever we have the time for a leisurely breakfast. The batter comes together in a snap. I received this recipe in my inbox, right about the time I had started lamenting that our white flour waffles were good but not good for us. I know that this recipe is a keeper because my kids and husband like it BETTER than our white flour waffles. It is by Heidi Swanson of 101 Cookbooks where you can find TONS of healthy recipes. She has also written her own cookbooks, Super Natural which is amazing and Super Natural Everyday will be released soon. Since I have not received permission to repost Heidi's waffle recipe here on my site, I am going to just give you the link to the recipe on her site. Here it is... I just want to make note that if you don't have buttermilk, you can substitute by adding 1 T lemon juice per cup of milk. The hint of lemon flavor is lovely! Enjoy :)

Wednesday, January 5, 2011

Weekly Recipe - My Swedish Pancakes (Using Whole Wheat Pastry & Barley Flours)


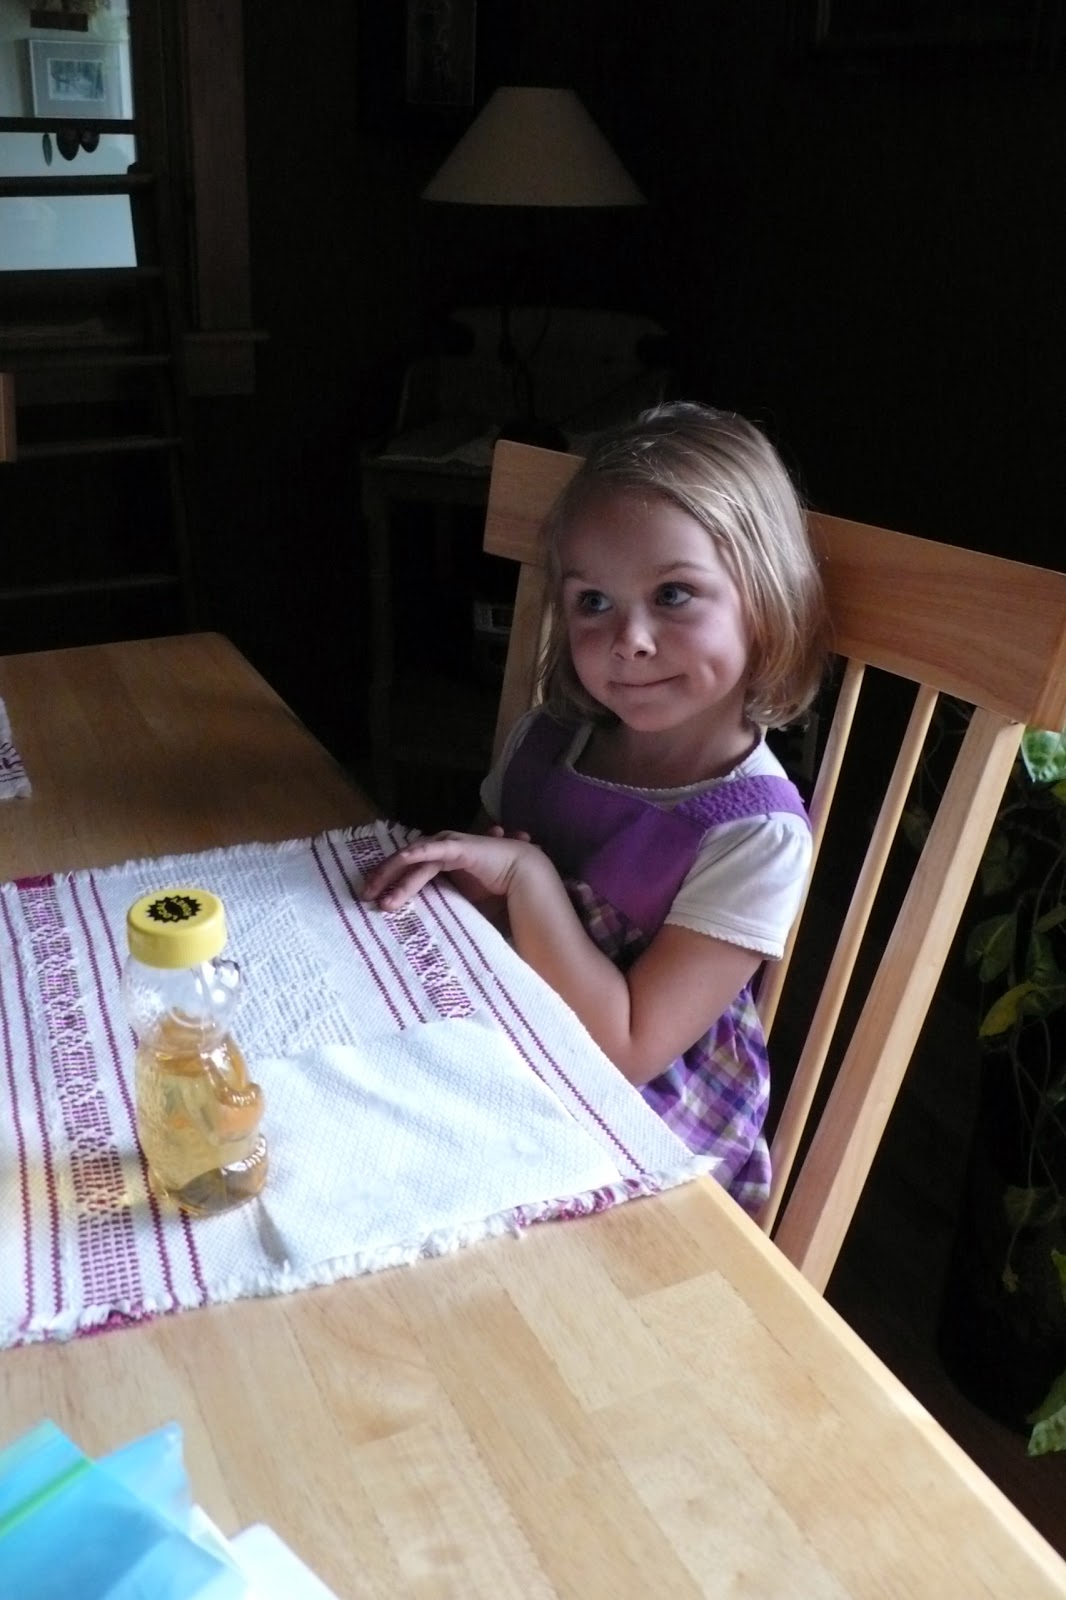
Have you ever bought something at a yard sale or thrift shop that you could not identify? I have a thing for cast iron pans. I love them, I use them, I give them to others and hope that they will love them. At this point, I have as many cast iron pans as one household could need, a 12", a 10", a square one with ridges for grilling, and a 9" crepe pan that is thin and super light for swirling around batter in the pan. I really didn't need anymore... then one day, I came across a cast iron pan with seven recessed circles in it. And when I flipped it over, a ribbed flower pattern on the bottom (I should take a picture of the bottom...). I had no idea what it was for. I thought maybe for eggs, but thinking of my egg poaching pan I knew the wells were too shallow. I am a bit of a kitchen gadget and equipment nerd but have been stumped before. Anyway, whatever it was for, I knew it was a specialty pan like my madeleine pan and my Nordic Ware mini bundt pan. I knew I would one day figure out what it was for and kick myself for not buying it. Especially since it was $3! Plus I thought to myself, it is so flat that I can store it under the lazy Susan in the corner cabinet where I store my pots and pans...

... which is exactly where it stayed until my birthday this past November. That is the morning that I woke up thinking I wanted to make a pannekoeken, a traditional Dutch pancake that is cooked in a skillet in the oven. I have eaten them, have a great Dutch cookbook series, but have never made them. And yes, my idea of fun, on my own birthday, is to cook something I have never made first thing in the morning. I am not a morning person, but I am skilled at breakfast making, and the thought of a hot pannekoeken was all the inspiration I needed. My daughters agreed and I jumped online to find a recipe for Swedish pancakes, BECAUSE the whole time I had been thinking about making a pannekoeken, I had been calling it a Swedish pancake. I had my countries and breakfast foods mixed up, hence the reason I didn't go and look the recipe up in my Dutch cookbooks! And am I ever glad I got mixed up. In fact, I believe that my Great Grandma Gerda, from Sweden, was looking down on me that day, because as I looked at the first image that popped up from my search for "Swedish pancake" I SAW MY CAST IRON PAN!! And, I started dancing around the kitchen with my wee ones, laughing, and brandishing the pan that I NOW knew was a Swedish pancake pan! HAHAHAHA. The reason that I had never know about this pan, since my grandmother, Harriett, daughter of Gerda, did make pancakes for me, is because she just made them in a regular pan. Which you can totally do. So, no worries if you don't have a "special" pan like me, you will be a-ok, and very happy that you followed the recipe for Swedish pancakes below. I have tweaked this recipe to fit our tastes and these pancakes are different than crepes, pancakes, and pannekoeken. They are richer, thinner, but moister than a traditional pancake. Give them a whirl. They made my birthday extra special and when I spoke with my grandmother Harriett on the phone, while I was making them, they made her happy as well. She has been losing her short term memory but when I told her I was making Swedish pancakes I could hear her voice change and it was like she was back on the farm as a kid. She was excited and it touched my heart because since my grandfather died she is never very excited. As I hung up the phone I felt happy to have made her day and happy to know we can now make pancakes that will always remind me of her.


Swedish Pancakes
By Tiffany Teske
Serves 3 to 4


Ingredients
I use organic ingredients whenever possible.

~ 3 eggs
~ 2 T sugar
~ 1 cup milk
~ 1 cup half and half OR buttermilk (you can use all milk but they will not taste as rich)
~ 3 T melted butter
~ 1/2 tsp sea salt
~ 3/4 cup whole wheat pastry flour
~ 1/4 cup barley flour

Directions

1. Using a wire whisk beat the eggs, sugar, milk, half & half or buttermilk, and the melted butter for one minute.
2. Slowly add the flour while continuing to mix. When the flour is completely added blend for an additional 30 seconds.


3. Heat griddle or pan. When griddle or pan is hot, grease with butter or cooking spray. Pour pancake batter in a large circle for crepe size pancakes or small silver dollar size pancakes. They will cook quickly.

Flip when the underside is golden brown and the upper side has an opaque look. They are done when both sides are a golden brown.


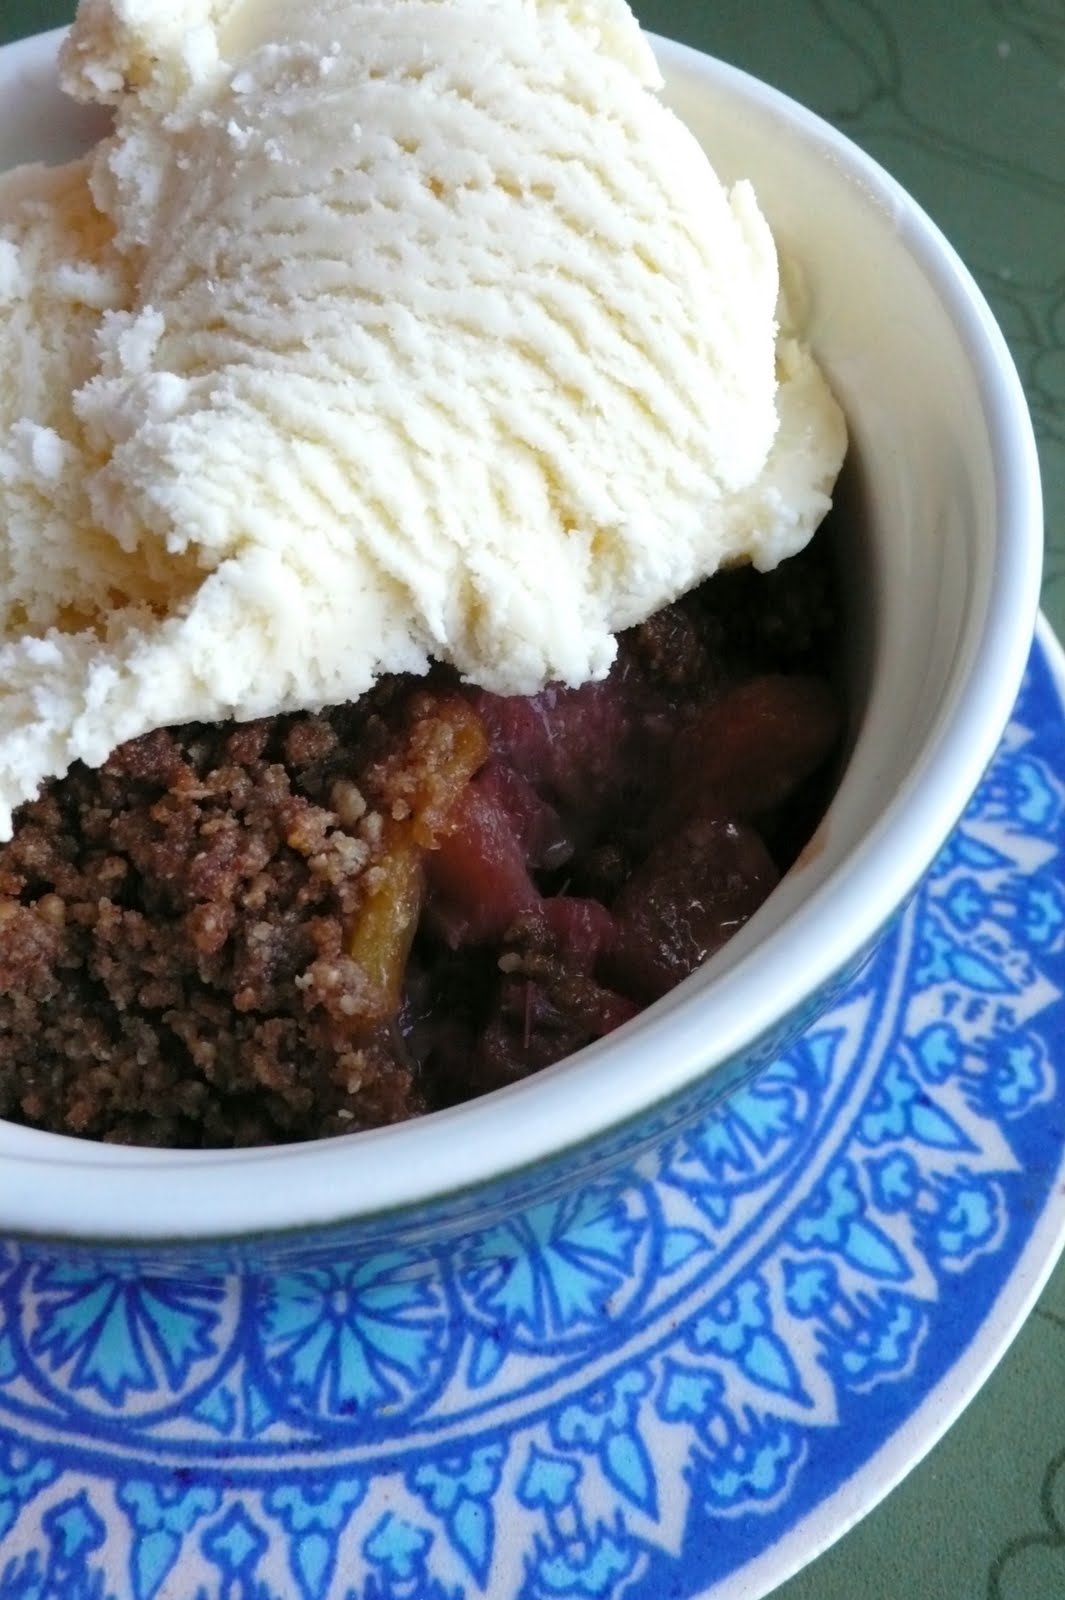
4. Serve hot with maple or fruit syrup, powdered sugar, applesauce or, with Lignonberries.

Thursday, October 28, 2010

Holiday Fun - Some Halloween Eats - Devilish Deviled Eggs

I LOVE deviled eggs. I don't make them often because I can eat them... ALL! I recently was looking through one of my favorite vintage cookbooks for kids, The Better Homes Junior Cookbook, from the early 70s. The cover and inside images, along with step by step illustrations are delightful. Some of the recipes leave a bit to be desired (think spam and molded gelatin). Others are a cheery trip back to my childhood. I got a serious craving when I saw their recipe for stuffed eggs. Apparently in the 70s, these eggs were not yet devilish...


Today was the first moment I had to finally make some. And since Halloween is just around the corner I decided that not only would we make some deviled eggs but we would make them a little devilish. My four year daughter helped me with each and every step.

Devilish Deviled Eggs
Inspired by Better Homes & Gardens Junior Cookbook
Recipe and devilish decoration adapted by Tiffany Teske

Ingredients

~ 6 Free range eggs
~ 2 Tablespoons olive oil mayonnaise
~ 1 teaspoon prepared yellow mustard
~ 1 teaspoon white vinegar
~ 1/2 teaspoon sea salt
~ 1/4 teaspoon fresh ground black pepper
~ Hungarian paprika to sprinkle on top
~ Sliced canned black olives and fresh red pepper for garnish

Directions

1. Place eggs in saucepan water to cover. Bring to a boil then simmer for 20 minutes.


2. Place eggs in a bowl of cold water to cool. You may need to change the water a couple of times. Using a spoon, crack the eggs shell of each egg and remove. Cut the eggs in half. Scoop or pop out the cooked yolks into a bowl. Put the white aside for the moment. Mash the yolks together.


3. Add the mayo, mustard, vinegar, salt, & pepper. Mix well. Spoon the yolk mixture back into the egg whites. Sprinkle paprika on top.


4. To make your eggs devilish, use sliced black olives and red pepper slices.


My lil' devil eating some of her handiwork!


PS If you are looking for a variation on the theme, why not make deviled egg ghosts?

Wednesday, October 13, 2010

365 Days With Kiddos - #12 - Make Your Child A Special School Day Breakfast


We love breakfast around here. We have many leisurely ones but there are also days when we need to get out the door for preschool and we don't have as much time. My daughter would eat toast every day (Have you ever read Bread and Jam for Frances? which is, of course, a snap to make. I like to find ways I can make a quicky breakfast that is extra special. Recently I was thinking about this and remembered Egg in a Hole. I have to admit I never had this as a kid but a boyfriend of mine made this for me. It became part of my repetoire then but I had all but forgotten about it by the time I had kids. I started to make it again recently. And then just yesterday I was reading a vintage copy of The Better Homes and Gardens Junior Cookbook and they have a version that uses a bun, an egg, the oven, and a slice of cheese. My version is made on the stove, is as fast as frying an egg, and I may start to mix it up by melting cheese on top...

Egg in the Hole

By Tiffany Teske

Ingredients

- a slice of bread
- an egg
- butter
- cheese, salt & pepper, optional

Directions

1) Tear the middle of the bread out of the center of the slice so that you have a hole. This can be toasted in the pan along side the slice of bread, as a wee piece of toast to have on the side of your toast ;).
2) Spread a bit of butter on each side of the slice. Also, melt a thin layer of butter in the pan so the egg won't stick, if you are using cast iron, like me. If you are using teflon or some other non stick you can omit the extra butter.
3) Place the bread with the hole in the pan, which should be on med to lo medium. Crack your egg and then drop it in the middle of the bread. Cook until it is solid on the bottom, then flip to cook the other side. Season with salt and pepper. If you are using cheese, place it on top, and cover the pan so it melts.
4) If you want the egg to look picture perfect you can cook it without flipping but I would toast one side of the bread first, and cover the pan while cooking. You may have to fiddle with the right temperature so you don't burn the bottom of the bread before the egg is cooked through. You can also cook all of this in the oven at 350 F if you have the time and prefer to do so.

If your child is vegan or allergic to dairy you can still make special toast by using cookie cutters to cut it into shapes, then spread with assorted nut butters. If your child is allergic to nuts you can use jams. If your child is gluten free, you can use gluten free bread. I guess the point is not so much what you make for your child as long as you find something fun and special that doesn't take a lot of time. This way you won't be stressed but your child will feel they are extra special when they are sent off to enjoy the day...

Saturday, October 9, 2010

365 Days With Kiddos - #11 - Have a Tea Party with Fairy "Milk"


I recently posted images of a friend's vintage tea cups. My wonderful friend, Kirsten, lives on Harmony Farm in Western Maine. I lived in Maine for close to 10 years and I have known Kiki for 11 years. We met when a mutual friend introduced us when I was selling some of my photography at an art sale. She was a reporter for the local weekly paper and we met soon after to talk about my work. The rest is history. Kirsten and I have worked on some amazing projects together as a writer and photographer duo, many of which were for the Kingfield Historical Society and the Mount Abram High School. We even received a grant to produce a documentary book with high school students who we were teaching photojournalism.


Over the course of these projects we became close friends. To say we have consumed massive amounts of chocolate and tea together would be an understatement. Since leaving Maine we have continued to have our tea parties via phone. This is actually a great way to keep the tradition alive but I always long to see my friend face to face.


This summer, we spent three days in Maine during the course of a trip to Ottawa to see family. Most of the time was spent at a family reunion in a town about 2 hours from where I lived in Maine. We did make it to my old town, but for less than 24 hours. Our family headed straight to Harmony Farm where Kiki and fresh blackberry tarts were waiting!

My husband, Andre, has known Kirsten for almost as long as he has known me. I met him in a church, while photographing his cousin's wedding, in the same town that Kirsten later got married in. When I met him, he lived 270 miles away in Canada. Soon, so did I. When we returned to Maine for Kiki's wedding, we stayed in the same inn as the whole wedding party and we could see the building where we were introduced from the window. Not only do Kirsten and Andre share the same birthday, they now share a friendship, too. Kiki has been to visit us in Banff, where she and I had high tea at the Banff Springs Hotel. Kiki has gotten to know our daughter, Quin, but this was the first time she met little Emmanuelle, who LOVED both Kiki and her tarts!


Like me, Quin knows how to enjoy a tea party. In fact, Kiki calls her a "professional". She got such a kick out of watching Quin pour and fix her tea and eat her little wrapped chocolates and several tarts.


Have you ever had a tea party with your child? Quin actually drinks decaf or herbal tea, with lots of milk and honey. Children in China, Japan, Korea, and India all grow up drinking tea. It is refreshing, has no calories without milk or honey, and is ph neutral so it is not bad for teeth. Tea has many health benefits and both fruit and mint teas appeal to kids. Everything from simple sandwiches with the crust cut off to fruit cups to baked goods are appropriate. And of course a pretty tablecloth and fancy tea cups add to the fun.


If you don't think you child will drink tea, you can make them a simple drink my father used to make for me. In fact, he made it for my brothers and I, and even they still talk about it. It is called Fairy Milk. The reason I put it in quotes in the title of this post is because it can be made with cow's milk, but it can also be made with soy, almond, or rice milk.

Dad's Fairy Milk
By Tiffany Teske

Ingredients
- a cup of milk
- food coloring (I recommend using natural food colorings which you can find online or you can make)
- honey

Directions
On the stove top or in the microwave warm the milk to a good drinkable temperature for a child. Let them select the color they want their milk to be and allow them to put a couple of drops of the coloring into their cup. Next let them add the honey and stir. Then gulp, gulp, gulp but remind them to keep their pinky finger up :)

Saturday, October 2, 2010

Weekly Recipe - My Sweet Potato & Black Bean Chili


This recipe came about like many do; I saw it in a cookbook but then because I didn't like certain ingredients or methods, I totally revamped it to make it my own. There was a time I would not have had the confidence to do this. Thanks to time and practice, I am getting better at "winging" it. When my aunt cooks she is amazing. The last time she was at my house she made the most delicious pistachio crusted fish with a moroccan flair and I can't replicate it because it was truly a little of this and a little of that. Being in her kitchen and having her in mine makes for the best memories. And when I marvel at the fact that I may never be able to cook "like that", she smiles and tells me to give it another 40 years or so...

The thing I disliked the most like in the recipe that originally inspired me, was something about making a slurry with cornstarch. Yuck. I have made several chilis without needing a thickener so I decided to omit it. If you are used to thickening chili, trust me, you don't need to in this recipe.


PS If you own a Slap Chop (or a Zyliss version like we have) I would get it out. There is a great deal of chopping in this recipe. I love to chop by hand and I am too lazy to clean the chopper, but trust me, it will be worth cleaning it up.

Sweet Potato and Black Bean Chili
By Tiffany Teske

Ingredients

I use organic wherever possible. This makes 8-10 bowls. It keeps well in the fridge for several days and would freeze well.

- 1 T grapeseed oil (you can substitute vegetable oil)
- 1.5 medium or 1 large yellow onion(s), chopped
- 3 cloves garlic, chopped or minced
- 1.5 t cumin
- 1 T Mexican chili powder
- 14 oz can crushed tomatoes
- 2 c vegetable broth
- 2 19 oz cans black beans, drained but not rinsed
- 1 14 oz can fire roasted diced tomatoes
- 28 oz can plain diced tomatoes
- 1 t Vege Sal Seasoned Salt (or other seasoned salt)
- 1/2 t ground black peper
- 1/2 t dried oregano
- 1 large carrot, peeled and diced
- 1 large sweet potato, peeled and diced
- 1 c frozen corn
- 2 bay leaves
- Optional - feta & cilantro for garnish

Directions


Heat the oil in a large pot on medium high heat. Add the diced onion and saute for 5 minutes, until tender. Add the garlic and saute another minute. Add the cumin and chili powder and saute 2 minutes.

On medium-low heat, stir in the crushed tomatoes and broth. Add the remaining ingredients except the toppings. Bring chili to a boil for 2 minutes and then reduce heat to low. Simmer over low heat uncovered for one hour, then simmer covered with a lid for 30 more minutes.

Serve with your choice of toppings.

Friday, September 24, 2010

Happy and Healthy - Making Homemade Yogurt - Part 1


I have always wanted to make yogurt. I know it is an easy thing to buy but I want to make it myself, like I want to learn to make cheese. Yes, I can now find even organic yogurt everywhere, but I still want to try to make it. It is a goal of mine to at least try to make everything I so conveniently buy from the store, from scratch. I make many things from scratch, although some things I leave to the experts (like sushi, you know how some things just taste so much better when someone else makes them?). In my effort to learn more about yogurt making, I ran across the blog One Hot Stove. In a post on making yogurt, Nupur states the following reasons for why she wanted to make her own yogurt:

"I'm happy I started making yogurt for several reasons-
(a) Texture: Don't get me wrong, I like store bought yogurt just fine and have eaten it for years. But since I started to make yogurt at home, I love how the texture is creamy but never gummy.
(b) Packaging waste: I'm very happy to be able to avoid the plastic yogurt tubs. I always reused the tubs (for pantry storage) or recycled them, but reduce beats both reuse and recycle.
(c) Cost: The yogurt cultures are not dirt cheap or anything (around 5-6$ for a pack of 6 sachets), and you have to factor in the cost of the milk, but homemade yogurt is still significantly cheaper than store-bought stuff.
(d) Streamlining my grocery list: I use fresh yogurt in place of sour cream and cream cheese in dips and spreads and to dollop on burritos, so I have cut down significantly on buying other dairy products."

These are all reasons I want to make yogurt. I also prefer to make the things I eat because they are fresh and I know every ingredient that has gone into to them.

It seems that I can make yogurt at home with very little equipment. There are many yogurt makers available for purchase and I have ordered the Cuisipro Donvier Electric Yogurt Maker above from CSN Stores. Have you ever heard of CSN? They have over 200 online stores that sell everything from dining sets to pet supplies. I am always finding some new kitchen gadget I need at CSN. I am anxiously awaiting my newest kitchen helper and will happily pass along my results.

Do you make yogurt at home? Do you have any good recipes to share? I would love to hear your advice so please comment below.

Monday, September 13, 2010

Weekly Recipe - Pineapple Rhubarb Crisp


I realize that it is getting a bit late in the season for this (even here in Banff where the growing season is late and short). Rhubarb can be found in the freezer section year round in some places. This recipe makes it worth checking out. I am a huge fan of any kind of crisp, especially when I can make homemade sweet cream ice cream to put on top. I had never thought of the combination of rhubarb and fresh pineapple... it is awesome! The sweet and tart go so well together. The heading of the recipe, from a free thrifted copy of Homemakes Magazine states "Consider this dessert a study in North-South dialogue: a blending of rich tropical sweetness with cool climate tartness". On a side note, old magazines abound, usually for free, so if you are ever in need of a new recipe, aside from the internet, or your cookbook collection, just pick up some free magazines, flip through, and pick out a something new to try...

Pineapple Rhubard Crisp
Homemakers Magazine

Ingredients
Makes 6-8 serving

4 cups/1 L chopped rhubarb
3 cups/750 ml chopped fresh pineapple
3 Tbsp/45ml granulated sugar (I use organic raw)
1 Tbsp/15 ml cornstarch
1 cup/250 ml all-purpose flour (I used organic whole wheat pastry flour)
2/3 cup/150 ml packed brown sugar
1 tsp/5 ml finely grated orange rind
1 tsp/5 ml ground ginger
1/4 tsp/1 ml EACH cinnamon and nutmeg
pinch cayenne pepper
1/3 cup/75 ml salted butter, melted

Directions
Toss together rhubard, pineappple, granulated sugar, and cornstarch; place in buttered 8 inch/20 cm square baking dish. Whisk together flour, brown sugar, orange rind, ginger, cinnamon, nutmeg, and cayenne until throughly combined. Drizzle with butter; stir until in small crumbs. Spread over fruit mixture. Bake in centre of 350 degree F/ 180 degree C oven until fruit is bubbling and topping is crisp, 50 -60 minutes.

Sweet Cream Base
By Ben & Jerry's

Ingredients
Makes 1 Liter

2 eggs
3/4 cup sugar
2 cups whipping cream
1 cup milk

Directions
Beat eggs, using a wire whisk, until frothy, 1-2 minutes. Add sugar a little at a time, beating about 1 minute. Add cream and milk and whisk to combine. Freeze according to your ice cream maker's directions.

Monday, July 19, 2010

Healthy Homemade Fruit Thin Bars (Think Fig Newtons...)


I am always on the look out for healthy homemade snacks and luckily I have lots of friends who are willing to share their recipes. My friend, Jane & I swap cookbooks, which is a really nice way to gain some new recipes, complete with feedback from someone you trust.

Our new favorite in this house are fruit thins. They are a fruit filled cookie that literally have tons of possible fillings. This recipe is from a very old out of print cookbook about baking.

Fruit Thins

Makes 24 to 32 cookies


Ingredients

- 1 1/2 cups Brazil nuts or walnuts (I used walnuts)
- 1 cup coconut (I used unsweetened shredded)
- 2 cups quick oats (I used organic)
- 1/2 cup whole wheat pastry flour
- 1 teaspoon salt (I used sea salt)
- 1/4 cup honey, warmed (although if you use liquid honey you don't need to warm it)
- 1/2 cup water
- Filling: use 1/2 cup water with a, b, c
a: 2 cups raisins, 1 cup dates
b: 1 cup each dates, raisins, and dried cranberries
c: 1 cup dried apricots, 1 cup dried pineapples pieces, and 1 cup golden raisins
NOTE: I used organic raspberry jam in my thins because I had it on hand.

Method
1. Blend coconut and oatmeal two minutes in food processor and place in bowl.
2. Blend nuts, flour, and salt for 30 seconds. Mix in bowl with coconut/oatmeal mixture. Add honey and water and stir together until pie-dough-like mixture is formed. Divide into two balls.
3. Filling: use a, b, or c from ingredient list; place in food processor with water and whiz, adding extra water if needed to make a thick speadable paste. (If dates or dried pineapple are hard, soften them in the water in microwave or on stove top before processing).
If using jam you do not need to prep it. Here is where things get a bit tricky...
4. Roll out first crust using two large pieces of plastic bag material or Bake Magic sheets. Place dough ball between sheets and rool, readjusting plastic if dough begins to press out as you roll. (Dampen counter slightly to keep the sheets from slipping around on the counter as you roll them. You will transfering everything to a cookie sheet with a lip, so roll it out to that size and shape.
5. Spread driend fruit mixture or jam over the surface.
6. Roll out the other ball of dough and place over the top of the other rolled out dough with filling and transfer to a cookie sheet. Place the plastic sheet on top and roll filmly to merge the layers together.
7. Score (press knife, don't drag). Bake at 350 degrees F for 25 minutes or until golden brown on edges and bottom.

These smell delicious while baking. Best wishes not having the whole family eat them on the first day...

Thursday, June 24, 2010

A Lovely Little Summer Lunch - Kale & Red Cabbage Salad with Tamari Pumpkin & Sunflower Seeds

 
Posted by Picasa

It is always nice to spend a leisurely afternoon with friends. A couple of weeks ago, my kiddos and I were invited to friend's home for food, laughter, and some good old backyard fun. Jane, opened her lovely home to us all, and served us a wonderful salad for lunch (the kiddos had Annie's bunny pasta, well, maybe the mommies had some, too...). I have since made it at home with raw sunflower and pumpkin seeds, which is how Jane served it. Below you will find the recipe, along with a little photo collage of Jane's art studio with work in progress and a peak at some of the things that inspire her. Just click on it or the one above to see the images larger... Enjoy!


(Aren't the colors beautiful?!)

Kale & Red Cabbage Salad with Tamari Pumpkin & Sunflower Seeds

Ingredients
- 1 bunch kale, chopped
- 3 cups carrots, grated
- 1/2 head red cabbage, thinly sliced
- 1/2 cup tamari pumpkin seeds (see how to make below)
- 1/2 cup tamari sunflower seeds
- 1/2 cup flax or hemp oil or olive oil
- 1/3 cup Bragg Liquid Aminos
- 5 Tbsp balsamic vinegar
- 1 tsp oregano, dried

Directions
Wash kale and chop. Be careful to rinse the leaves to remove dirt and grit.

In a cast iron skillet, over medium heat, stir sunflower and pumpkin seeds. Remove from heat when they're toasted golden brown. While the skillet is hot, add in a few drops of tamari, which will sear onto the seeds. Remove and let cool.

In a large bowl, combine chopped kale, shredded carrots, sliced cabbage and tamari seeds. Set aside.

In a small bowl, whisk together oil, Bragg Liquid Aminos (or Maggi or Soy Sauce or Tamari - but Braggs is definitely tastiest), vinegar and oregano. Refrigerate for 30 minutes or more to let the flavours blend together. Pour over the kale mixture. Toss until evenly coated and chill for at least 2 hours before serving.

This salad keeps well refrigerated for 2 - 3 days.

Number of Servings: 8

 
Posted by Picasa

All Images by Tiffany Teske

Tuesday, June 22, 2010

African Fruit Salad - A Lesson in Geography, Food, & Fun


My four year old has been cooking since she could stand on a step stool next to me. We try to make several things a week, both for the fun of it, and to have healthy, good things around to snack on. Thanks to a well stocked pantry, some of our cooking sessions are impromptu, while others are planned. A few weeks ago, Quin picked a book at the library called Desserts from Around the World. It is a book for older kids but is quite suitable for small children and their parents. The first chapter has the most words and shares different parts of the world and the desserts that are common in each. Quin and I both enjoy curling up with a cookbook and dreaming of what we will make so we looked at a few recipes and their photos before bed each night.

Because we had a large box of mangoes that needed to be used, we decided to make the African Fruit Salad. We also had the bananas and pineapple on hand, but we made a special trip to the store to find a papaya. We actually had to go to two stores as part of this adventure and in the end I bought a not-quite-ripe papaya because it was all they had. For tips on selecting mangoes, pineapple, papaya, and other tropical fruits check out this great link. Quin loves to try new foods, and has not had fresh papaya since I was making her baby food. I recommend a fruit salad as a good way of introducing new fruits to kids.


Africa, on a vintage globe

This is also a good recipe to pair with a geography lesson. We have a vintage globe, which is not the best for showing Quin specific countries, but which she loves to play with so it engages her. It is fine for talking using to show her the continents. We were also able to talk a bit about how in parts of Africa, as in most parts of the world, including Canada, that there are people who are hungry and who need our help. I don't get very political with my small children but I do think it is important to talk about all we have, so we can be grateful for it, and so we can decide how we can help others who are in need.


African Fruit Salad

From the book, Desserts from Around the World


Ingredients
~ Two bananas, sliced
~ One mango, chopped
~ One papaya, seeded and chopped
~ One pineapple, chopped

Directions
Slice and chop all of the fruit into bite sized pieces, combine in a bowl, and serve. If you want to make this ahead of time, do not add the banana. The other fruit will keep 1-2 days when refrigerated. Just add the banana when you are ready to eat it.


"YUM, Pineapple!"

Sunday, May 23, 2010

My New Favorite Cookbook - Super Natural Cooking by Heidi Swanson


Peanut Butter Krispy Treats from the Cookbook Super Natural Cooking by Heidi Swanson

My friend, Jane, and I have been having fun exchanging cookbooks. It is a great way to find some new recipes and to check out cookbooks I might want to buy. The library is good for this, too, but when I exchange with Jane I get the added benefit of hand written notes and recipe recommendations based on what Jane has tried. My new favorite cookbook is Super Natural Cooking by Heidi Swanson. I can hardly begin to tell you why because I love everything about it from the writing style of Swanson to her use of obscure ingredients like agar agar, which I happen to have in my cupboard. It is the vegab marshmallow replacer in the peanut butter krispy treats recipe, seen on Heidi's blog, with pistachios included! We made these treats to take to Quin's friend's house the other day. The kids like them, but mom's LOVE them!


I have also made the Banana Espresso Muffins, which are amazing. I used decaf espresso so that my kids could eat them. The mini muffin version I made along with the regular sized muffins were a bit rubbery... sometimes, living in the mountains wrecks havoc on my baking... but the ones I made in the standard muffin cups were wonderful.


Banana Espresso Muffins

I will make everything I have made again, including the spring asparagus puree which can be used like traditional basil pesto. I am truly happy to know this recipe, since I am not a huge fan of jarred pesto, and I never have access to piles of fresh basil. I will be making this a lot.


Spring Asparagus Puree with pasta

I am so happy that Jane lent it to me Super Natural Cooking. I must get my hands on my own copy, as I want to try all the recipes. Also, it has so much valuable information about different flours as well as recipes for basic things like making your own aluminum-free baking powder and a good vegetable stock. I could go on and on. If you are the type of person, like I am, to curl up on the couch with a cookbook, and you love natural foods, you will appreciate Swanson's newest cookbook!

PS You can also subscribe to her blog, 101 Cookbooks, and she will send you a recipe a week! And if you want to look at this book online I found it here on Google Books!