Thursday, October 28, 2010

Holiday Fun - Some Halloween Eats - Devilish Deviled Eggs

I LOVE deviled eggs. I don't make them often because I can eat them... ALL! I recently was looking through one of my favorite vintage cookbooks for kids, The Better Homes Junior Cookbook, from the early 70s. The cover and inside images, along with step by step illustrations are delightful. Some of the recipes leave a bit to be desired (think spam and molded gelatin). Others are a cheery trip back to my childhood. I got a serious craving when I saw their recipe for stuffed eggs. Apparently in the 70s, these eggs were not yet devilish...


Today was the first moment I had to finally make some. And since Halloween is just around the corner I decided that not only would we make some deviled eggs but we would make them a little devilish. My four year daughter helped me with each and every step.

Devilish Deviled Eggs
Inspired by Better Homes & Gardens Junior Cookbook
Recipe and devilish decoration adapted by Tiffany Teske

Ingredients

~ 6 Free range eggs
~ 2 Tablespoons olive oil mayonnaise
~ 1 teaspoon prepared yellow mustard
~ 1 teaspoon white vinegar
~ 1/2 teaspoon sea salt
~ 1/4 teaspoon fresh ground black pepper
~ Hungarian paprika to sprinkle on top
~ Sliced canned black olives and fresh red pepper for garnish

Directions

1. Place eggs in saucepan water to cover. Bring to a boil then simmer for 20 minutes.


2. Place eggs in a bowl of cold water to cool. You may need to change the water a couple of times. Using a spoon, crack the eggs shell of each egg and remove. Cut the eggs in half. Scoop or pop out the cooked yolks into a bowl. Put the white aside for the moment. Mash the yolks together.


3. Add the mayo, mustard, vinegar, salt, & pepper. Mix well. Spoon the yolk mixture back into the egg whites. Sprinkle paprika on top.


4. To make your eggs devilish, use sliced black olives and red pepper slices.


My lil' devil eating some of her handiwork!


PS If you are looking for a variation on the theme, why not make deviled egg ghosts?

Wednesday, October 27, 2010

365 Days with Kiddos - #16 - Get Your Child a Library Card and Watch Their Imaginations Grow


Ok, ok, for those of you who know me, you are probably saying, ok already, Tiffany LOVES the library. Yes, yes, it is true. I can't imagine a week going by without going to the library. It is a regular activity for us. We have TONS of books in our home but we still go to the library each week to check out books. Why? Because it is fun to get out in our community, to meet friends there, and to get to pick whatever strikes our fancy and bring it home. Where else can you do that? Where else do you have access to so many wonderful opportunities to explore materials that aid in better imagination? My oldest daughter watches about 2 hours of television a week but she "reads" several books a day on her own and 3-4 with my husband and I at bedtime. She actually turns the TV off to read a book. This may just be her personality, but I believe it is because she has always been surrounded by books, has been taken to the library, and she sees me reading all the time. If your child has not been read to or has not shown an interest in books it is never too late to start. Children just love to spend time with their parents so if you suggest sitting down and reading a book, they are almost sure to respond favorably. And the more you do it, they may start to request it. Reading is something that takes a little bit of time but is time well spent. Even if you are not much of a reader, your child will not care or judge you. They will appreciate your attention. A good way to get a child to participate in reading time is to allow them to pick the books you will read. This is where the library comes in. You don't need to purchase tons of books, you can borrow them from the library. Our library is free but we also have a card for the library in the next town, which costs $12 a year. It is money well invested. Most libraries have day and evening hours so if you have not been to your local library why not make a plan to visit soon?

Tuesday, October 26, 2010

Weekly Recipe - My Illustrated Apple Pecan Cobbler Recipe (and How To Make Unsweetened Applesauce)


Last week, my husband was gifted with TONS of apples. I am not complete clear on the story but one of his clients left three boxes of BC (British Columbia) apples for him and his employees. My hubby manages a ski resort, so I am not really sure of the connection, but, boy were we excited when he brought them home! There are standard Red Delicious, MacIntosh, and I think, Jonagold. The latter are absolutely delicious for eating and are almost gone. The Red Delicious, which was the top variety of apple in the world for decades, but not a favorite of mine, are good for both eating and cooking. MacIntosh, which have been popular since the early 1800s, are great for my toddler when skinned because they are soft, but since I like crisp apples, I prefer to make them into applesauce. Applesauce just might be the easiest thing on the planet to make...

How to Make Applesauce

By Tiffany Teske
The following works for any amount of apples. I often made small batches with one or two apples for my babies but you can also do this with a dozen apples. Just select your saucepan according to the amount of chopped apples you will have.

Ingredients
~ Apples
~ Water

Directions
1. Peel the apples.
2. Chop the apples.
3. Put the apples into a saucepan. Add water until it just covers the apples, and bring to a boil. Reduce heat and simmer until soft (up to 20 minutes).
4. Puree in the blender or with a handmixer or smoothie mixer or food mill. You can also mix or whisk it by hand.
I don't sweeten my applesauce, since I find it unnecessary with Macs.

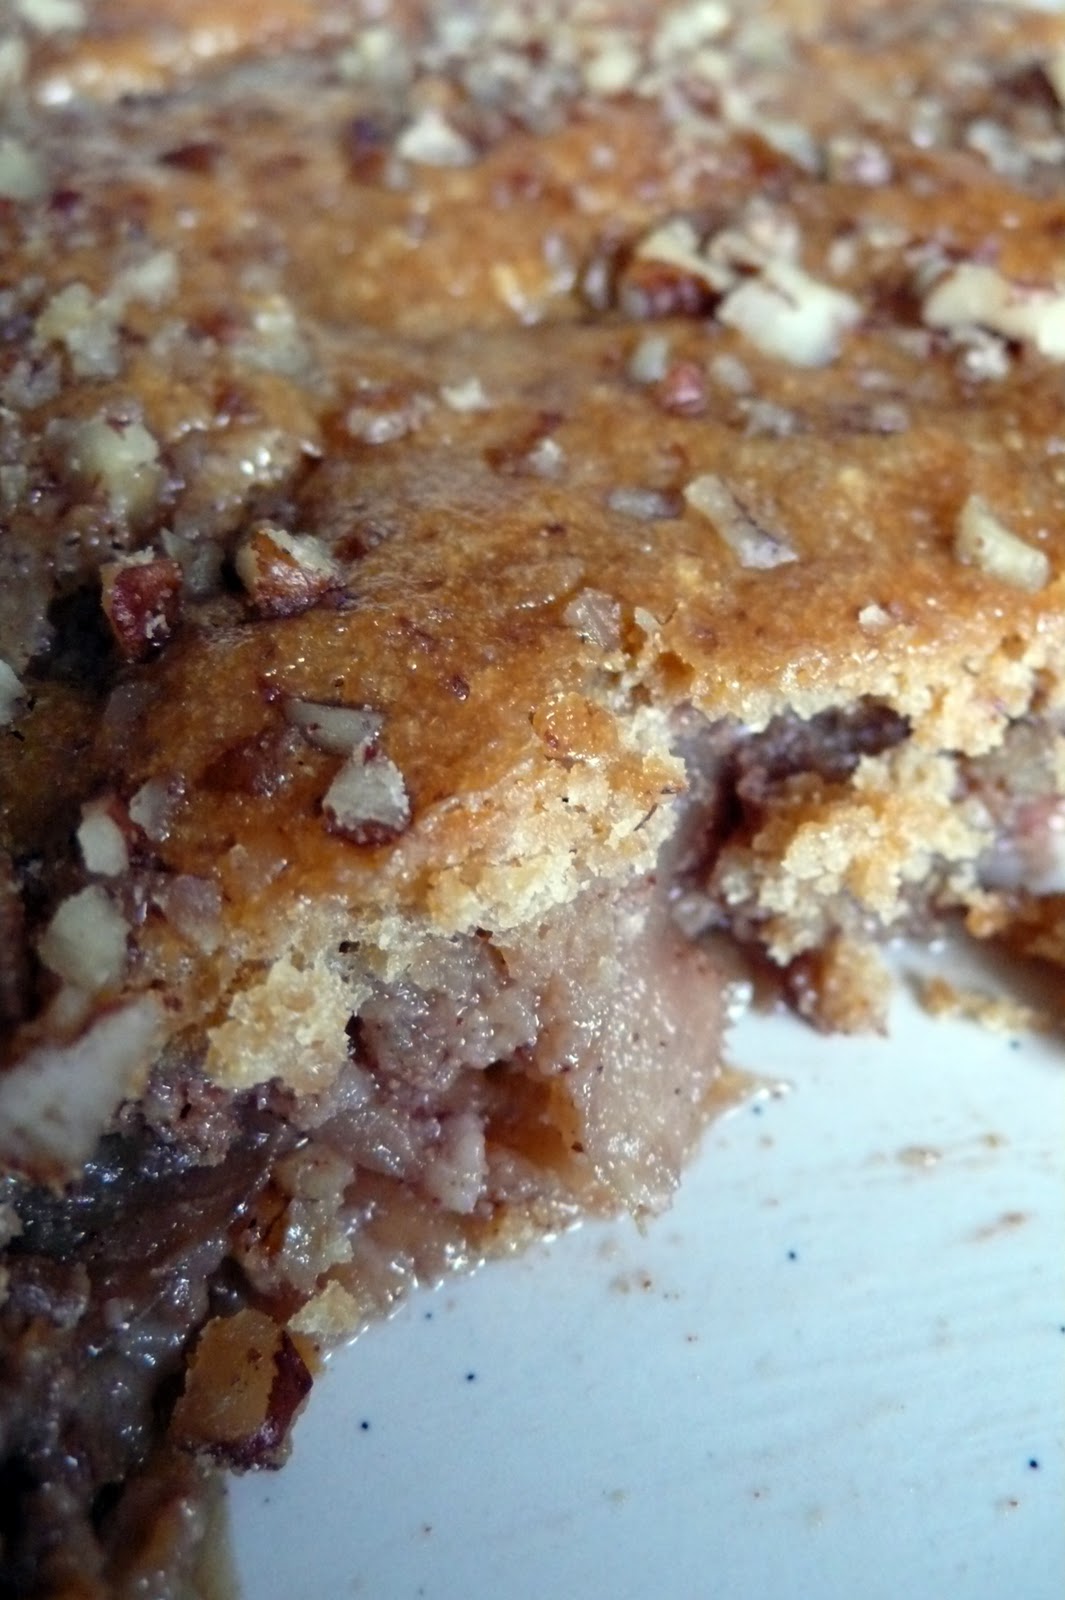
I also decided to use some of our Macs in a dessert. I must confess, I love to have an overabundance of fruit or veggies that I need to figure out a way to use. I get inspired to try something new. In this case, I started with the idea of an apple pecan cobbler, peeked at a couple of recipes, then made this up with what I had on hand.


Apple Pecan Cobbler
By Tiffany Teske


Ingredients
~ 4 cups thinly sliced apples (I used 5 apples)
~ 1/2 c organic raw sugar
~ 1/2 tsp ground cinnamon
~ 1/2 c chopped pecans
~ 1 c whole wheat pastry flour
~ 3/4 c brown sugar
~ 1 tsp baking powder
~ 1/4 tsp sea salt
~ 1 free range egg, beaten
~ 1/2 c evaporated milk
~ 1/3 c organic butter, melted
~ an additional 1/4 c chopped pecans


Directions

1) Preheat oven to 325° F. Generously grease a rectangular baking dish with butter.
2) Arrange apple slices in an even layer (not a single layer, they can cover one another but it should be about even in depth throughout) in baking dish. In a small bowl, mix raw sugar, cinnamon, and 1/2 c pecans. Sprinkle over apples.


3) In a medium bowl, mix flour, brown sugar, baking powder, and salt. In a separate bowl whisk egg, evaporated milk, and melted butter. Add milk mixture all at once to the dry ingredients and stir until smooth. Pour this over apples and sprinkle with the remaining 1/4 pecans.


(It had gotten dark outside by the time I got to this step so this doesn't look quite right in the artifical light...)

4) Bake for 55 - 60 minutes.


This is delicious with a little bit of evaporated milk or cream poured over it. Or you could make this sweet cream ice cream.


To make this recipe even better, why not support a local apple orchard or farm and buy your apples there. Take the kiddos and pick them yourself. For more on apple varieties check out pickyourown.org.

Saturday, October 23, 2010

365 Days with Kiddos - #15 - Buy a Pumpkin Direct From a Farm


Our family loves to visit farms, whether in our area, or while on vacation visiting friends and family. This week, my daughter's preschool class visited Butterfield Acres in Calgary for a harvest pumpkin hunt. What a hit! 


Parents, teachers, children, and siblings piled into two tractors, which brought us a short way to the woods where pumpkins were hiding. The kids went running, peeked around trees and under leaves, and each found a perfect little pumpkin to take home.


But, before we could take them home, the kids decorated them with everything from pasta to fairydust.


As usual, it was fascinating for me to watch all the different pumpkin personalities emerge while the kids were use the same materials.


Butterfield Acres is a wonderful place for children to experience an afternoon on a farm complete with animals (which I will blog about in my next post...).


If you have yet to buy your pumpkins for Halloween, and you have not grown them yourself, why no support a local farm. There are many online resources for finding farms in your area, such as Local Harvest in the US or Pick Your Own in US, Canada, and beyond...

Wednesday, October 20, 2010

Vintage Finds - Embroidered Tablecloth


I have a weakness for handiwork, especially embroidery, especially linens (tablecloths, curtains, towels, napkins, pillowcases). I can't seem to pass them by. Someone took the time to stitch all of these stitches and make something lovely. I don't care if their stitches are perfect on the back. Or on the front. I am drawn to the fact that it was done by hand by someone who cared about it. Even if it was machine embroidered I don't mind as long as it was made by someone who was not mass producing them in a factory. This is one of my favorite tablecloths in my large collection. There is a bird on each corner. It fits my daughters' little tea table perfectly. Cheep, cheep...


Tuesday, October 19, 2010

365 Days with Kiddos - #14 - Take Your Curiosity for a Walk


We often walk through our day and don't really think about it. Some of us chose to walk as a means of transportation, or to get exercise, or as an activity. I wish I walked more. I live in the perfect town for walking everywhere. I have the double Chariot stoller, many sling type child carriers, a baby backpack, you name it. But, most of the time I have too much to transport to or from home and am usually running behind so I hop in the car with the kiddos. We enjoy walking and no matter what the weather we do get out ever few days for a walk, sometimes just a quick jaunt to the playground in our townhouse complex. Being in the heart of the Canadian Rockies, there is always something beautiful to see in our grand panoramic view. But, there are also always things to see that are down low, or hidden in the woods, or in a places we look everyday but take for granted.


I am the type of person who likes to take everything in. I like to look at the ground, at the sky, and everywhere in between. I try to instill these observational skills in my girls. A walk with a child can be an adventure, for many reasons, but here I am focusing on what the outdoors have to offer and on focusing on really seeing around you. Even when trying to really see, I miss things, but kids don't miss anything. They are excited by what may be old hat to us. Just the other day we watched a squirrel gathering nuts for the winter, found a giant mushroom growing next to a tree, and took the time to appreciate the berries of the Mountain Ash in front of our house. All within in two blocks and a half an hour. The highlight was noticing a pale California poppy that for some reason is still alive, bobbing away out in the open, long past the time when all of its kin have died and rotted. Quin wanted to pick it, as many children would, but since we live in a National Park, this is not allowed. She knows that but instead of reminding her of that I decided to have her think about how long we could enjoy it if she picked it, versus maybe how many more times we could enjoy seeing it if we left it alone. She decided not to pick it, and we have seen it another two times. These types of walks are not made to be educational, they just end up being that way. Kids learn just as much by experiences as they do by studying. I find one often leads to the other. So, even if you only have 10 minutes, go outside and take a leisurely walk with your kids. It might make you see those things you don't even see anymore with new eyes, eyes like those of your kids.

Friday, October 15, 2010

365 Days with Kiddos - #13 - "Read" Your Child a Book Without Words - Book Recommendation - Wonder Bear by Tao Nyeu


My husband and I read three to four bedtime stories to our children each night. My husband is bilingual French and English. His family is French Canadian and he was raised in French. He is a Francophone which means "French-speaking, typically as a primary language, whether referring to individuals, groups, or places. Often, the word is used as a noun to describe a natively French-speaking person" (according to Wikipedia). He reads most of our French books. I have studied a lot of French in my life, most of it since meeting him. While it doesn't come easy to me, I continue to learn and can read to my children, at this point, in French. I am a Francophile, "a person who has a strong positive predisposition or interest toward the government, culture, history, or people of France. This could include France itself and its history, the French language, French cuisine, literature, etc." I am very supportive of my children and our family being part of the French Canadian culture and we are lucky enough to have a French preschool and school in the next town. Our oldest daughter attends preschool three times a week and will continue on to full time kindergarten next year. I am sure I will be posting about her school a lot. But for now, where I was going with this, is bedtime stories.

We read books in French and English, and I know that there are people all over who read to their children in two or more languages. Recently I came across a very unique book. It is a gorgeous picture book that doesn't have any text called Wonder Bear by illustrator Tao Nyeu. Wonder Bear is about two children who climb a hill to plant a garden. They have two envelopes of seeds, one that has a pumpkin on it, and one that had a top hat. The children go to sleep and wake up to seedlings in the pumpkin row and an amazing flowering vine in the top hat row. In a large flower at the top of the vine is Wonder Bear, introducing himself. From here on the story grows with additional characters that will delight your child.

I think it is important to spend time with our children and books. While most books have text that we read to them, it is a great opportunity when a book doesn't have text. Some people will shy away from this type of book, for fear they are not good story tellers, but you don't have to tell the story. The illustrations are so vivid and engaging in Wonder Bear that your child will tell you the story. You can ask them to do this before you start or you can just see what unfolds. I told Quin that her book didn't have words and we discussed what was happening in the first few pages and then she ran with it. Her imagination kicked in and took over. It was delightful! And the next night it was different, and the next a bit different. By the time it was time to return the book to the library we decided to renew it because we were having so much fun. I am sure that from now on we will be seeking out additional books without text, to go along with our other stories, so we can let our imaginations run wild.

If you know of any books that don't have text and you would like to recommend them, please leave the titles and authors in the comments below. Thank you et Merci!

Wednesday, October 13, 2010

365 Days With Kiddos - #12 - Make Your Child A Special School Day Breakfast


We love breakfast around here. We have many leisurely ones but there are also days when we need to get out the door for preschool and we don't have as much time. My daughter would eat toast every day (Have you ever read Bread and Jam for Frances? which is, of course, a snap to make. I like to find ways I can make a quicky breakfast that is extra special. Recently I was thinking about this and remembered Egg in a Hole. I have to admit I never had this as a kid but a boyfriend of mine made this for me. It became part of my repetoire then but I had all but forgotten about it by the time I had kids. I started to make it again recently. And then just yesterday I was reading a vintage copy of The Better Homes and Gardens Junior Cookbook and they have a version that uses a bun, an egg, the oven, and a slice of cheese. My version is made on the stove, is as fast as frying an egg, and I may start to mix it up by melting cheese on top...

Egg in the Hole

By Tiffany Teske

Ingredients

- a slice of bread
- an egg
- butter
- cheese, salt & pepper, optional

Directions

1) Tear the middle of the bread out of the center of the slice so that you have a hole. This can be toasted in the pan along side the slice of bread, as a wee piece of toast to have on the side of your toast ;).
2) Spread a bit of butter on each side of the slice. Also, melt a thin layer of butter in the pan so the egg won't stick, if you are using cast iron, like me. If you are using teflon or some other non stick you can omit the extra butter.
3) Place the bread with the hole in the pan, which should be on med to lo medium. Crack your egg and then drop it in the middle of the bread. Cook until it is solid on the bottom, then flip to cook the other side. Season with salt and pepper. If you are using cheese, place it on top, and cover the pan so it melts.
4) If you want the egg to look picture perfect you can cook it without flipping but I would toast one side of the bread first, and cover the pan while cooking. You may have to fiddle with the right temperature so you don't burn the bottom of the bread before the egg is cooked through. You can also cook all of this in the oven at 350 F if you have the time and prefer to do so.

If your child is vegan or allergic to dairy you can still make special toast by using cookie cutters to cut it into shapes, then spread with assorted nut butters. If your child is allergic to nuts you can use jams. If your child is gluten free, you can use gluten free bread. I guess the point is not so much what you make for your child as long as you find something fun and special that doesn't take a lot of time. This way you won't be stressed but your child will feel they are extra special when they are sent off to enjoy the day...

Saturday, October 9, 2010

365 Days With Kiddos - #11 - Have a Tea Party with Fairy "Milk"


I recently posted images of a friend's vintage tea cups. My wonderful friend, Kirsten, lives on Harmony Farm in Western Maine. I lived in Maine for close to 10 years and I have known Kiki for 11 years. We met when a mutual friend introduced us when I was selling some of my photography at an art sale. She was a reporter for the local weekly paper and we met soon after to talk about my work. The rest is history. Kirsten and I have worked on some amazing projects together as a writer and photographer duo, many of which were for the Kingfield Historical Society and the Mount Abram High School. We even received a grant to produce a documentary book with high school students who we were teaching photojournalism.


Over the course of these projects we became close friends. To say we have consumed massive amounts of chocolate and tea together would be an understatement. Since leaving Maine we have continued to have our tea parties via phone. This is actually a great way to keep the tradition alive but I always long to see my friend face to face.


This summer, we spent three days in Maine during the course of a trip to Ottawa to see family. Most of the time was spent at a family reunion in a town about 2 hours from where I lived in Maine. We did make it to my old town, but for less than 24 hours. Our family headed straight to Harmony Farm where Kiki and fresh blackberry tarts were waiting!

My husband, Andre, has known Kirsten for almost as long as he has known me. I met him in a church, while photographing his cousin's wedding, in the same town that Kirsten later got married in. When I met him, he lived 270 miles away in Canada. Soon, so did I. When we returned to Maine for Kiki's wedding, we stayed in the same inn as the whole wedding party and we could see the building where we were introduced from the window. Not only do Kirsten and Andre share the same birthday, they now share a friendship, too. Kiki has been to visit us in Banff, where she and I had high tea at the Banff Springs Hotel. Kiki has gotten to know our daughter, Quin, but this was the first time she met little Emmanuelle, who LOVED both Kiki and her tarts!


Like me, Quin knows how to enjoy a tea party. In fact, Kiki calls her a "professional". She got such a kick out of watching Quin pour and fix her tea and eat her little wrapped chocolates and several tarts.


Have you ever had a tea party with your child? Quin actually drinks decaf or herbal tea, with lots of milk and honey. Children in China, Japan, Korea, and India all grow up drinking tea. It is refreshing, has no calories without milk or honey, and is ph neutral so it is not bad for teeth. Tea has many health benefits and both fruit and mint teas appeal to kids. Everything from simple sandwiches with the crust cut off to fruit cups to baked goods are appropriate. And of course a pretty tablecloth and fancy tea cups add to the fun.


If you don't think you child will drink tea, you can make them a simple drink my father used to make for me. In fact, he made it for my brothers and I, and even they still talk about it. It is called Fairy Milk. The reason I put it in quotes in the title of this post is because it can be made with cow's milk, but it can also be made with soy, almond, or rice milk.

Dad's Fairy Milk
By Tiffany Teske

Ingredients
- a cup of milk
- food coloring (I recommend using natural food colorings which you can find online or you can make)
- honey

Directions
On the stove top or in the microwave warm the milk to a good drinkable temperature for a child. Let them select the color they want their milk to be and allow them to put a couple of drops of the coloring into their cup. Next let them add the honey and stir. Then gulp, gulp, gulp but remind them to keep their pinky finger up :)

Friday, October 8, 2010

Vintage Finds - Aloha!

I am a nut for all things vintage. I love to go hunting for treasures, especially those from before I was born. I get giddy when I find a vintage book with beautiful illustrations or a roll of retro wallpaper or a beautiful hand embroidered table cloth. For a long time I have been wanting to record my finds here on my blog. I guess today is the day! So, for the first one I will show you perhaps the strangest, most pointless little knick knack I have ever seen. It has very little purpose, other than to make a tourist feel they have found a unique souvenir and to make someone smile... or even bust out laughing, which is what the manager of Victory Thrift Store did when I posted a photograph of this on their Facebook page for a contest on the best thrift store find. I won a $20 gift certificate! Pointless, I think not... did I mention it is a music box? Don't you love the little poem on the front?

"Waikiki Kimo
Basking in the sun
Round he goes
the music plays
"Aloha" he says to everyone"

Wednesday, October 6, 2010

365 Days With Kiddos - #10 - Pinecone Turkey Tutorial for Thanksgiving (Which is on October 11th here in Canada)


Yes, here in Canada we will celebrate Thanksgiving on Monday, October 11th. I grew up in Minnesota where, like the rest of the US, Thanksgiving is celebrate the last Thursday in November. Canadian Thanksgiving coincides with the US Columbus Day (A holiday I have never liked since Columbus "discovered" a place that was already there and, ask the natives, had already been found). Thanksgiving is one of my favorite holidays (the other is Valentine's Day) and I get to celebrate it twice! It is not the turkey part of the turkey dinner that I enjoy, since I am a vegetarian, it IS the being together with friends and family and being grateful for that we have. It just makes me feel all warm and fuzzy. It is a welcome holiday that doesn't focus on gifts but on appreciating and reflecting on that which we already have.


This week, I taught a Thanksgiving themed craft at the Banff Elementary's After School Club. When I got the call to come in I knew exactly what I would teach. This past spring I collected a bunch of pinecones while we were on a trip to Kelowna, British Columbia. This is important to note, since I live in Banff National Park and I am not allowed to go out and collect pinecones in my own backyard. I knew I would use them in some kind of craft and when I opened an old copy of Chirp Magazine I knew right away what I would do. Make pinecone turkeys. Now, their turkey was very "appropriate" with red, orange, & brown feathers, and a walnut in the shell for the head. I decided to revamp this because I wanted our turkeys to be colorful and because there are no nuts allowed in the school. Quin & I made three little guys at home, including the two above, as examples for the kids at school.

The project was a big hit with the 13 kids who were at the After School Club, most of whom were 6-8 years of age. Six of them, five boys and one girl, chose to make two, and two boys chose to make THREE!

Pinecone Turkeys
by Tiffany Teske

Materials
- Pinecone
- Stone or pompom for the head
- Pipe cleaners for the feet and wattle
- Two googly eyes
- Feathers
- Craft glue

Directions


1) Glue your googly eyes on the head (here it is a stone but in class we used pompoms since they will stick to your pinecone faster than a stone). Cut a small piece of pipe cleaner for a waddle and glue it on. Glue the head to the pinecone.


2) Cut two small pieces of pipecleaner and shape them into feet with an "ankle" that can be covered with glue and stuck up into the bottom of the pinecone. Since some of pinecones won't sit well on their own these feet can be used to keep the pinecone in a standing position. If you wish you can glue feathers onto the feet.


3) Glue the feathers into the back end of the pinecone. If you want to add some sparkle, you can first put glue on the ends of the top of each feather and then wipe it across a plate with glitter on it or sprinkle the glitter on.


Tada! You and your kiddos are now ready to celebrate Thanksgiving...