Showing posts with label weekly recipe. Show all posts

Thursday, March 17, 2011

Weekly Recipe - Happy St Patrick's Day Vegan Irish Stew & Sweet Guinness Quick Bread


I have not written a weekly recipe in so long that maybe I should call this feature the "Monthly or Longer Recipe"... I do apologize! Life has been handing me some amazing opportunities lately and, as usual, some challenges. I am the mom to two little ones, so my time is always too short for all the things on my plate. We are ALL busy, so this is no excuse, I just wanted to catch all of you up on my lack of posting.

So, Happy St Paddy's Day! My grandmother's father, Ira Stewart, was from Ireland. He was married to Gerta, from Sweden. They moved to Minnesota and were farmers. My grandmother, Harriett, has wonderful stories about growing up on a farm but she moved to the city as soon as she could and left the farm days behind her. Ira, was my great grandfather, and he was, well, a rather abrasive guy, until it came to me. He lived until I was 5 or 6 years old, and loved to hold me on his lap and to talk with me. I have fond memories of the small apartment he and my great grandmother lived in at a nursing home. My great grandmother used to pass me sugar cubes under the table and I would pop them in my mouth and suck on them until they melted. Today, I remembered my family...

I am not exactly sure how Ira would feel about the fact that I have been a vegetarian for 24 years. I adapted this traditional Irish Stew to make it vegan. Both of these recipes are great during the winter months, not just on St Paddy's Day.


Vegan Irish Stew
Makes 6 - 8 servings
Prep Time 15 minutes
Cook Time one hour

Ingredients
~ 4 cups vegetable broth
~ 4 cups water
~ 2 medium yellow onions
~ 3/4 cup pearl barley (rinsed)
~ 1/2 teaspoon salt
~ 1 1/2 lbs potatoes with skins (waxy, not russets)
~ 1 14 oz can of chickpeas (also known as garbanzo beans)
~ 3 large peeled carrots
~ 1 - 2 celery stalks
~ 2 tablespoons tamari
~ 1/4 teaspoon thyme
~ 1/4 teaspoon rosemary
~ fresh ground black pepper to taste

Directions
Cut all the vegetables into large chunks. In a large pot combine water, vegetable broth, barley, onions, and salt. Bring to a boil and cook at medium heat for about 15 minutes. Add in the potatoes and cook for another 15 minutes. Add the carrots, chickpeas, celery, tamari, and spices and cook for another 30 minutes on low. Enjoy with Irish soda bread or the Guinness bread below...


Guinness Quick Bread
Makes one loaf
Prep time 10 minutes
Cook time 50 minutes

Ingredients

~ 1 1/2 cups non-bleached all-purpose flour
~ 1 cup whole wheat pastry flour
~ 1 teaspoon baking powder
~ 3/4 cup brown sugar
~ 1 teaspoon cinnamon
~ 1 12-ounce Guinness (that leaves some of the pint for drinking...)
~ 1 cup walnuts, chopped
~ 1/2 cup raisins

Directions
Preheat oven to 350F. Combine all ingredients and pour into greased loaf pan. Bake 50 minutes. Serve right out of the over with butter or room temperature.

Tuesday, January 25, 2011

Weekly Recipe - Heidi Swanson's Multigrain Waffles


Yum, yum, yum, yum, yum, yum... that pretty much sums up these waffles. We eat these whenever we have the time for a leisurely breakfast. The batter comes together in a snap. I received this recipe in my inbox, right about the time I had started lamenting that our white flour waffles were good but not good for us. I know that this recipe is a keeper because my kids and husband like it BETTER than our white flour waffles. It is by Heidi Swanson of 101 Cookbooks where you can find TONS of healthy recipes. She has also written her own cookbooks, Super Natural which is amazing and Super Natural Everyday will be released soon. Since I have not received permission to repost Heidi's waffle recipe here on my site, I am going to just give you the link to the recipe on her site. Here it is... I just want to make note that if you don't have buttermilk, you can substitute by adding 1 T lemon juice per cup of milk. The hint of lemon flavor is lovely! Enjoy :)

Wednesday, January 5, 2011

Weekly Recipe - My Swedish Pancakes (Using Whole Wheat Pastry & Barley Flours)


Have you ever bought something at a yard sale or thrift shop that you could not identify? I have a thing for cast iron pans. I love them, I use them, I give them to others and hope that they will love them. At this point, I have as many cast iron pans as one household could need, a 12", a 10", a square one with ridges for grilling, and a 9" crepe pan that is thin and super light for swirling around batter in the pan. I really didn't need anymore... then one day, I came across a cast iron pan with seven recessed circles in it. And when I flipped it over, a ribbed flower pattern on the bottom (I should take a picture of the bottom...). I had no idea what it was for. I thought maybe for eggs, but thinking of my egg poaching pan I knew the wells were too shallow. I am a bit of a kitchen gadget and equipment nerd but have been stumped before. Anyway, whatever it was for, I knew it was a specialty pan like my madeleine pan and my Nordic Ware mini bundt pan. I knew I would one day figure out what it was for and kick myself for not buying it. Especially since it was $3! Plus I thought to myself, it is so flat that I can store it under the lazy Susan in the corner cabinet where I store my pots and pans...

... which is exactly where it stayed until my birthday this past November. That is the morning that I woke up thinking I wanted to make a pannekoeken, a traditional Dutch pancake that is cooked in a skillet in the oven. I have eaten them, have a great Dutch cookbook series, but have never made them. And yes, my idea of fun, on my own birthday, is to cook something I have never made first thing in the morning. I am not a morning person, but I am skilled at breakfast making, and the thought of a hot pannekoeken was all the inspiration I needed. My daughters agreed and I jumped online to find a recipe for Swedish pancakes, BECAUSE the whole time I had been thinking about making a pannekoeken, I had been calling it a Swedish pancake. I had my countries and breakfast foods mixed up, hence the reason I didn't go and look the recipe up in my Dutch cookbooks! And am I ever glad I got mixed up. In fact, I believe that my Great Grandma Gerda, from Sweden, was looking down on me that day, because as I looked at the first image that popped up from my search for "Swedish pancake" I SAW MY CAST IRON PAN!! And, I started dancing around the kitchen with my wee ones, laughing, and brandishing the pan that I NOW knew was a Swedish pancake pan! HAHAHAHA. The reason that I had never know about this pan, since my grandmother, Harriett, daughter of Gerda, did make pancakes for me, is because she just made them in a regular pan. Which you can totally do. So, no worries if you don't have a "special" pan like me, you will be a-ok, and very happy that you followed the recipe for Swedish pancakes below. I have tweaked this recipe to fit our tastes and these pancakes are different than crepes, pancakes, and pannekoeken. They are richer, thinner, but moister than a traditional pancake. Give them a whirl. They made my birthday extra special and when I spoke with my grandmother Harriett on the phone, while I was making them, they made her happy as well. She has been losing her short term memory but when I told her I was making Swedish pancakes I could hear her voice change and it was like she was back on the farm as a kid. She was excited and it touched my heart because since my grandfather died she is never very excited. As I hung up the phone I felt happy to have made her day and happy to know we can now make pancakes that will always remind me of her.


Swedish Pancakes
By Tiffany Teske
Serves 3 to 4


Ingredients
I use organic ingredients whenever possible.

~ 3 eggs
~ 2 T sugar
~ 1 cup milk
~ 1 cup half and half OR buttermilk (you can use all milk but they will not taste as rich)
~ 3 T melted butter
~ 1/2 tsp sea salt
~ 3/4 cup whole wheat pastry flour
~ 1/4 cup barley flour

Directions

1. Using a wire whisk beat the eggs, sugar, milk, half & half or buttermilk, and the melted butter for one minute.
2. Slowly add the flour while continuing to mix. When the flour is completely added blend for an additional 30 seconds.


3. Heat griddle or pan. When griddle or pan is hot, grease with butter or cooking spray. Pour pancake batter in a large circle for crepe size pancakes or small silver dollar size pancakes. They will cook quickly.

Flip when the underside is golden brown and the upper side has an opaque look. They are done when both sides are a golden brown.


4. Serve hot with maple or fruit syrup, powdered sugar, applesauce or, with Lignonberries.

Monday, December 6, 2010

Weekly Recipe - Banana Wheat Germ Muffins


MMMMMM! Banana muffins. I like them plain. I like them with peanut butter. I like them with chocolate chips. I was recently playing around with different flours and created a pretty darn good and healthier version than I normally make.

When making banana muffins I always try to use black bananas, the riper the better, for flavor and moisture. In this recipe I used two thawed frozen bananas, that I had put in the freezer when they were super ripe. I also added one yellow banana.

Wheat germ is named as one of the top ten foods by the Mayo Clinic. With 23 nutrients it has more nutrients per ounce than any other grain or vegetable. It is easy to put on cereal, in pancakes, on yogurt, in smoothies, or in muffins. My kids love to sprinkle it on all kinds of things.

Banana Wheat Germ Muffins
By Tiffany Teske
12 standard muffins

Ingredients
~ 1/2 cup rye flour
~ 1/2 cup barley flour
~ 1/2 cup whole wheat pastry flour
~ 1 cup wheat germ
~ 1/2 cup brown sugar
~ 1 tsp baking powder
~ 1 tsp baking soda
~ 1/2 tsp salt
~ 1 cup mashed banana (2-3 bananas)
~ 1/2 milk (you can use soy, almond, rice, cow)
~ 2 tsp lemon juice
~ 1/4 cup vegetable or canola oil
~ 2 Free Range eggs

Directions
1. Preheat oven to 375 degrees and grease muffin pan(s).
2. Combine dry ingredients and mix well.
3. In another bowl combine the wet ingredients and mix well.
4. Add the banana mix to the dry mix and stir until just blended. Do not over mix, which makes muffins dense and heavy.
5. Spoon into pan. Bake 20-25 minutes.

Sunday, December 5, 2010

Weekly Recipe - Pumpkin Nutella Snack Cake Plus How To Make Fresh Pumpkin Puree - A Week of Recipes Coming Up


I haven't posted a recipe is soooooo long, that I decided this week I will only post recipes, so if you like to cook and eat, stay tuned...

My newest creation was inspired by the name of someone else's recipe. It piqued my interested but when I read it there was WAY too much sugar and only white flour in it. I tweeked it and ended up with a moist, amazing, and healthier cake. It is delicious without any frosting.

One of the reasons I stumbled on the other recipe was that I had some leftover pumpkin I wanted to try to puree, so I am also including instructions on how to puree fresh pumpkin, although this cake is also good, and quicker and easier, if you use canned pumpkin.


How to Make Fresh Pumpkin Puree
by Tiffany Teske

The average pie pumpkin (which is kind a funny thing to say since they are all different) makes about 3 cups of puree. I used half a pumpkin and indeed I had 1.5 cups.

1. Wash and dry your pumpkin. Preheat your oven to 400 degrees.
2. Cut the top off your pumpkin and discard it. Now cut your pumpkin in half, remove the seeds (which you can roast) by scrapping with a metal spoon, then cut each half in half again.
3. Place your pumpkin quarters on a cookie sheet, cut side down. You can cover them with foil (I did this in my toaster oven and didn't cover them, which worked fine). Bake for 35 - 45 minutes, until the meat can easily be scraped from the shell.
4. Let the pumpkin cool. Scrap the meat from the shell.
5. Put the meat into your food processor and puree. If it is thick you can slowly add a teaspoon or so of water at a time. Mine was very wet without any additional water. Mine looks a bit like applesauce but the color will vary.


I wish I had a picture of this cake but I made it at night, wanted to photograph it in daylight, then we ate a bunch and took the rest to friends, and I never got a photo... I think that is a first!

Pumpkin Nutella Snack Cake
By Tiffany Teske

1 c unbleached all-purpose flour
1 c whole wheat pastry flour (this is finer than whole wheat flour so not as heavy)
1 tsp baking soda
1/2 tsp sea salt
1 tsp of cinnamon
1/4 tsp nutmeg
1/2 tsp ginger
1/2 lb (or 2 sticks or 8 oz or 1 c) butter, at room temperature
1/2 c granulated sugar
1/2 c packed brown sugar
1 large egg
1 t real vanilla extract
1 1/2 c canned or fresh pumpkin puree
1/2 c Nutella

1. Preheat oven to 350 degrees. Spray a 9-by-13-inch baking pan with cooking spray.
2. In a medium bowl, whisk together flour, baking soda, salt and spices.
3. In the bowl of a stand mixer, cream butter and sugars until smooth. Beat in the egg and vanilla until well blended. Add the pumpkin puree and Nutella. Reduce speed to low, and mix in the flour mixture until just combined.
4. Spread batter evenly into the prepared pan.
5. Bake for about 35-40 minutes or until the sides pull away from the pan and a toothpick comes out clean. Place cake on a wire rack and cool completely.

Bon appetit!

Tuesday, October 26, 2010

Weekly Recipe - My Illustrated Apple Pecan Cobbler Recipe (and How To Make Unsweetened Applesauce)


Last week, my husband was gifted with TONS of apples. I am not complete clear on the story but one of his clients left three boxes of BC (British Columbia) apples for him and his employees. My hubby manages a ski resort, so I am not really sure of the connection, but, boy were we excited when he brought them home! There are standard Red Delicious, MacIntosh, and I think, Jonagold. The latter are absolutely delicious for eating and are almost gone. The Red Delicious, which was the top variety of apple in the world for decades, but not a favorite of mine, are good for both eating and cooking. MacIntosh, which have been popular since the early 1800s, are great for my toddler when skinned because they are soft, but since I like crisp apples, I prefer to make them into applesauce. Applesauce just might be the easiest thing on the planet to make...

How to Make Applesauce

By Tiffany Teske
The following works for any amount of apples. I often made small batches with one or two apples for my babies but you can also do this with a dozen apples. Just select your saucepan according to the amount of chopped apples you will have.

Ingredients
~ Apples
~ Water

Directions
1. Peel the apples.
2. Chop the apples.
3. Put the apples into a saucepan. Add water until it just covers the apples, and bring to a boil. Reduce heat and simmer until soft (up to 20 minutes).
4. Puree in the blender or with a handmixer or smoothie mixer or food mill. You can also mix or whisk it by hand.
I don't sweeten my applesauce, since I find it unnecessary with Macs.

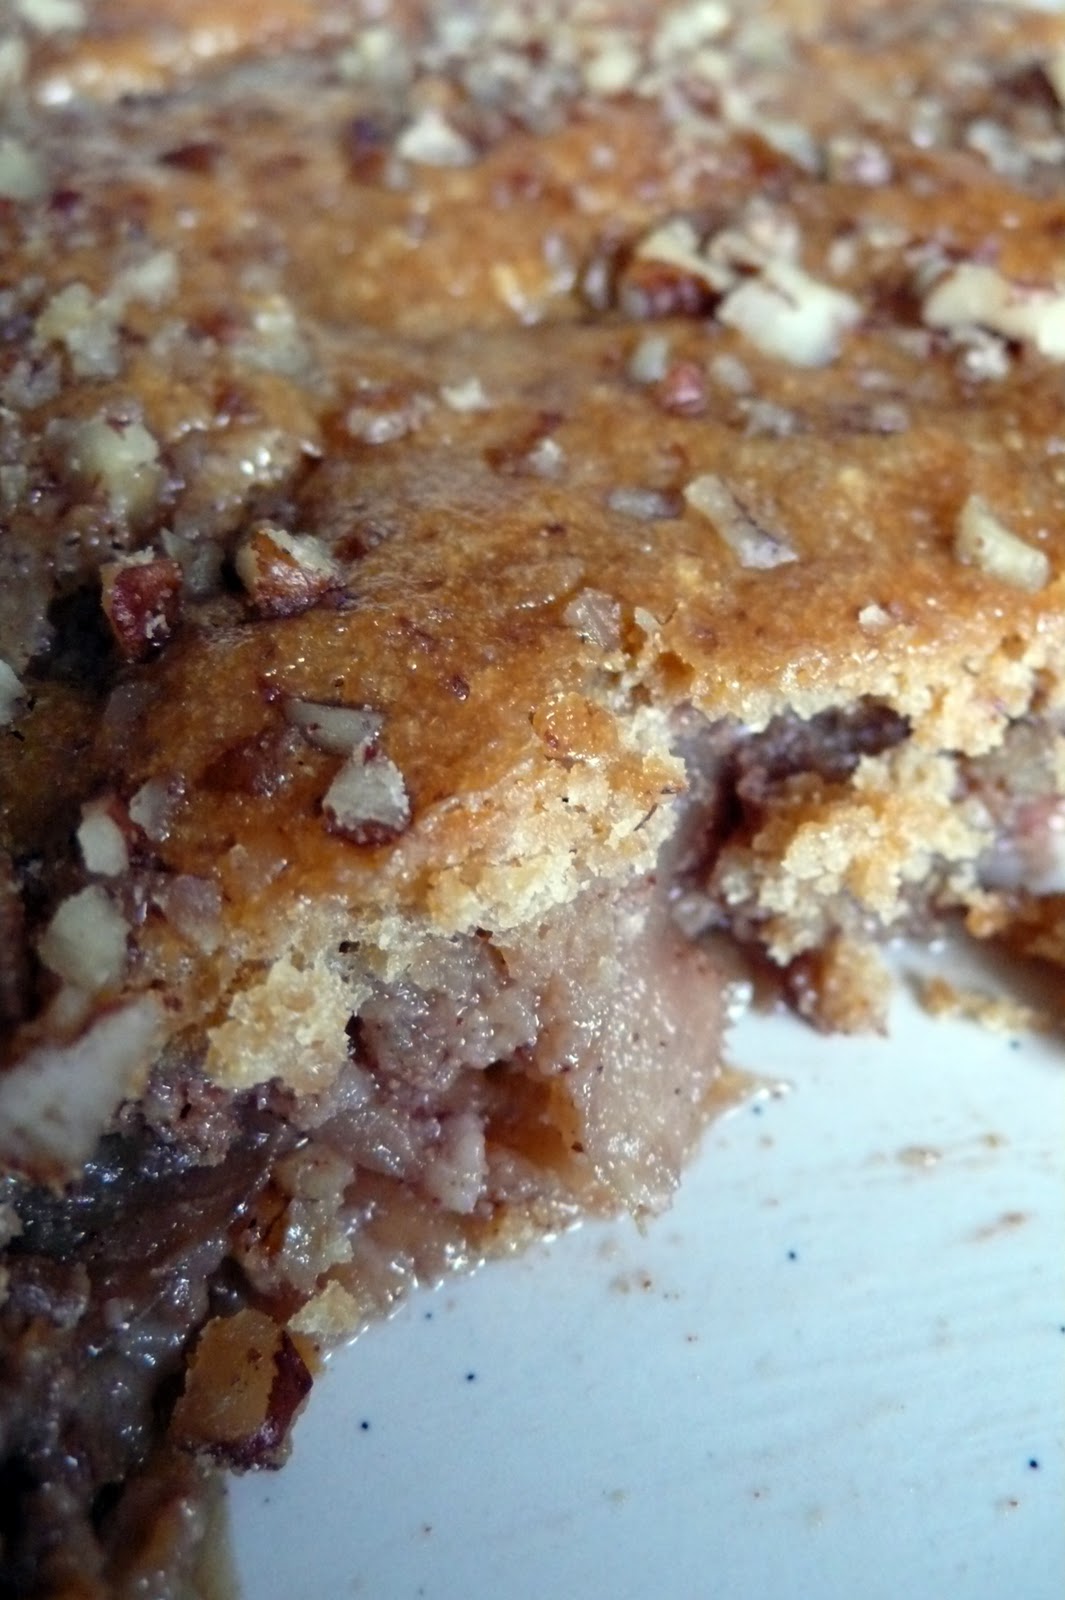
I also decided to use some of our Macs in a dessert. I must confess, I love to have an overabundance of fruit or veggies that I need to figure out a way to use. I get inspired to try something new. In this case, I started with the idea of an apple pecan cobbler, peeked at a couple of recipes, then made this up with what I had on hand.


Apple Pecan Cobbler
By Tiffany Teske


Ingredients
~ 4 cups thinly sliced apples (I used 5 apples)
~ 1/2 c organic raw sugar
~ 1/2 tsp ground cinnamon
~ 1/2 c chopped pecans
~ 1 c whole wheat pastry flour
~ 3/4 c brown sugar
~ 1 tsp baking powder
~ 1/4 tsp sea salt
~ 1 free range egg, beaten
~ 1/2 c evaporated milk
~ 1/3 c organic butter, melted
~ an additional 1/4 c chopped pecans


Directions

1) Preheat oven to 325° F. Generously grease a rectangular baking dish with butter.
2) Arrange apple slices in an even layer (not a single layer, they can cover one another but it should be about even in depth throughout) in baking dish. In a small bowl, mix raw sugar, cinnamon, and 1/2 c pecans. Sprinkle over apples.


3) In a medium bowl, mix flour, brown sugar, baking powder, and salt. In a separate bowl whisk egg, evaporated milk, and melted butter. Add milk mixture all at once to the dry ingredients and stir until smooth. Pour this over apples and sprinkle with the remaining 1/4 pecans.


(It had gotten dark outside by the time I got to this step so this doesn't look quite right in the artifical light...)

4) Bake for 55 - 60 minutes.


This is delicious with a little bit of evaporated milk or cream poured over it. Or you could make this sweet cream ice cream.


To make this recipe even better, why not support a local apple orchard or farm and buy your apples there. Take the kiddos and pick them yourself. For more on apple varieties check out pickyourown.org.