Showing posts with label craft tutorial. Show all posts

Thursday, February 2, 2012

365 Days With Kiddos - #37 - Make "Stained Glass" Hearts Using Crayon Shaving


The first time my daughter used a crayon sharpener she got so into it that we decided to sharpen every crayon we own. This, of course, produced a large pile of crayon shavings. I seemed to remember using these in a craft when I was a child, and after thinking on it a bit, I remembered putting them between pieces of wax paper, ironing, and making "stained glass". This is a great way to recycle and upcycle your crayon shavings.


How to Make a Stained Glass Heart (or any other shape) With Crayon Shavings
By Tiffany Teske
For all ages (children will need adult supervision when using the iron)

You will need:
- crayons that need to be sharpened
- a crayon or pencil sharpener
- wax paper
- a cereal box cardboard for making a template
- an iron
- a dish towel
Optional - a table top or standing ironing board to iron on (we just ironed on the counter on top of the dish towel)
Optional - foil ribbon, glitter, confetti, or anything else you would like to add.


Instructions:

1) Create a template in the shape that you want the wax paper to be. We used a heart we saved from a box of chocolates from several years ago. You can preheat the iron now. We used it on a medium high setting since we ironed through the dish towel.

2) Cut two pieces of wax paper to a size that the template will fit onto.

3) Put the template on top of the wax paper and trace. Repeat on the other sheet.

4) Cut out the shapes along the traced lines.


5) Cut out pieces of ribbon to sandwich into your heart.

6) Place one of the wax paper pieces on top of half of the dish towel. Place ribbon snippets, crayon shavings, and any other optional items on top of the wax paper.


7) Place the other wax paper piece on top of the other. Fold the empty side of the dish towel over on top of the wax paper sandwich.

8) Iron, with the steam setting off, on top of the towel, checking from time to time to see if the crayon shaving are melting in the sandwich.


Iron....


Iron a bit more...


9) When the shaving have melted, remove the dish towel and admire your art work! Tape it to the window using clear tape.

Do you know a variation on this craft? If so, please leave it in the comment below. You could make these smaller, put them on a string, and hand them out as Valentines...

Sunday, February 6, 2011

365 Days With Kiddos - #27 - Make Paper Puppets from a Children's Book


My kids don't watch a lot of TV. I try to make sure they have lots of opportunities to use their imaginations. They have been to a couple of puppet shows, thanks to the Banff Public Library and preschool. They also own more books than most children I know.


Recently, on a snowy day, I was going through these books, trying to cull a few from the collection. There is no shortage of things I could do with the ones that are in good shape; some could be passed on to friends, some could be sold to the second hand book store, and some could go to the thrift store. But what to do with the ones that are in bad shape? My toddler and I volunteer at a local thrift store a few times a week while my eldest is at preschool. We organize their books. I know for certain they do not need anymore damaged books that people could not bear to get rid of but that the store has to ultimately throw away. My kids are pretty respectful of their books, but some books I find at rummage sales and thrift stores I bring home unaware of the full extent of damage inside. We read around crayon and marker scribbles, bent pages, and stickers. We try to repair ripped pages and loose covers. But some books, namely pop up books and books that contain flaps can be a bit of a bummer when they are wrecked.


On this day, I was specifically inspired to find a use for a Spot book that was missing important pieces that conceal part of the page until you lift them up. More than half of these pieces were ripped out when it came to us. I mulled it over and remembered a cookie tin full of colored Popsicle sticks that I have also been wanting to use. The Spot book had heavy weight card stock pages, which once glued to Popsicle sticks could make great... PUPPETS! I also grabbed a heavy weight Kindermusik song book with simple illustrations that I had repaired on a couple of occasions but that refused to staying together. Voila! Time to get crafty with the cooped up kids... what a fun project for a winter storm day!


Make Puppets from Old Books

By Tiffany Teske


Materials

~ Books with card stock pages (or as a variation on this craft you can use thinner book pages glued to poster board or card stock and then cut out)
~ Scissors
~ Popsicle sticks
~ White glue (PVA is better than school glue because it won't wrinkle the paper)


Directions
1) Select the images you want to cut out of your book, remembering that you can probably only cut out an image from one side of the page.
2) Rip out the pages you will use.
3) Cut out the images. For young children who are learning to cut it is not important for them to be precise. For older kids, they can cut on the lines that are provided around the images. We didn't stick to a plan, some of the images we used are cut out on the lines and for some of them we cut out a whole scene rather than just a piece. We also cut out the title of the books so we could use them as the titles when we started out puppet show.
4) Glue your Popsicle sticks to your pieces. I am out of PVA glue so we used school glue which has more water in it and it will wrinkle even card stock if used too heavily, which is normal for young children. If you only have school glue you can minimize wrinkling by using a brush to apply the glue, sparingly. The point here is fun for your kids, not professional puppets. We didn't put Popsicle sticks on all of our pieces because my daughter wanted to use some of them like paper dolls.
5) Throw a blanket over a table and have a puppet show!


I am always happy to hear from readers who have made this craft, either on their own, or because they were inspired here. Please leave a comment if you have something to share!

Saturday, January 1, 2011

Happy New Year! 365 Days with Kids - #21 - Make a Banner to Celebrate the New Year (or ANY Special Occasion)


Welcome 2011! 2010 was a great year for us, so I was in no rush for 2011, but here it is. Our family has been partying for over a week now and I am looking forward to relaxing from the relaxing :) My husband and eldest daughter didn't make it to midnight, but my 18 month old and I were treated to a fireworks show from my bedroom picture window. Nice! She has been going to bed way too late and sleeping in way too late so I had a feeling this morning that she and I would probably be ringing in the New Year together. It was fun to watch her eyes glued to the bursting fireworks as she babbled "Happy New Year!" It was even more fun to know it was freezing cold outside (-26 C) but we were in the warmth of our home watching this harbinger of the New Year. All while Sister slept in the next room and Daddy snored...


Earlier in the day, when my little one was napping, her sister and I decided to make something to celebrate New Year's Day. We settled on a banner. It was amongst a plethora of  New Year's crafts for kids on a site called Kaboose. We gave it our own twist, of course. I thought of making a paper banner but we decided that if we were going to take the time to make it, we might as well make something we can use year after year. While it may be too late for your own New Year's Day banner, this craft can be adapted for any holiday or celebration. We have decided to keep the "Happy" banner up all year round...


New Year's Banner
By Tiffany Teske

What You Need:

- Craft felt in up to 12 colors
- Colorful yarn or string
- Felt glue
- Scissors
- Sharpie
- Sequins; we used very fancy ones...

How To

1. Measure out a rectangle of felt that is 3" x 8". Cut it out. Use it as a template with the other colors by tracing around it with the sharpie. You will need 12 rectangles in all. Cut out each one. I wanted to use pinking shears but Quin wanted to use the regular scissor...


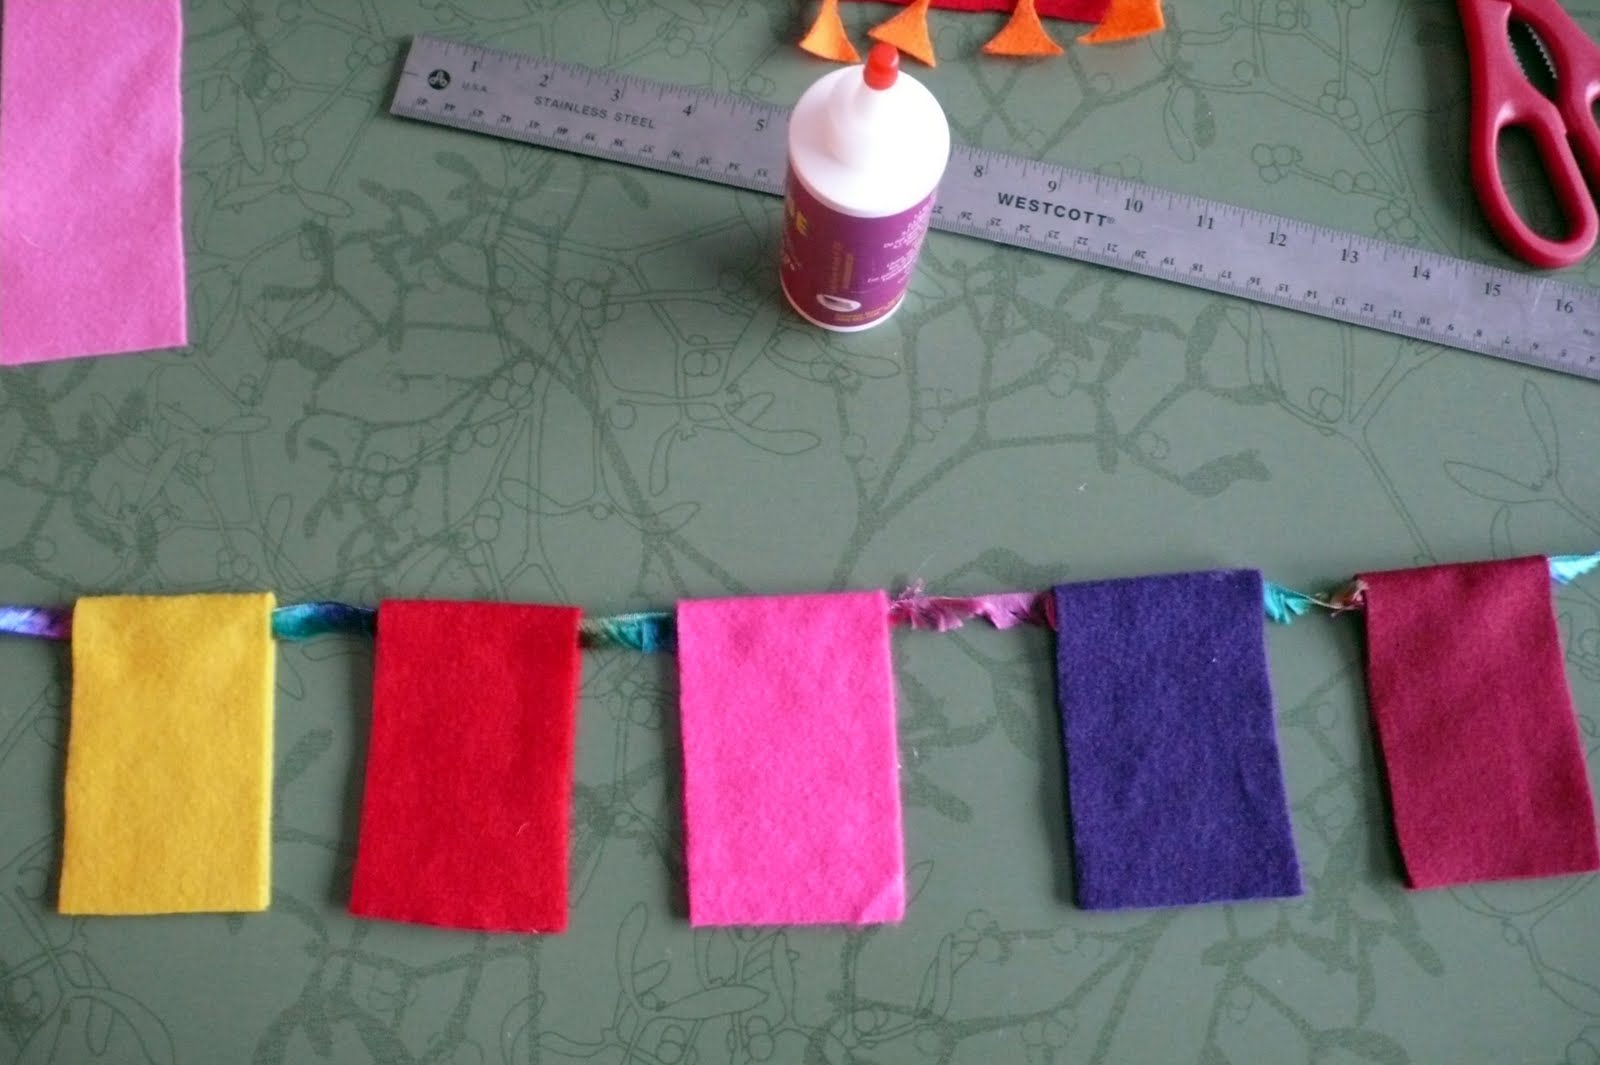
2. Cut your yarn into two 48" pieces. Find the center of one. This banner will say "Happy". Center your middle flag, the one that will be the first "P", on the center of the yarn. Apply glue to the inside of the bottom half of the rectangle, then line up the top of the rectangle, over the yarn, with the bottom and push them together, smoothing with your hand so they stick well. Move over an inch on each side of the first rectangle and do the same for the next two and then the next two flags.


3. For the second banner, find the center of the yarn and attach the flag that will have the "Y" for "year". To the right of the "Y", spacing each flag out by an inch, attach each flag for the rest of the word "year". To the left of the "Y" about 2 - 3 inches over, attach the three flags for the word "new".


4. Using the felt glue and working on one flag at a time, write the first letter in the font of your choice on the first flag. Place your sequins onto the glue and press down so they are secure. The glue will dry clear so don't worry if there is a bit extra.

5. When you are finished with all of the flags let your banners dry for several hours to overnight. When you pick the banners up for hanging, check to make sure all the sequins are securely attached and reglue any that fall off.


6. Hang you banner!


There are many variations for this craft. You can use regular sequins, glitter, metallic confetti, or craft jewels for your bling. Or you can cut out the letters from felt or other fabric. To jazz up the flags you can use a pinking shears or a different shape than a rectangle. I am sure I will be trying several banner variations in the coming year. Quin, who is 4 1/2, enjoyed the results and was able to stick with me through the sequin glueing on the "Happy" banner. I did the rest. She is looking forward to making an Easter banner and now that we know we can hang it across the window between our kitchen and dining room we may have to try a double sided version. Plus, I am a bit of a font junkie so I want to try this with different fonts. Also, this is a nice idea for a birthday gift for kids. If you have ever made a banner I would love to hear about it...

Happy 2011 Everyone!

Tuesday, November 9, 2010

365 Days with Kiddos - #17 - Make Creativity Journals Using Recycled Paper & Books


If you have kids you probably have them... books that have wrecked bindings, ripped or missing pages, or maybe so much doodling on some pages that they are ready to be tossed. Instead of tossing them you can use them for many projects, including for making creativity journals. This is a simple project that along with other paper destined for recycle bin is a great way to save paper.

Creativity Journals
By Tiffany Teske

Materials
- Delapidated book
- Paper that needs to be recycled, like printer paper that is printed on one side, old notebook paper or filler paper, drawing or construction paper from mostly used books, your child's art work, etc
- A cover for your book, either a soft book cover or cardboard from packaging
- Scissors or paper cutter
- Office type comb binding punch machine for use with wire or plastic comb bindings
- Wire or plastic comb binding that fits your punch
*For a variation
- Three ring binder punch
- hinged key chain rings if using a three hole punch


Directions
1. Trim down paper to a size that fits in your binding machine. All of your pages do not need to be the same size as long as the largest size fits in your punch. Lay out your book whatever way you like with smaller pages contained inside large ones. Once you have your book the way you want it, use binder clips to hold the "spine" in place.
2. Put your book into your punch all at once or in sections.
3. Put your comb binding into the machine and make your book.

*Variation
Instead of using an comb binding machine you can three hole punch your book and then used hinged key chain rings to hold the book together. There are many many ways a book can be bound. If you are looking for other ways just google "book binding".


In the book shown we used all-purpose kid's craft paper from a book we found partially used at the thrift store, and an old book that had come apart. We put a piece of paper, then a book page, then paper, then a book page. I made this book before we headed out for a summer plane trip. It was a good way to combine a book to read with paper for drawing in a way that was compact and contained. We also brought along crayon cakes, which will not roll off a plane tray table onto the floor...

Wednesday, October 6, 2010

365 Days With Kiddos - #10 - Pinecone Turkey Tutorial for Thanksgiving (Which is on October 11th here in Canada)


Yes, here in Canada we will celebrate Thanksgiving on Monday, October 11th. I grew up in Minnesota where, like the rest of the US, Thanksgiving is celebrate the last Thursday in November. Canadian Thanksgiving coincides with the US Columbus Day (A holiday I have never liked since Columbus "discovered" a place that was already there and, ask the natives, had already been found). Thanksgiving is one of my favorite holidays (the other is Valentine's Day) and I get to celebrate it twice! It is not the turkey part of the turkey dinner that I enjoy, since I am a vegetarian, it IS the being together with friends and family and being grateful for that we have. It just makes me feel all warm and fuzzy. It is a welcome holiday that doesn't focus on gifts but on appreciating and reflecting on that which we already have.


This week, I taught a Thanksgiving themed craft at the Banff Elementary's After School Club. When I got the call to come in I knew exactly what I would teach. This past spring I collected a bunch of pinecones while we were on a trip to Kelowna, British Columbia. This is important to note, since I live in Banff National Park and I am not allowed to go out and collect pinecones in my own backyard. I knew I would use them in some kind of craft and when I opened an old copy of Chirp Magazine I knew right away what I would do. Make pinecone turkeys. Now, their turkey was very "appropriate" with red, orange, & brown feathers, and a walnut in the shell for the head. I decided to revamp this because I wanted our turkeys to be colorful and because there are no nuts allowed in the school. Quin & I made three little guys at home, including the two above, as examples for the kids at school.

The project was a big hit with the 13 kids who were at the After School Club, most of whom were 6-8 years of age. Six of them, five boys and one girl, chose to make two, and two boys chose to make THREE!

Pinecone Turkeys
by Tiffany Teske

Materials
- Pinecone
- Stone or pompom for the head
- Pipe cleaners for the feet and wattle
- Two googly eyes
- Feathers
- Craft glue

Directions


1) Glue your googly eyes on the head (here it is a stone but in class we used pompoms since they will stick to your pinecone faster than a stone). Cut a small piece of pipe cleaner for a waddle and glue it on. Glue the head to the pinecone.


2) Cut two small pieces of pipecleaner and shape them into feet with an "ankle" that can be covered with glue and stuck up into the bottom of the pinecone. Since some of pinecones won't sit well on their own these feet can be used to keep the pinecone in a standing position. If you wish you can glue feathers onto the feet.


3) Glue the feathers into the back end of the pinecone. If you want to add some sparkle, you can first put glue on the ends of the top of each feather and then wipe it across a plate with glitter on it or sprinkle the glitter on.


Tada! You and your kiddos are now ready to celebrate Thanksgiving...

Sunday, September 26, 2010

365 Days With Kiddos - #8 - MAKE Sidewalk Chalk

Yes, you read that right. I have to admit that while I make a lot of things, I was both inspired and delighted by the idea of being able to make chalk. Every time Quin writes on the driveway, front steps, or deck with chalk, it brings me back to my childhood. I love the bright colors of the hearts and Qs that are scrawled everywhere. And I love getting in on the action. But why make sidewalk chalk when you can buy tubs of it for so little? Well, why make anything? For me, I enjoy it, and my Quin enjoys helping. I find making things we can easily buy at the store a great way to teach my kiddos things in a way that they enjoy learning. As many people who sew know, these days it is NOT cheaper to sew clothes than to buy them. So many things that used to be cheaper to make are now available for super cheap. My top motivated in making something is not saving money. Making something with my hands, spending time with my kids, using local resources, recycling or upcycling items that might get throw away, and learning something new come first. I also like to know what is in things and to be able to personalize things. Which brings me to the sidewalk chalk. It uses simple ingredients and tools that most people have around the house. It is non-toxic (although I would never let my kids eat it, plaster of paris should never be ingested), can easily be made with kids assisting, and can be personalize by the colors they choose and the molds that you have. Plus it makes a great gift. Because I wrote this tutorial for the wonderful crafty website, Craftbits, I will not re-write it here but will direct you to the project link on their site. Have fun!! And please let me know if you currently make chalk or if you are inspired to by this post...


Wednesday, April 22, 2009

Happy Earth Day! A Kid's Craft Project and a Couple Children's Book Recommendations....

Today, it was FREEZING here... especially since yesterday was extremely springlike. Our Earth Day saw flurries. Oh well, I keep saying it is not really spring here until June...


I taught an Earth Day craft to an enthusiastic group of kids, ages 6-12, at the Banff Public Library this afternoon. The book that originally inspired our craft today is called "Seeds, Seeds, Seeds" by Nancy Elizabeth Wallace. This wonderful books tells the story of a young bear, whose grandfather sends him 5 seed projects in the mail. Each project is dedicated to several pages of the book. I would love to teach a whole afternoon that is just centered around this book. The projects include making seed identification cards, watching how a seed germinates over time using illustrations on cards, planting a seed, making a bird feeder, and making a frame covered with beans and seeds. The book is recommended for ages 4-8 but could be adapted to all ages.


Our project involved decorating mat board with seeds. I photographed each child at the beginning of the hour, and Tonya, one of the librarians who was also my lovely assistant (thanks, Tonya!) for the class, ran them to Banff Camera where they were printed while she waited.

Project Materials
- Mat board with window
- Decorative paper
- White glue
- Raffia
- Poppy Seeds, Sunflower Seeds in the shell, and Pumpkin Seeds
- Photo corners
- Photo

1) Select a piece of decorative paper and a mat. Using the mat as a template, draw around it, then cut out a piece of paper the same size as the mat board.

2) Put glue on three sides of the back of the mat board, flip over the paper so that the colored side is glued to the back of the mat (so that you could see the color through the window).

3) Take a couple of strands of raffia, twist the ends, cover them in glue, and stick them between the paper and mat board, on the side that is not glued together. Now glue the edge together.


4) Now, it is time to work on the design. Using glue in a squeeze bottle it is very easy to create your design. The large seeds can be glued right on. The poppy seeds are sprinkled onto the glue, then the excess is tapped of the back. I work over a shoe box lid when sprinkling the seeds and then tapping. I use a small dish to hold the seeds and to sprinkle from. It is easy to repeatedly pick up the box top and return the seeds to the dish during the process.


5) Put the photo corners on the edges of the photo, and lick, or if self adhesive, remove the backing.

6) Center photo and stick down. Voila!


The kids did a great job. I am always struck by the variety of designs that come from kids in the same group using the same materials. It is amazing!


The book that we read while our glue was drying is called "June 29th, 1999" by David Weisner. It is about a girl who sends her seeds up to outer space to see what will happen. She reports to her class what she is hoping and soon GIANT vegetables start landing in the area. It is only once vegetables she had not planted start to arrive that she realizes these must not be her experiments... I will leave the surprise ending for you to discover. The illustrations are lovely and the language is wonderful!

Happy Earth Day!!