Thursday, September 30, 2010
365 Days With Kiddos - #9 - Observe Animals in Your Neighborhood
We live in a tourist mecca in the Canadian Rocky Mountains, that also happens to be a national park. In Banff National Park we are surrounded by natural beauty, which includes wildlife. According to Parks Canada there are 53 species of mammals in our backyard. My kids regularily see elk, deer, bighorn sheep, and occassionally fox and coyotes. Usually, the bears stay in the woods but sometimes they cross main street. Yet as often as they see these amazing animals, they are just as happy to see squirrels and birds. We have a squirrel who "lives" part time in our fenced in backyard. He runs along the fence, darts in and out of deck furniture, and steals bits of the old push mop my husband left propped against the outer wall of our house long ago. My kids delight in seeing him! Quin calles him "my friend, Squirrly". They also like to watch the birds, like the magpies that land on the neighboring roofs and in our trees, especially now that the Mountain Ash in our front yard has berries. Whether you live in a city, a rural area, on an island, or in the desert, there is some kind of wild animal that you and your child can observe in it natural habitat. Take a look around and start to notice what kinds of animals you see. Google your area or check your library for local guides. If you want to attract birds to your yard, hang a bird feeder. There are many wonderful DIY bird feeder projects online. I have been wanting to make some but here in Banff we are not allowed to have bird feeders. We can have bird houses (I will have a share a bird house project soon). If you don't have a backyard, go to the park. That is where I shot the above video of my children, earlier this week, watching a squirrel putting away food for the winter. Watching animals will lead to questions from your kids that you may not always be able to answer but the great part about that is that together you can research to find out more.
Sunday, September 26, 2010
365 Days With Kiddos - #8 - MAKE Sidewalk Chalk


Friday, September 24, 2010
Happy and Healthy - Making Homemade Yogurt - Part 1

I have always wanted to make yogurt. I know it is an easy thing to buy but I want to make it myself, like I want to learn to make cheese. Yes, I can now find even organic yogurt everywhere, but I still want to try to make it. It is a goal of mine to at least try to make everything I so conveniently buy from the store, from scratch. I make many things from scratch, although some things I leave to the experts (like sushi, you know how some things just taste so much better when someone else makes them?). In my effort to learn more about yogurt making, I ran across the blog One Hot Stove. In a post on making yogurt, Nupur states the following reasons for why she wanted to make her own yogurt:
"I'm happy I started making yogurt for several reasons-
(a) Texture: Don't get me wrong, I like store bought yogurt just fine and have eaten it for years. But since I started to make yogurt at home, I love how the texture is creamy but never gummy.
(b) Packaging waste: I'm very happy to be able to avoid the plastic yogurt tubs. I always reused the tubs (for pantry storage) or recycled them, but reduce beats both reuse and recycle.
(c) Cost: The yogurt cultures are not dirt cheap or anything (around 5-6$ for a pack of 6 sachets), and you have to factor in the cost of the milk, but homemade yogurt is still significantly cheaper than store-bought stuff.
(d) Streamlining my grocery list: I use fresh yogurt in place of sour cream and cream cheese in dips and spreads and to dollop on burritos, so I have cut down significantly on buying other dairy products."
These are all reasons I want to make yogurt. I also prefer to make the things I eat because they are fresh and I know every ingredient that has gone into to them.
It seems that I can make yogurt at home with very little equipment. There are many yogurt makers available for purchase and I have ordered the Cuisipro Donvier Electric Yogurt Maker above from CSN Stores. Have you ever heard of CSN? They have over 200 online stores that sell everything from dining sets to pet supplies. I am always finding some new kitchen gadget I need at CSN. I am anxiously awaiting my newest kitchen helper and will happily pass along my results.
Do you make yogurt at home? Do you have any good recipes to share? I would love to hear your advice so please comment below.
Thursday, September 23, 2010
365 Days With Kiddos - Update & #7 - Eat Dessert FIRST
I am enjoying the 365 Days With Kiddos posts and have received nice feedback. In an effort to blog on other topics I have decided that the 365 Days posts will not necessarily be daily but there will be 365 of them.
Winter technically starts on December 21st, although here in the Canadian Rocky Mountains it could be winter any time. We woke up to 20 cm/ 7 inches of snow yesterday! We even made a snowman which I was going to blog about but have decided that since for most of you, there are still months of autumn left, I will stick with general or fall themed ideas and hold off on winter ones... although, I am aware of our friends from all over the world, in places that are now spring, like Australia, so maybe it doesn't really matter what I post when. It will continue to be a hodge podge with no real rhyme or reason. That said, on to #7...

Do you EVER eat dessert first at your house?! We don't do it very often. In fact, the first time I ever mentioned it to my husband, we didn't even have kids and he responded like I was suggesting something really radical. In fact, I believe his exact words, accompanied by a concerned look, were "But you will spoil your dinner!". It was priceless. I thought my mom was in the room. My Aunt Helen is probably the only person who ever fed me dessert before a meal, although my Dad may have done it, too, but I blocked it from my memory for fear my mother might find out. The point is, it was done only often enough that it was seen as an enormous treat, something that was special and just a little sinful. I am vaguely recalling a friend telling me that they have ice cream sundaes before dinner, or maybe it is for dinner, once a month. WOW! So go ahead, make your kiddo's eye go wide as if you have lost your marbles, EAT DESSERT FIRST!
Sunday, September 19, 2010
365 Days With Kiddos - #6 - Dance & Play in the Rain


This post has come about thanks to the several gray days of rain we have had lately. I personally love rain. With the right rain gear I have spent DAYS in the rain before, camping, hiking, fly fishing, backpacking. I have learned that I won't melt (although my camera equipment needed to stay dry). I like gray days. If there were never any gray days I would not get much done. I like feeling I can stay inside and work on projects. And many kids love rain, too, but they especially like being out in it. My daughter doesn't want to stay in when it rains. She wants to bike, play, dance, and splash in the rain. Her purple rain boots with flowers are her favorite shoes. She loves her pink and red polka dot rain coat and carries her dinosaur umbrella where ever I will let her. She is drawn to puddles like a fish to water. She is all smiles which makes me want to stop my projects to party with her in the rain. Give it a try the next time the rain is making you feel sluggish and cranky. Take your child by the hand, suit up, and head out for some fun in the rain...
Saturday, September 18, 2010
Happy and Healthy - The Odd Evolution of the Baby Carrot
I always wondered about baby carrots. The answer came in my inbox today. I have always been leery about them. It turns out they use carrots that otherwise would go to waste which is good. But they also douse them in chemicals before packaging and oddly want to start marketing them as junk food, which are both bad and odd. To find out more visit the link below...
The Odd Evolution of the Baby Carrot - Planet Green
Thursday, September 16, 2010
365 Days With Kiddos - #5 - Write a Letter and MAIL It

Ideas for letter writing...
1) Pick up stationary, blank cards, and post cards for a steal at yard sales and thrift stores.
2) Make some cards...
3) If you child gets really into letter writing, or if you get back into it, why not splurge on some amazing cards, like the ones at made by orsis on Etsy.
4) If you like vintage stationary and you don't get your fill from tag sales, you can search Etsy, where I found these fun retro mushroom fold-a-notes.

As always, I welcome your ideas and comments...
Monday, September 13, 2010
Weekly Recipe - Pineapple Rhubarb Crisp

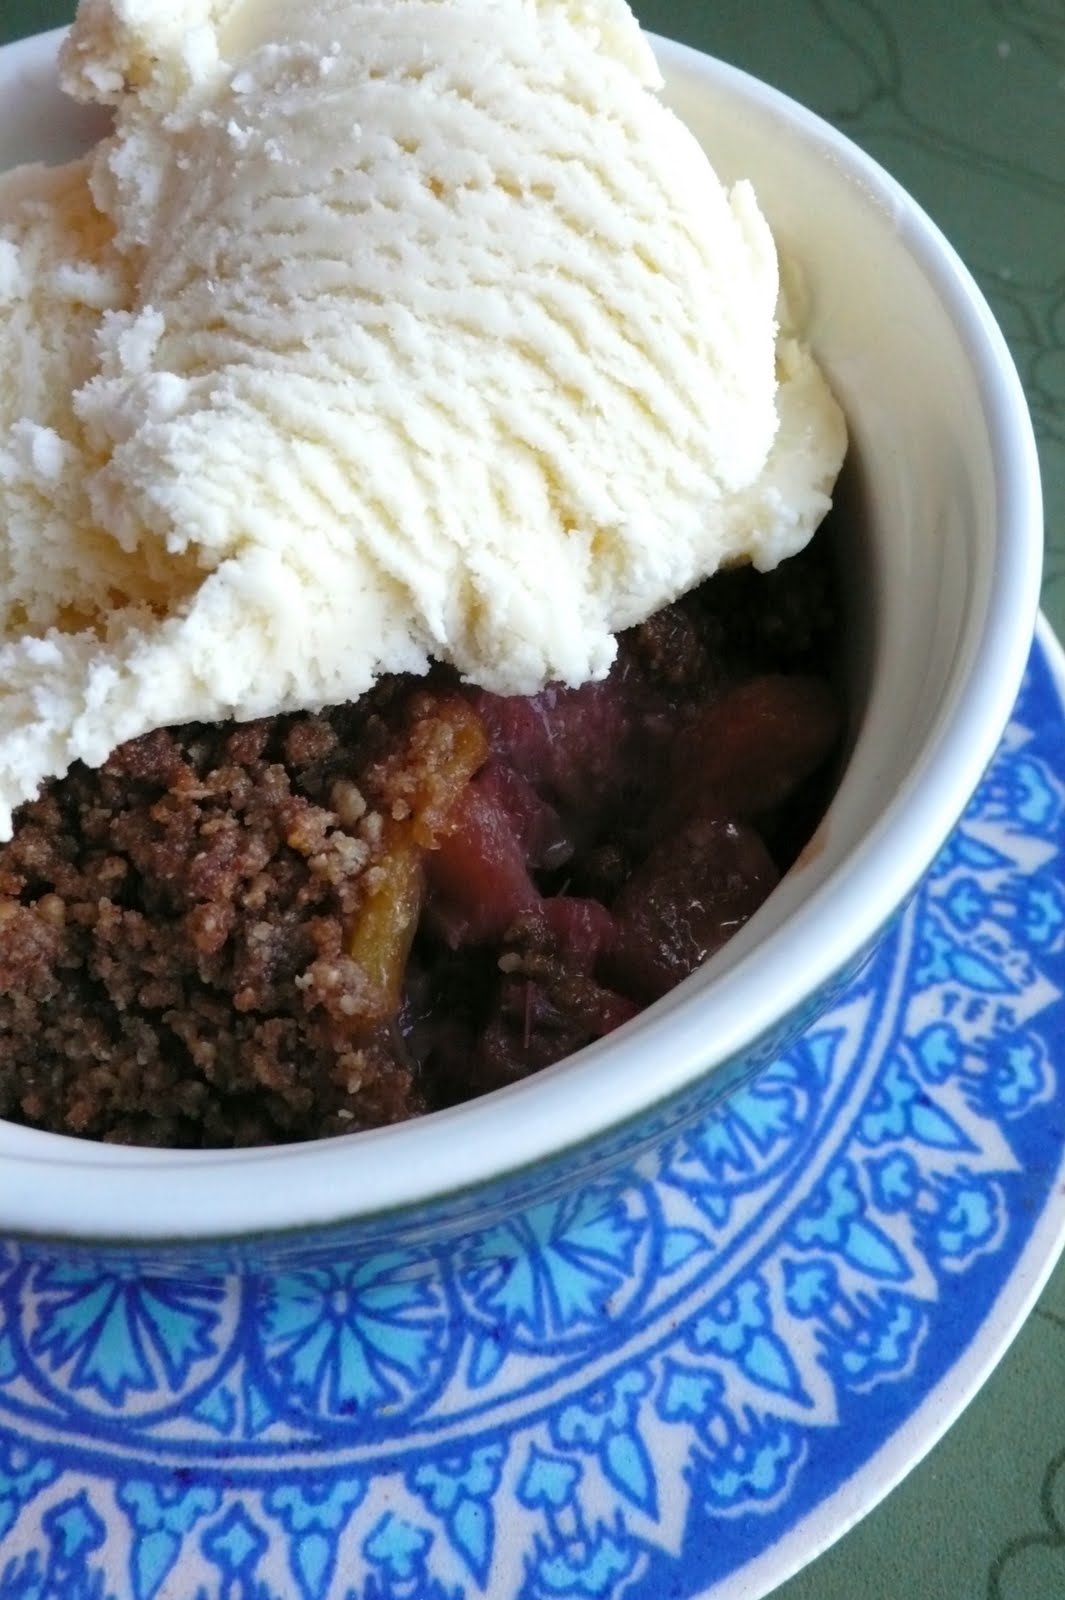
I realize that it is getting a bit late in the season for this (even here in Banff where the growing season is late and short). Rhubarb can be found in the freezer section year round in some places. This recipe makes it worth checking out. I am a huge fan of any kind of crisp, especially when I can make homemade sweet cream ice cream to put on top. I had never thought of the combination of rhubarb and fresh pineapple... it is awesome! The sweet and tart go so well together. The heading of the recipe, from a free thrifted copy of Homemakes Magazine states "Consider this dessert a study in North-South dialogue: a blending of rich tropical sweetness with cool climate tartness". On a side note, old magazines abound, usually for free, so if you are ever in need of a new recipe, aside from the internet, or your cookbook collection, just pick up some free magazines, flip through, and pick out a something new to try...
Pineapple Rhubard Crisp
Homemakers Magazine
Ingredients
Makes 6-8 serving
4 cups/1 L chopped rhubarb
3 cups/750 ml chopped fresh pineapple
3 Tbsp/45ml granulated sugar (I use organic raw)
1 Tbsp/15 ml cornstarch
1 cup/250 ml all-purpose flour (I used organic whole wheat pastry flour)
2/3 cup/150 ml packed brown sugar
1 tsp/5 ml finely grated orange rind
1 tsp/5 ml ground ginger
1/4 tsp/1 ml EACH cinnamon and nutmeg
pinch cayenne pepper
1/3 cup/75 ml salted butter, melted
Directions
Toss together rhubard, pineappple, granulated sugar, and cornstarch; place in buttered 8 inch/20 cm square baking dish. Whisk together flour, brown sugar, orange rind, ginger, cinnamon, nutmeg, and cayenne until throughly combined. Drizzle with butter; stir until in small crumbs. Spread over fruit mixture. Bake in centre of 350 degree F/ 180 degree C oven until fruit is bubbling and topping is crisp, 50 -60 minutes.
Sweet Cream Base
By Ben & Jerry's
Ingredients
Makes 1 Liter
2 eggs
3/4 cup sugar
2 cups whipping cream
1 cup milk
Directions
Beat eggs, using a wire whisk, until frothy, 1-2 minutes. Add sugar a little at a time, beating about 1 minute. Add cream and milk and whisk to combine. Freeze according to your ice cream maker's directions.
Friday, September 10, 2010
365 Days With Kiddos - #4 - Your Child's Art - Stage a Home Art Show


Wednesday, September 8, 2010
365 Days With Kiddos - #3 - Your Child's Art - Documentation & Storage


Are you looking for ideas for showcasing your child's artwork that doesn't involve hanging it on the fridge? Do you have so many of your child's art projects hanging around that you need to find a better way to store them? Is your child like my daughter, who can't bear to part with anything she made? Here are some ideas...
* Hang your child's art work on your walls. You can frame it or just use wall tack so you can change it from time to time.
* Put a cheery painting on your front door to greet your visitors and yourself. I blog about how-to in this post.
* Roll up flat art and store in a mailing tube.
* One of my favorite ways to document the art that my daughter makes, especially the 3-D items, is to photograph them. She also gets in on the action using her toy digicam. Then, we can show the creations to others and include them in photo albums. Since we begun doing this she has an easier time parting with the work we can't keep.
Do any of your have information to share on how you store your child's art? Please leave me a comment...
Tuesday, September 7, 2010
365 Days With Kiddos - #2 - Your Child's Drawings and Paintings - An Awesome Birthday Card/Wall Hanging Project


Monday, September 6, 2010
365 Days With Kiddos - #1 - Your Child's Drawings and Paintings - Repurposing Them Into Cards, Stationary, & Envelopes

Happy Labour Day! It seems like a good day to start my 365 posts. Each post is an idea from our home to yours on ways you and your children can live a more creative life each day. These are all ideas we have used or regularly use in our home. Some are simple and require just a few minutes and some are more complex, requiring an afternoon or weekend. Most do not require purchasing special items but instead focus on activities that are little or no cost, often recycling or repurposing (upcycling) items you already have or can find at thrift stores and yard sales. I don't know which one is the best one to start with so I am just going to dive right in... To enrich each post with ideas and inspiration, please feel free to add your comments, links, and ideas.

Most children produce a plethora of drawings, paintings, and other 2-D visual art pieces. Home, school, and daycare, are just a few of the many places our kids make art, and our homes become filled with these amazing creations. Over the next few days I will give you my ideas on ways to view, store, and repurpose these works of art.

The simplest way to repurpose your child's art work is to make cards, stationary, and envelopes out of them. We keep a stack of Quin's art just for this purpose. When it is time to give a birthday card, to send a thank you card, or to write to my grandmother, we go to the pile and select a drawing or painting. For stationary we cut the painting or drawing down to a managable size and then cut out sheets using our rotary cutter (since I am unable to draw and cut a straight line to save my life!). If you prefer, you can always trace a template piece of stationary or use a straight edge to mark off the larger sheet to the smaller size you want, then cut it all out with a scissor. For cards, we cut out the part of the painting we want to be on the card, then fold. Voila! I often use stray envelopes that I have from old card and stationary sets, but we also make envelopes that match the cards. A great place for envelope templates is Mirkwood Designs. The templates are free to use and there are so many of them that just browsing is sure to inspire you to try other projects. Ruthann, of Mirkwood Designs, also has a blog. Friends and family will be happy to receive a personal card from your child. Have fun!
Saturday, September 4, 2010
Ch-ch-ch-ch-Changes!

Mixed Media Collage on Record Album Jacket (from the series Wanderlust)
SOLD
Come along with me as I change this blog for the better. I have enjoyed the randomosity but had sometime to think about it during our recent holidays, and I would like to have more of a plan. Hmmmmm, me! I just think that it would be helpful for me to have a bit of a guide, a loose guide, to what I would like to cover in each week. And, it would let regular readers know what to expect each week. I have decided not to do something specific each day, such a Monday being a recipe, Tuesday being a craft, because I am not sure I would stick with it, but I do want to have several topics that I will cover each week, every week. They are as follows...
1) 365 Days With Kiddos - This is something I have been yearning to do. It will be ideas and inspiration for moms, dads, and kiddos, on ways to spend time together, being creative, being grateful, making memories, and so much more. There will be lots of surprises! I will post something EACH DAY, some simple (just a line or two), some with added suggestions to take things in a more personal direction, and some that have recipes or craft tutorials. I will also include guest bloggers. The sky is the limit. This is a way for me to record the many things I do with my kiddos and to share them with others who are interested in connecting as a family in a fun and meaningful way. I will welcome comments, as always, and I think these posts will be all the richer if you let me know if you do these activities, and how you go about them, or if I have inspired you to do one of them, what YOU did.
2) One Recipe - There will be one recipe each week, in addition to any that are in 365.
3) Photo Day - Since I am a professional photographer, and I love to share my images, there will be a day where I share maybe one photo, maybe a whole photo essay with you.
4) Vintage Love - This is where I will share my favorite vintage finds, whether from my own collection, or that I have recently found while thrifting and rummaging.
Now, there will also be some topics that I blog about bi-monthly or monthly. These will include What I Am Working On (my art), Book Recommendations, My Talented Friends Feature, Grown Up Crafting, Giveaways, Happy & Healthy (natural health tips) and a Wanderings (travel) Feature. Whoo Hoo! I hope you will enjoy my new blog. I have put it out there and will now make it so...
Friday, September 3, 2010
Why, Hello There!!

It has been ages! I do apologize. I was away for 4.5 weeks. In the course of those weeks my family and I visited three states (Maine, Minnesota, & Wisconsin) and two provinces (Ontario & Quebec), went to a family reunion (Andre's mom's side of the family), a wedding (my brother), a heartbreaking funeral (a friend's child), the arrival of our twin nieces (my other brother & his wife; my brothers are twins & the mother of my sister-in-law is also a twin), visited my grandfather's grave, stayed with my grandmother, stayed at my best friend's, stayed at my dad's cabin, and went to many, many wonderful friend and family functions and stayed in many cozy homes... it was wonderful! But I have negelected my blog. The only thing I have had time to do on the computer is upload photos from each day and from the photo sessions I was able to do with clients, family, and friends. NOW IT IS TIME TO GET BACK TO BLOGGING! I thought about it a lot while we were gone, and I have come up with some new ideas for this old blog. I am excited to get started and I hope that those of you who enjoy reading this (and who may have missed me, like I have missed you) will be happy with the changes. Stay tuned...
Subscribe to:
Posts (Atom)