You may like my blog if you like art, photography, crafting, sewing, upcycling, cooking, baking, reading, traveling, thrift store finds, parenting, kid's activities, writing, the environment, natural living, activism, and more... I am dedicated to living an artful & creative life, each & everyday.
Showing posts with label cooking with kids. Show all posts
Friday, December 17, 2010
365 Days With Kiddos - #20 - Make Gingerbread Cookies
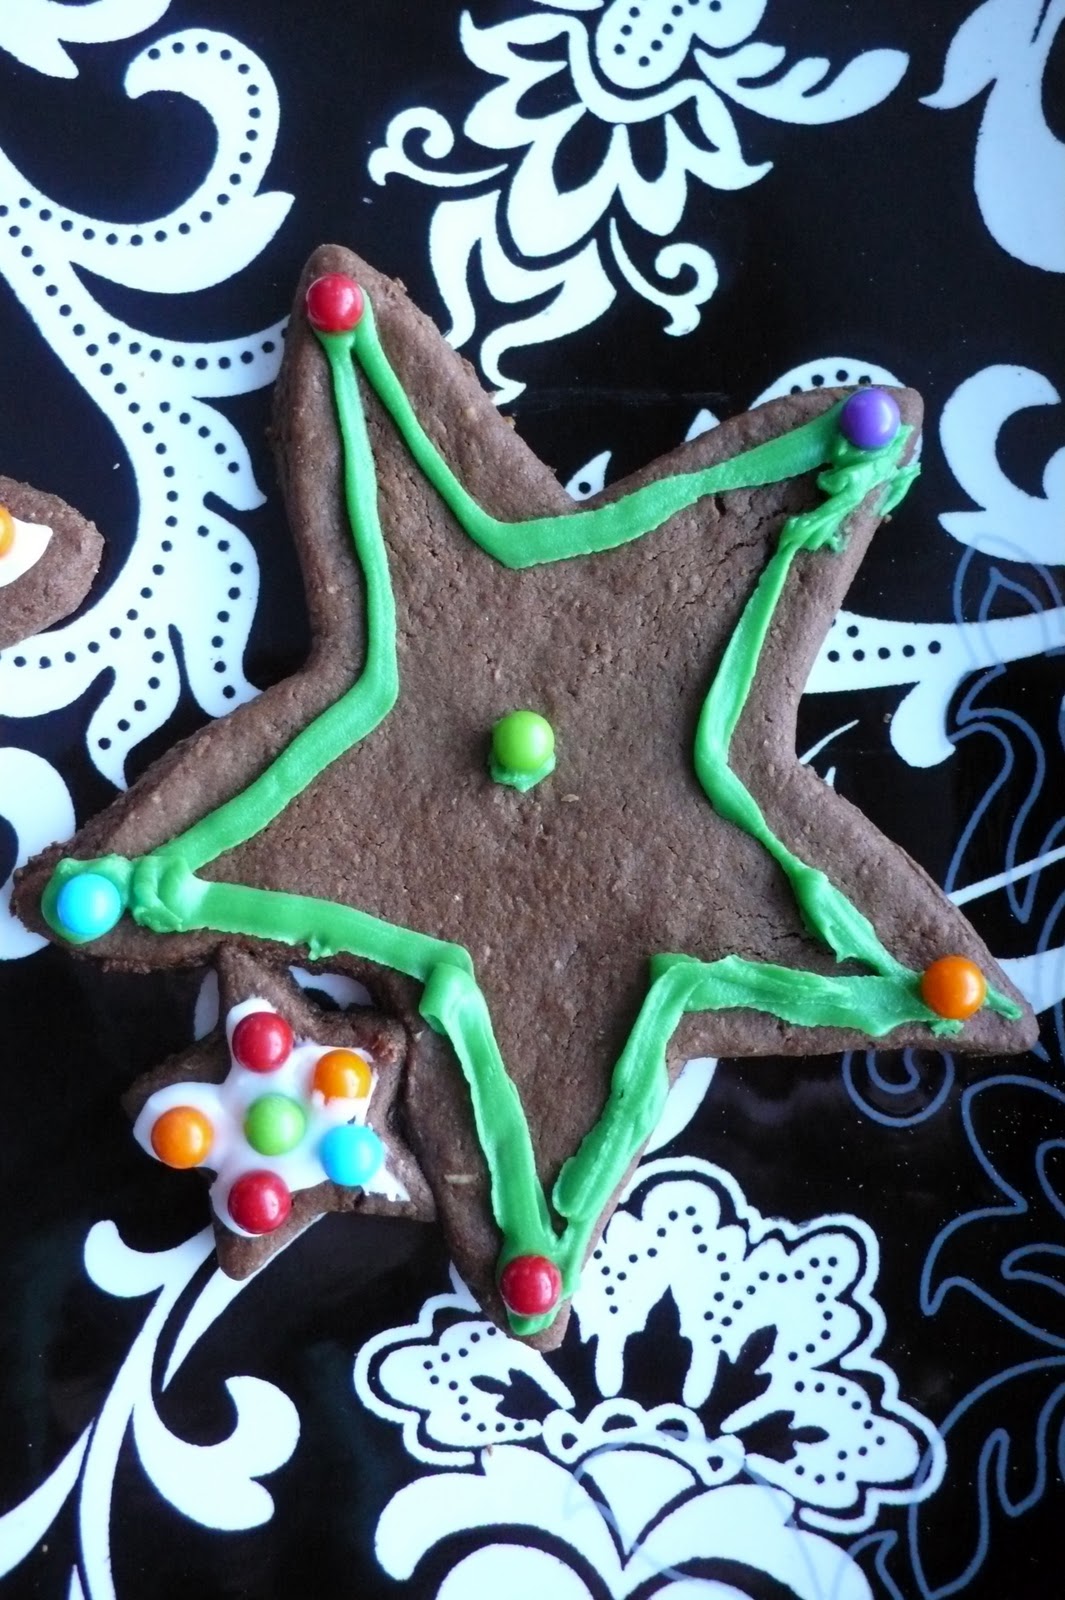
Making gingerbread cookies is a great way for kids to help in the kitchen during the holidays. They can measure the ingredients and mix the dough, as well as roll it out. Their imaginations can run wild by picking and using cookie cutters, as well as decorating the cookies. This year we had everything from connected rows of stars, to fairies, to mommy and baby stars, to simple circles (which were nice blank canvases for elaborate decoration). Premade icing is available but I wrote about a simple vanilla buttercream recipe that can be dyed any color you like, here. If you don't have a piping bag you cab fill a ziploc bag with icing, then cut of the tip of one of the bottom corners. We also used sprinkles and little round hard candies. The sky is the limit and half of the fun is chosing what to use. If you would like to make the connected cookies we did, just make sure your dough cut outs are touching each other on the cookie sheet before you place them in the oven.
I found this recipe on a card in my jumbo sized recipe box that I don't look in often enough. It has good ingredients that I replaced with organic versions. It is a very easy recipe to put together and I love all the spices that are used. The cookies are crisp and delicious. The dough should be chilled before rolling it out or it will be very sticky. I made half of the batch one evening and left the dough in the fridge overnight and baked the rest the next day. You can freeze this dough for 4-6 weeks by double wrapping it plastic wrap. Defrost it by placing it in the fridge for several hours. The baked cookies can be frozen for 3-4 weeks by double wrapping the same as with dough. When you want to eat them just let them sit out until they are room temperature or pop them in the microwave for 20-30 seconds. Be sure to make extras so you can share them. We saved some of ours for a family that is hosting an upcoming open house...
Yummy Organic Gingerbread Cookies
Ingredients
1/2 cup butter
3/4 cup brown sugar (or 1/2 cup honey)
1/2 cup molasses
1 tsp cinnamon
1 tsp ground ginger
1/2 tsp ground allspice
1/2 tsp ground cloves
1/2 tsp ground nutmeg
1 1/2 cups whole wheat pastry flour
1 1/2 cups unbleached white flour
2 tsp baking soda
1/4 cup water (1/8 if using honey)
Directions
1) In a large bowl with a hand or stand mixer, cream together butter with sugar or honey, molasses and spices. In a medium bowl combine flours and baking soda.
2) Add flour mix to butter mix and stir well. Mix in water. The dough should be stiff (I use my hands to combine everything). Chill for several hours. You can put in the freezer for 30 minutes if you are rushed for time.
3) Preheat oven to 350 degrees F. Roll out the dough on a lightly floured board or your counter to a thickness of 1/4" to 1/3".
4) Cut cookies using cookie cutters. Bake on a greased cookie sheet for 10 - 15 minutes.
5) Let cool on the pan for a minute or two, then transfer to wire cooling racks.
6) Decorate!
Labels:
baking,
cooking with kids,
Holiday fun,
kids in the kitchen
Thursday, October 28, 2010
Holiday Fun - Some Halloween Eats - Devilish Deviled Eggs
I LOVE deviled eggs. I don't make them often because I can eat them... ALL! I recently was looking through one of my favorite vintage cookbooks for kids, The Better Homes Junior Cookbook, from the early 70s. The cover and inside images, along with step by step illustrations are delightful. Some of the recipes leave a bit to be desired (think spam and molded gelatin). Others are a cheery trip back to my childhood. I got a serious craving when I saw their recipe for stuffed eggs. Apparently in the 70s, these eggs were not yet devilish...
Today was the first moment I had to finally make some. And since Halloween is just around the corner I decided that not only would we make some deviled eggs but we would make them a little devilish. My four year daughter helped me with each and every step.
Devilish Deviled Eggs
Inspired by Better Homes & Gardens Junior Cookbook
Recipe and devilish decoration adapted by Tiffany Teske
Ingredients
~ 6 Free range eggs
~ 2 Tablespoons olive oil mayonnaise
~ 1 teaspoon prepared yellow mustard
~ 1 teaspoon white vinegar
~ 1/2 teaspoon sea salt
~ 1/4 teaspoon fresh ground black pepper
~ Hungarian paprika to sprinkle on top
~ Sliced canned black olives and fresh red pepper for garnish
Directions
1. Place eggs in saucepan water to cover. Bring to a boil then simmer for 20 minutes.
2. Place eggs in a bowl of cold water to cool. You may need to change the water a couple of times. Using a spoon, crack the eggs shell of each egg and remove. Cut the eggs in half. Scoop or pop out the cooked yolks into a bowl. Put the white aside for the moment. Mash the yolks together.
3. Add the mayo, mustard, vinegar, salt, & pepper. Mix well. Spoon the yolk mixture back into the egg whites. Sprinkle paprika on top.
4. To make your eggs devilish, use sliced black olives and red pepper slices.
My lil' devil eating some of her handiwork!
PS If you are looking for a variation on the theme, why not make deviled egg ghosts?
Today was the first moment I had to finally make some. And since Halloween is just around the corner I decided that not only would we make some deviled eggs but we would make them a little devilish. My four year daughter helped me with each and every step.
Devilish Deviled Eggs
Inspired by Better Homes & Gardens Junior Cookbook
Recipe and devilish decoration adapted by Tiffany Teske
Ingredients
~ 6 Free range eggs
~ 2 Tablespoons olive oil mayonnaise
~ 1 teaspoon prepared yellow mustard
~ 1 teaspoon white vinegar
~ 1/2 teaspoon sea salt
~ 1/4 teaspoon fresh ground black pepper
~ Hungarian paprika to sprinkle on top
~ Sliced canned black olives and fresh red pepper for garnish
Directions
1. Place eggs in saucepan water to cover. Bring to a boil then simmer for 20 minutes.
2. Place eggs in a bowl of cold water to cool. You may need to change the water a couple of times. Using a spoon, crack the eggs shell of each egg and remove. Cut the eggs in half. Scoop or pop out the cooked yolks into a bowl. Put the white aside for the moment. Mash the yolks together.
3. Add the mayo, mustard, vinegar, salt, & pepper. Mix well. Spoon the yolk mixture back into the egg whites. Sprinkle paprika on top.
4. To make your eggs devilish, use sliced black olives and red pepper slices.
My lil' devil eating some of her handiwork!
PS If you are looking for a variation on the theme, why not make deviled egg ghosts?
Labels:
cooking,
cooking with kids,
food,
Halloween,
Holiday fun,
holidays,
vintage cookbook
Wednesday, October 13, 2010
365 Days With Kiddos - #12 - Make Your Child A Special School Day Breakfast
We love breakfast around here. We have many leisurely ones but there are also days when we need to get out the door for preschool and we don't have as much time. My daughter would eat toast every day (Have you ever read Bread and Jam for Frances
Egg in the Hole
By Tiffany Teske
Ingredients
- a slice of bread
- an egg
- butter
- cheese, salt & pepper, optional
Directions
1) Tear the middle of the bread out of the center of the slice so that you have a hole. This can be toasted in the pan along side the slice of bread, as a wee piece of toast to have on the side of your toast ;).
2) Spread a bit of butter on each side of the slice. Also, melt a thin layer of butter in the pan so the egg won't stick, if you are using cast iron, like me. If you are using teflon or some other non stick you can omit the extra butter.
3) Place the bread with the hole in the pan, which should be on med to lo medium. Crack your egg and then drop it in the middle of the bread. Cook until it is solid on the bottom, then flip to cook the other side. Season with salt and pepper. If you are using cheese, place it on top, and cover the pan so it melts.
4) If you want the egg to look picture perfect you can cook it without flipping but I would toast one side of the bread first, and cover the pan while cooking. You may have to fiddle with the right temperature so you don't burn the bottom of the bread before the egg is cooked through. You can also cook all of this in the oven at 350 F if you have the time and prefer to do so.
If your child is vegan or allergic to dairy you can still make special toast by using cookie cutters to cut it into shapes, then spread with assorted nut butters. If your child is allergic to nuts you can use jams. If your child is gluten free, you can use gluten free bread. I guess the point is not so much what you make for your child as long as you find something fun and special that doesn't take a lot of time. This way you won't be stressed but your child will feel they are extra special when they are sent off to enjoy the day...
Labels:
365 Days With Kiddos,
cooking with kids,
food,
recipe,
recipe vegetarian
Monday, July 19, 2010
Healthy Homemade Fruit Thin Bars (Think Fig Newtons...)
I am always on the look out for healthy homemade snacks and luckily I have lots of friends who are willing to share their recipes. My friend, Jane & I swap cookbooks, which is a really nice way to gain some new recipes, complete with feedback from someone you trust.
Our new favorite in this house are fruit thins. They are a fruit filled cookie that literally have tons of possible fillings. This recipe is from a very old out of print cookbook about baking.
Fruit Thins
Makes 24 to 32 cookies
Ingredients
- 1 1/2 cups Brazil nuts or walnuts (I used walnuts)
- 1 cup coconut (I used unsweetened shredded)
- 2 cups quick oats (I used organic)
- 1/2 cup whole wheat pastry flour
- 1 teaspoon salt (I used sea salt)
- 1/4 cup honey, warmed (although if you use liquid honey you don't need to warm it)
- 1/2 cup water
- Filling: use 1/2 cup water with a, b, c
a: 2 cups raisins, 1 cup dates
b: 1 cup each dates, raisins, and dried cranberries
c: 1 cup dried apricots, 1 cup dried pineapples pieces, and 1 cup golden raisins
NOTE: I used organic raspberry jam in my thins because I had it on hand.
Method
1. Blend coconut and oatmeal two minutes in food processor and place in bowl.
2. Blend nuts, flour, and salt for 30 seconds. Mix in bowl with coconut/oatmeal mixture. Add honey and water and stir together until pie-dough-like mixture is formed. Divide into two balls.
3. Filling: use a, b, or c from ingredient list; place in food processor with water and whiz, adding extra water if needed to make a thick speadable paste. (If dates or dried pineapple are hard, soften them in the water in microwave or on stove top before processing).
If using jam you do not need to prep it. Here is where things get a bit tricky...
4. Roll out first crust using two large pieces of plastic bag material or Bake Magic sheets. Place dough ball between sheets and rool, readjusting plastic if dough begins to press out as you roll. (Dampen counter slightly to keep the sheets from slipping around on the counter as you roll them. You will transfering everything to a cookie sheet with a lip, so roll it out to that size and shape.
5. Spread driend fruit mixture or jam over the surface.
6. Roll out the other ball of dough and place over the top of the other rolled out dough with filling and transfer to a cookie sheet. Place the plastic sheet on top and roll filmly to merge the layers together.
7. Score (press knife, don't drag). Bake at 350 degrees F for 25 minutes or until golden brown on edges and bottom.
These smell delicious while baking. Best wishes not having the whole family eat them on the first day...
Labels:
baking,
cookies,
cooking with kids,
Dessert,
food,
vegetarian recipe
Tuesday, June 22, 2010
African Fruit Salad - A Lesson in Geography, Food, & Fun
My four year old has been cooking since she could stand on a step stool next to me. We try to make several things a week, both for the fun of it, and to have healthy, good things around to snack on. Thanks to a well stocked pantry, some of our cooking sessions are impromptu, while others are planned. A few weeks ago, Quin picked a book at the library called Desserts from Around the World. It is a book for older kids but is quite suitable for small children and their parents. The first chapter has the most words and shares different parts of the world and the desserts that are common in each. Quin and I both enjoy curling up with a cookbook and dreaming of what we will make so we looked at a few recipes and their photos before bed each night.
Because we had a large box of mangoes that needed to be used, we decided to make the African Fruit Salad. We also had the bananas and pineapple on hand, but we made a special trip to the store to find a papaya. We actually had to go to two stores as part of this adventure and in the end I bought a not-quite-ripe papaya because it was all they had. For tips on selecting mangoes, pineapple, papaya, and other tropical fruits check out this great link. Quin loves to try new foods, and has not had fresh papaya since I was making her baby food. I recommend a fruit salad as a good way of introducing new fruits to kids.
Africa, on a vintage globe
This is also a good recipe to pair with a geography lesson. We have a vintage globe, which is not the best for showing Quin specific countries, but which she loves to play with so it engages her. It is fine for talking using to show her the continents. We were also able to talk a bit about how in parts of Africa, as in most parts of the world, including Canada, that there are people who are hungry and who need our help. I don't get very political with my small children but I do think it is important to talk about all we have, so we can be grateful for it, and so we can decide how we can help others who are in need.
African Fruit Salad
From the book, Desserts from Around the World
Ingredients
~ Two bananas, sliced
~ One mango, chopped
~ One papaya, seeded and chopped
~ One pineapple, chopped
Directions
Slice and chop all of the fruit into bite sized pieces, combine in a bowl, and serve. If you want to make this ahead of time, do not add the banana. The other fruit will keep 1-2 days when refrigerated. Just add the banana when you are ready to eat it.
"YUM, Pineapple!"
Labels:
cooking with kids,
Dessert recipe,
food,
recipe,
recipe vegan,
travel,
vegetarian recipe
Sunday, June 6, 2010
A Week of Birthday Posts - #2 - Two Summer Time Organic Lemonade Recipes
Every year at the same time the strawberries are suddenly half the price they were in the winter, I can get organic lemons by the bag, and fresh rhubarb is available. All of this coincides with my husband and daughters' birthdays. One of the special things I like to do for them is to make fresh lemonade. It is worth all of the effort and it is fun for my daughter and I to make together. Plus, it is always a hit with both adults and kids at a kid's birthday party, so this year we served it at my daughter's tea party. I would like to thank my friend, Jano, from Maine, for the following recipes, which I adapted to be organic and I have had in my collection for years.
Fresh Squeezed Lemonade
Recipe by Jano
This recipe is perfect for kids, who seem to find the second version a bit to tart and pulpy.
Ingredients:
~ 1 cup fresh organic lemon juice (about 6 average sized lemons)
~ 3/4 cup organic natural cane sugar
~ 4 cups water
Directions:
1. Squeeze your lemons. There are several ways you can do this; by hand; using a juicer; or my favorite method which is to use a metal lemon squeezer, like I have in the photograph at the end of this recipe. There is nothing like having the proper tool for a job, and for lemonade this IS the one...
2. Bring sugar and water to a boil. When the sugar dissolves reduce the heat and simmer a minute or two more.
3. Add lemon juice. Let cool. Refrigerate. Enjoy!
Strawberry-Rhubarb Lemonade
By Jano
Ingredients:
~ 1 cup fresh organic lemon juice (about 6 average sized lemons)
~ 2 1/2 cups chopped rhubarb
~ 3/4 cup organic cane sugar
~ 4 cups water
~ Zest from one organic lemon
~ 1/2 t organic vanilla
~ 1 1/2 - 2 cups organic strawberries, chopped, plus 2-3 whole strawberries
Directions:
1. Squeeze your lemons.
2. Heat water, rhubarb, sugar, dash of lemon zest, and vanilla. Bring to boil. When sugar dissolves, reduce heat and simmer for 5 minutes, covered. Add chopped strawberries and boil again for two minutes, covered.
3. Cool mixture. Blend in food processor or blender. Add zest and lemon juice and blend. Pulse in whole strawberries if you want some fresh chunks.
4. Taste - adjust sweetness. Refrigerate. Serve.
Labels:
beverage recipe,
birthdays,
cooking with kids,
kids,
recipe,
vegetarian recipe
Friday, May 21, 2010
Smile, A Fun Treat For Kids
I collect vintage cookbooks, craft & art books, and kid's craft & activity books. I randomly pull them from the shelves when I need inspiration for a project, for a class I am teaching, or for a fun activity to make with my eldest daughter. Yesterday, I found this simple snack, which we had all the ingredients for, and which I knew Quin & I could make together in a snap.
Apple Smiles
Makes 4
Ingredients:
- one apple
- peanut butter
- mini marshmallows
1. Cut apple into 8 slices.
2. Spread peanut butter on one side of each slice.
3. Place 4-5 marshmallows on top of one slice. Press the other slice on top of that.
4. Have fun hamming it up for the camera. Then, eat!
Quin LOVES these. We made them after lunch then again after dinner so she could share some with Daddy...
Friday, March 26, 2010
Upcoming Banff Community Courses

I am teaching three kids courses through the Town of Banff Community Courses during April and May...
Kid's Digital Photography (Ages 10+)
Grab your camera and get ready to have photography fun! This course will cover the basics of photography, and allow you and your camera to develop creative projects using the photos you take. We will be working with lots of natural light and trying new approaches to making your ordinary pictures extraordinary!
$40
Banff High School
Mon - Fri, April 5 – 9
1 – 3 pm
Kid's Good Earth Art (Ages 5 – 9)
Join Tiffany for an afternoon of fun crafting with your friends. Take part in learning a series of projects and crafts that will be created by using recycled materials. Parents are welcome to join their children for the afternoon if they wish.
$30
Middle Springs Cabin
Fri, April 16, 30, May 14, 28
1 – 3 pm
Kids in the Kitchen (Age 9+)
Hey kids! Learn how to become mini chefs in the kitchen and have fun preparing snacks and meals that you’ll love to eat! Kids will also learn kitchen safety and proper food handling techniques.
$35
Banff High School
Sat, May 29
10:30am – 2:30 pm
To see the full course guide and for info on how to register click here.
Sunday, February 21, 2010
February 21st - Chocolate Peanut Butter Brownies TO DIE FOR
I will forever be grateful to my friend, Kirstin, for forwarding this recipe to me. I am a huge fan of peanut butter and chocolate. And brownies, I love them! I haven't made brownies from a box since I was a kid because they really are easy to make from scratch and taste so good. I did 1 and a half of the recipe below and used a 9x13" pan and baked it for 45 minutes. Do not make theses unless you are prepared to eat half the pan... they are that good!
Peanut Butter Swirl Brownies
by Kim D. RecipeZaar
* 1/2 cup butter or margarine, softened
* 2/3 cup sugar
* 1/2 cup packed brown sugar
* 2 eggs
* 2 tablespoons milk
* 3/4 cup all-purpose flour
* 1/2 teaspoon baking powder
* 1/4 teaspoon salt
* 1/4 cup creamy peanut butter
* 1/3 cup peanut butter chip
* 1/3 cup cocoa powder
* 1/2 cup semi-sweet chocolate chips
1. In a mixing bowl, combine butter and sugars.
2. Add eggs and milk; mix well.
3. Combine flour, baking powder, and salt; add to creamed mixture and mix well.
4. Divide batter in half.
5. To one portion, add peanut butter and peanut butter chips.
6. To the other portion, add cocoa and chocolate chips; mix well.
7. In a greased 9-inch square pan, spoon chocolate batter into 8 mounds in a checker board pattern.
8. Spoon 8 mounds of peanut butter batter in between the chocolate batter.
9. Cut through batter with a knife to swirl.
10. Bake at 350F for 25-30 minutes or until toothpick inserted near the center comes out clean.
11. Cool on a wire rack.
Now eat! Yum!
And watch for smiles...
Labels:
baking,
cooking with kids,
Dessert recipe,
food,
recipe,
Thing-a-day,
vegetarian recipe
Monday, February 15, 2010
February 15th - Homemade Vegetarian Alphabet Soup
My daughter loves alphabet soup (what kid doesn't?). I usually buy Amy's Organic at $4 a can. Today, I decided to make some. I was inspired the last time I went to the grocery store and saw that they sell the alphabet pasta. I decided to try this recipe from RecipeZaar.
Healthy Alphabet Soup Recipe #112133
A delicious real alphabet soup which is much more nutritionally sound, as well as tastier, than the canned stuff. Recipe from "Stealth Health" Mar/99. In the ingredients, "Dried Italian herb seasoning is just regular dried Italian herb.
by LUv 2 BaKE
2 hours | 20 min prep
SERVES 6
* 1 cup onion, chopped
* 1 cup carrot, finely chopped
* 4 garlic cloves, minced
* 3 1/2 cups vegetarian chicken broth or chicken broth
* 3 cups water
* 1 cup dried white bean, rinsed (I used canned beans)
* 1 (398 ml) can tomatoes, cut up
* 1 teaspoon dried Italian herb seasoning or dried oregano
* 1/8 teaspoon cayenne
* 1 cup dry alphabet pasta
1. Combine first five ingredients; boil.
2. Add next four ingredients; boil; reduce heat, cover and simmer stirring occasionally for 1 1/2 hours until beans are tender.
3. Using a slotted spoon, remove most of the beans and transfer remaining liquid to a blender; process till smooth.
4. Return mixture and beans back to the pot; Stir in alphabet pasta.
5. Boil then reduce hear; cover and simmer 8 minutes until pasta is tender but firm.
6. Yield: 6 1 1/2 cup servings.
My daughter's initials are QQ....
Labels:
baby food,
cooking with kids,
recipe,
Thing-a-day,
vegetarian recipe
Subscribe to:
Posts (Atom)

