You may like my blog if you like art, photography, crafting, sewing, upcycling, cooking, baking, reading, traveling, thrift store finds, parenting, kid's activities, writing, the environment, natural living, activism, and more... I am dedicated to living an artful & creative life, each & everyday.
Showing posts with label Dessert recipe. Show all posts
Tuesday, October 26, 2010
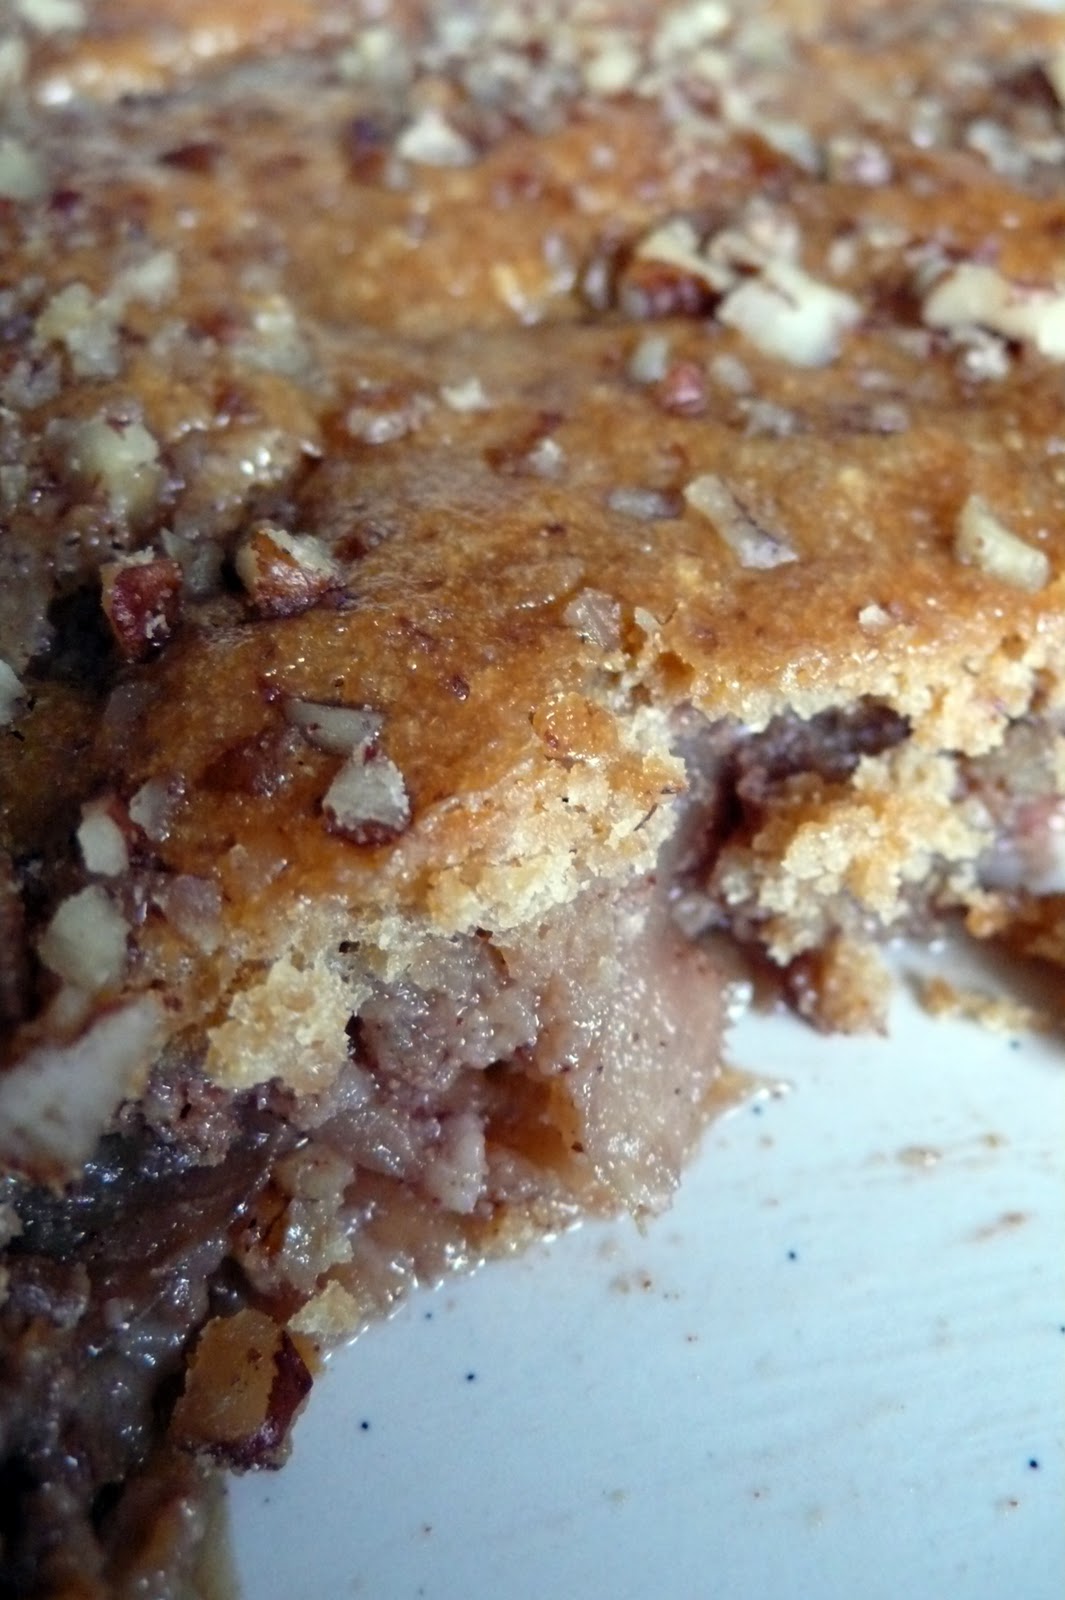
Weekly Recipe - My Illustrated Apple Pecan Cobbler Recipe (and How To Make Unsweetened Applesauce)
Last week, my husband was gifted with TONS of apples. I am not complete clear on the story but one of his clients left three boxes of BC (British Columbia) apples for him and his employees. My hubby manages a ski resort, so I am not really sure of the connection, but, boy were we excited when he brought them home! There are standard Red Delicious, MacIntosh, and I think, Jonagold. The latter are absolutely delicious for eating and are almost gone. The Red Delicious, which was the top variety of apple in the world for decades, but not a favorite of mine, are good for both eating and cooking. MacIntosh, which have been popular since the early 1800s, are great for my toddler when skinned because they are soft, but since I like crisp apples, I prefer to make them into applesauce. Applesauce just might be the easiest thing on the planet to make...
How to Make Applesauce
By Tiffany Teske
The following works for any amount of apples. I often made small batches with one or two apples for my babies but you can also do this with a dozen apples. Just select your saucepan according to the amount of chopped apples you will have.
Ingredients
~ Apples
~ Water
Directions
1. Peel the apples.
2. Chop the apples.
3. Put the apples into a saucepan. Add water until it just covers the apples, and bring to a boil. Reduce heat and simmer until soft (up to 20 minutes).
4. Puree in the blender or with a handmixer or smoothie mixer or food mill. You can also mix or whisk it by hand.
I don't sweeten my applesauce, since I find it unnecessary with Macs.
I also decided to use some of our Macs in a dessert. I must confess, I love to have an overabundance of fruit or veggies that I need to figure out a way to use. I get inspired to try something new. In this case, I started with the idea of an apple pecan cobbler, peeked at a couple of recipes, then made this up with what I had on hand.
Apple Pecan Cobbler
By Tiffany Teske
Ingredients
~ 4 cups thinly sliced apples (I used 5 apples)
~ 1/2 c organic raw sugar
~ 1/2 tsp ground cinnamon
~ 1/2 c chopped pecans
~ 1 c whole wheat pastry flour
~ 3/4 c brown sugar
~ 1 tsp baking powder
~ 1/4 tsp sea salt
~ 1 free range egg, beaten
~ 1/2 c evaporated milk
~ 1/3 c organic butter, melted
~ an additional 1/4 c chopped pecans
Directions
1) Preheat oven to 325° F. Generously grease a rectangular baking dish with butter.
2) Arrange apple slices in an even layer (not a single layer, they can cover one another but it should be about even in depth throughout) in baking dish. In a small bowl, mix raw sugar, cinnamon, and 1/2 c pecans. Sprinkle over apples.
3) In a medium bowl, mix flour, brown sugar, baking powder, and salt. In a separate bowl whisk egg, evaporated milk, and melted butter. Add milk mixture all at once to the dry ingredients and stir until smooth. Pour this over apples and sprinkle with the remaining 1/4 pecans.
(It had gotten dark outside by the time I got to this step so this doesn't look quite right in the artifical light...)
4) Bake for 55 - 60 minutes.
This is delicious with a little bit of evaporated milk or cream poured over it. Or you could make this sweet cream ice cream.
To make this recipe even better, why not support a local apple orchard or farm and buy your apples there. Take the kiddos and pick them yourself. For more on apple varieties check out pickyourown.org.
Labels:
baby food,
Dessert recipe,
recipe,
seasonal fruit,
weekly recipe
Monday, September 13, 2010
Weekly Recipe - Pineapple Rhubarb Crisp
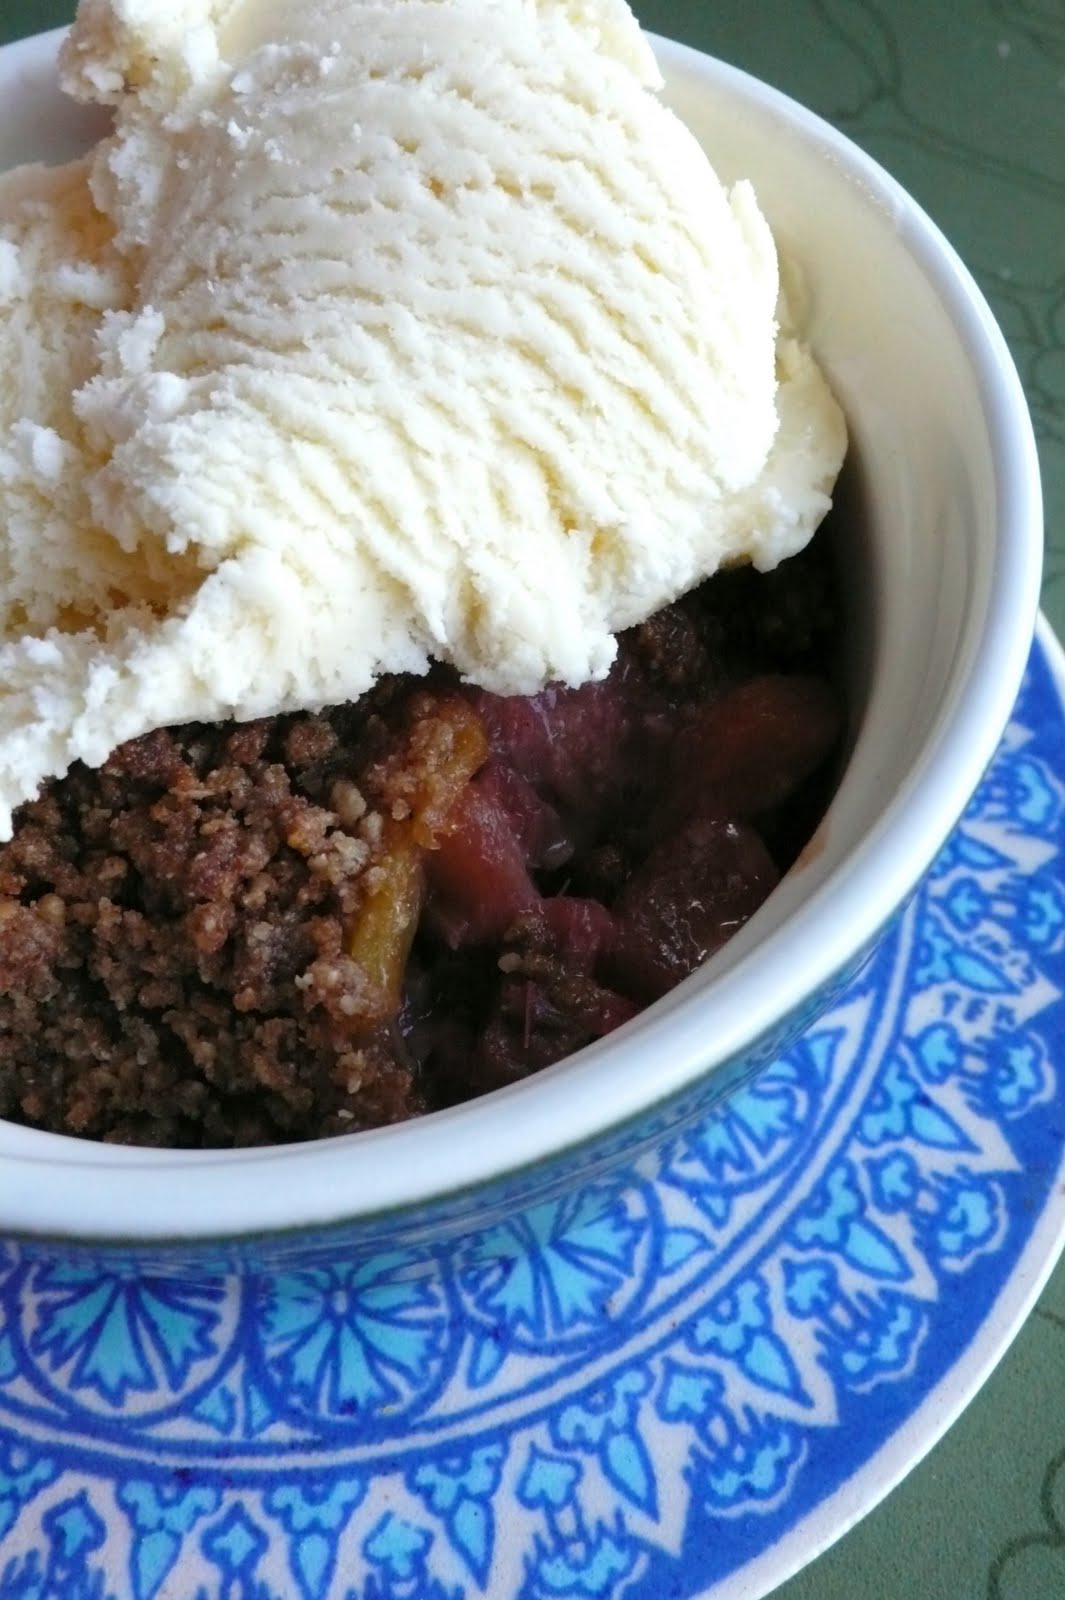
I realize that it is getting a bit late in the season for this (even here in Banff where the growing season is late and short). Rhubarb can be found in the freezer section year round in some places. This recipe makes it worth checking out. I am a huge fan of any kind of crisp, especially when I can make homemade sweet cream ice cream to put on top. I had never thought of the combination of rhubarb and fresh pineapple... it is awesome! The sweet and tart go so well together. The heading of the recipe, from a free thrifted copy of Homemakes Magazine states "Consider this dessert a study in North-South dialogue: a blending of rich tropical sweetness with cool climate tartness". On a side note, old magazines abound, usually for free, so if you are ever in need of a new recipe, aside from the internet, or your cookbook collection, just pick up some free magazines, flip through, and pick out a something new to try...
Pineapple Rhubard Crisp
Homemakers Magazine
Ingredients
Makes 6-8 serving
4 cups/1 L chopped rhubarb
3 cups/750 ml chopped fresh pineapple
3 Tbsp/45ml granulated sugar (I use organic raw)
1 Tbsp/15 ml cornstarch
1 cup/250 ml all-purpose flour (I used organic whole wheat pastry flour)
2/3 cup/150 ml packed brown sugar
1 tsp/5 ml finely grated orange rind
1 tsp/5 ml ground ginger
1/4 tsp/1 ml EACH cinnamon and nutmeg
pinch cayenne pepper
1/3 cup/75 ml salted butter, melted
Directions
Toss together rhubard, pineappple, granulated sugar, and cornstarch; place in buttered 8 inch/20 cm square baking dish. Whisk together flour, brown sugar, orange rind, ginger, cinnamon, nutmeg, and cayenne until throughly combined. Drizzle with butter; stir until in small crumbs. Spread over fruit mixture. Bake in centre of 350 degree F/ 180 degree C oven until fruit is bubbling and topping is crisp, 50 -60 minutes.
Sweet Cream Base
By Ben & Jerry's
Ingredients
Makes 1 Liter
2 eggs
3/4 cup sugar
2 cups whipping cream
1 cup milk
Directions
Beat eggs, using a wire whisk, until frothy, 1-2 minutes. Add sugar a little at a time, beating about 1 minute. Add cream and milk and whisk to combine. Freeze according to your ice cream maker's directions.
Labels:
baking,
cooking,
Dessert recipe,
food,
recipe
Tuesday, June 22, 2010
African Fruit Salad - A Lesson in Geography, Food, & Fun
My four year old has been cooking since she could stand on a step stool next to me. We try to make several things a week, both for the fun of it, and to have healthy, good things around to snack on. Thanks to a well stocked pantry, some of our cooking sessions are impromptu, while others are planned. A few weeks ago, Quin picked a book at the library called Desserts from Around the World. It is a book for older kids but is quite suitable for small children and their parents. The first chapter has the most words and shares different parts of the world and the desserts that are common in each. Quin and I both enjoy curling up with a cookbook and dreaming of what we will make so we looked at a few recipes and their photos before bed each night.
Because we had a large box of mangoes that needed to be used, we decided to make the African Fruit Salad. We also had the bananas and pineapple on hand, but we made a special trip to the store to find a papaya. We actually had to go to two stores as part of this adventure and in the end I bought a not-quite-ripe papaya because it was all they had. For tips on selecting mangoes, pineapple, papaya, and other tropical fruits check out this great link. Quin loves to try new foods, and has not had fresh papaya since I was making her baby food. I recommend a fruit salad as a good way of introducing new fruits to kids.
Africa, on a vintage globe
This is also a good recipe to pair with a geography lesson. We have a vintage globe, which is not the best for showing Quin specific countries, but which she loves to play with so it engages her. It is fine for talking using to show her the continents. We were also able to talk a bit about how in parts of Africa, as in most parts of the world, including Canada, that there are people who are hungry and who need our help. I don't get very political with my small children but I do think it is important to talk about all we have, so we can be grateful for it, and so we can decide how we can help others who are in need.
African Fruit Salad
From the book, Desserts from Around the World
Ingredients
~ Two bananas, sliced
~ One mango, chopped
~ One papaya, seeded and chopped
~ One pineapple, chopped
Directions
Slice and chop all of the fruit into bite sized pieces, combine in a bowl, and serve. If you want to make this ahead of time, do not add the banana. The other fruit will keep 1-2 days when refrigerated. Just add the banana when you are ready to eat it.
"YUM, Pineapple!"
Labels:
cooking with kids,
Dessert recipe,
food,
recipe,
recipe vegan,
travel,
vegetarian recipe
Monday, June 14, 2010
A Week of Birthday Posts - #5 - Birthday Party Food
Food, glorious food. Hehehe! We love it around here. And party food is oh so fun to research, decide upon, and prepare. I have found that for kids' birthday parties it is best to keep it simple. My children are adventurous eaters but that doesn't mean all of their friend are. In fact, my daughter, and all the moms, were the only ones who really liked my homemade strawberry rhubarb lemonade. It never even crossed my mind that most of the kids would find it way too tart...
I made a better decision on the healthy snack part of the party. After the kids made a craft, I served fruit and dip. I never realized that strawberries and mini marshmallows would be such a sell! The berries were organic and so deliciously sweet that they didn't need any special preparation. I just washed and hulled them, slid them onto a frilly toothpick, and kept them from sliding off with a single mini marshmallow. Every single one was eaten. The dip on the other hand, again something my daughter likes, was not a huge hit with some of the kids. I had made it during a cooking class I taught for older kids (ages 6 - 9) where it was well received. See what you think...
Honey Fruit Dip
Ingredients
~ 1 cup plain yogurt
~ 1 Tablespoon honey
~ Brown sugar to sprinkle on top
~ Fruit
Directions
1. Mix honey into yogurt.
2. Sprinkle brown sugar on top.
3. Dip strawberries, grapes, banana slices, whatever fruit you like, into the dip and enjoy!
And what would a party be without cake? Since we had other food and snacks I decided to go with mini cupcakes. This way the kids could eat one or two and get to chose exactly what they wanted.
My friend, Alannah, owns my favorite bakery and she is amazing with mini cupcakes. I am blown away by the array of flavors and her attention to detail. They are all beautiful!
Happy birthday, Quin! We can't believe how quickly you are growing. You are a wonderful daughter, friend, sister... We love you!
Wednesday, June 2, 2010
A Week of Birthday Posts - #1 - My Strawberry Banana Baby's First Birthday Cake
"A whole cake?! What is going on here? Do you REALLY want me to eat this?!"
Both of my daughters and my husband have birthdays in the same week (lucky me, I am in November). This means there was a lot of cooking, baking, crafting, and party throwing going on last week. I will be posting some photos, how-tos, and recipes to share with you during the coming week.
Emmanuelle, our baby, turned ONE last week! A very exciting time which has included three new teeth (bringing the total to 7), walking her first steps, and surprising us with new skills every time we turn around. For her first birthday cake, I wanted something that was healthy or at least healthier than something from a big store. Our oldest daughter was given a super sugary, very blue frostinged cake for her first, by my mother, and Andre and I were smuggly thrilled when she wouldn't eat it. For Emmanuelle, who is a big eater, I wanted something delicious and free from colorings. I decided that a strawberry banana cake would be awesome. I searched the internet and was surprised that I could find reference to a couple of them, but no recipes... I decided to cobble together several recipes and try to make my own. I decided to make a banana honey cake and to frost it with a cream cheese butter strawberry frosting. It was a hit! ESPECIALLY with ME. YUM YUM... This cake is amazingly moist and soooooo delicious.
Banana Honey Cake with Strawberry Cream Cheese Frosting - Baby's First Birthday Cake
by Tiffany Teske
Banana Honey Cake
Makes 2 8" square cakes
Ingredients
~ 1 c honey
~ 1 tsp soda
~ 1 c organic oatmeal, uncooked (quick or old-fashioned)
~ 3/4 c organic unsalted butter (omit sea sale below if using salted butter)
~ 1/2 c natural sugar
~ 2 organic eggs
~ 1 c mashed bananas (I used 4, three that were pretty ripe, one frozen one that was thawed, the riper the better)
~ 1 1/2 c whole wheat pastry flour
~ 3/4 tsp baking powder
~ 3/4 tsp sea salt
Directions
1. Bring honey to a boil in medium-sized saucepan. Add oats, the pour 1/2 teaspoon
of the soda over oats and stir to combine. Cover and let stand 10
minutes.
2. Beat butter until creamy. Gradually add sugar, beating until fluffy.
Blend in eggs. Add oats mixture and bananas then blend well. Sift together
flour, remaining 1/2 teaspoon soda, baking powder and salt. Add to
creamed mixture and blend well.
3. Pour batter into 2 greased 8-inch square cake pans. Bake in preheated 350 F degree oven for 35 to 40 minutes. Cool on wire rack about 10 minutes. Remove from pans and let cool. Frost.
Quin blowing out her sister's birthday candles...
Strawberry Cream Cheese Frosting
Approx 2 cups
Ingredients
~ 6 ounces cream cheese, softened
~ 1/4 cup organic butter, unsalted, softened
~ 1 cup icing sugar (For the baby cake I only used 1/4 c icing sugar)
~ 1/2 cup mashed drained fresh strawberries
Directions
1. Blend together the cream cheese and butter using an electric mixer on low speed until combined.
2. Add sugar, gradually, and the mashed strawberries; blend frosting again on low speed until the sugar is incorporated, 1 minute.
3. Increase mixer speed to medium and blend frosting until fluffy, 30-45 seconds more. You can add as much sugar as you like for the spreading consistency you want.

Emmanuelle, loving her first birthday cake... (No, she didn't eat it all, she ate less than 1/4 of it, which is a lot for a babe!
Labels:
babies,
baking,
birthdays,
Breakfast recipe,
Dessert recipe,
family
Monday, April 5, 2010
Buttermilk Cakes Recipe
I mentioned these cakes in this post about quiche. These cakes make a wonderful brunch dessert or even breakfast. You can cover them with fresh whipped cream but I like them drizzled with real maple syrup.
Buttermilk Pudding Cakes
By Martha Stewart (Here is the link to her recipe). I did 1.5 times her recipe so I could make 12 (since the muffin pan makes 12). This makes my recipe a bit wonky but I have typed it out below. I have to say these don't seem like pudding cakes to me. They were a bit dense but they were yummy. I didn't let my melted butter cool to room temp which probably changed the texture.
Ingredients
Serves 12
- 1 plus 1/8 cup sifted all-purpose flour (I used unbleached)
- 2 1/4 teaspoons baking powder
- 3 large eggs
- 1 plus 1/8 cup cup whole or low-fat buttermilk (I used whole)
- 1 1/2 teaspoon pure vanilla extract
- 14 tablespoons sugar
- 6 tablespoons unsalted butter, melted and cooled to room temperature
- Nonstick cooking spray (I used butter)
- 3 cups fresh raspberries (I used strawberries & kiwi)
- Whipped cream, for serving (optional)
Directions
1. Preheat oven to 425 degrees with a rack positioned in the top third of the oven.
2. Sift together flour and baking powder in a large bowl. In another large bowl beat eggs until creamy and yellow. Whisk in buttermilk, vanilla, 5 tablespoons plus 1 teaspoon sugar, and butter (mixture will look curdled and broken). Slowly add flour and whisk until batter is smooth and combined.
3. Spray 8 standard-size (3-ounce) nonstick muffin pan cups with nonstick cooking spray. Divide batter evenly among prepared muffin pan cups, filling about two-thirds full. Transfer to oven and bake until sides of cakes are evenly browned (check by inserting a knife tip between the rim of cake and muffin cup, pulling gently to expose side of cake), about 9 minutes. If cakes are not evenly browned, they will not hold together when inverted. Continue baking, checking every minute, until evenly browned.
4. Meanwhile, place raspberries in a medium bowl; add remaining 4 tablespoons sugar and gently toss to coat.
5. Invert cakes onto twelve individual plates. Place berries on top and alongside cakes; serve with whipped cream, if desired.
Friday, March 5, 2010
How To Make Hot Fudge Sauce and French Vanilla Ice Cream
My aunt was visiting us recently and we went out for dinner. When dessert time came, I was excited to see Vanilla Bean Ice Cream Profiteroles with Kahlua Hot Fudge (check out this lovely blog I just stumbled upon for a recipe). I had been craving hot fudge for weeks so I would have eaten it on anything.
The profiteroles were scrumptious and I give them a A+ for presentation (see photo above) but, alas, the hot fudge sauce tasted like Hershey's chocolate syrup. It was not at all fudgy. I decided it was time to try this recipe...
Ben & Jerry's Hot Fudge Sauce
From Ben & Jerry's Homemade Ice Cream and Dessert Book
Ingredients (I use organic where ever possible)
- 4 oz unsweetened chocolate
- 1/2 cup (1 stick) of butter
- 3/4 cup unsweetened cocoa powder
- 2 cups sugar
- 1/2 cup milk
- 1/2 cup heavy cream or whipping cream
Directions
1. In double boiler, melt chocolate and butter, stirring frequently. Whisk in cocoa powder until dissolved.
2. Gradually stir in sugar; the mixture will resemble wet sand (see photo above). Cook over simmering water for 20 minutes, stirring occasionally. Check water level of double boiler, adding more if necessary.
3. Gradually stir in milk and cream. Continue stirring until completely blended. Continue cooking for 1 hour, stirring and checking water level occasionally. The sauce is ready when completely smooth and all sugar is dissolved.
Yields 1 quart
This recipe is simple but requires a bit of babysitting. I was able to make it while my aunt and I cooked a delicious dinner. We put it on Ben & Jerry's French Vanilla Ice Cream, which I whipped up in our Cuisinart ice cream maker.
Ben & Jerry's French Vanilla Ice Cream
From Ben & Jerry's Homemade Ice Cream and Dessert Book
Ingredients (I use organic where ever possible)
- 2 large eggs
- 3/4 cup sugar
- 2 cups heavy whipping cream
- 1 cup milk
- 2 teaspoons vanilla extract
Directions
1. Whisk the eggs in a mixing bowl until light and fluffy, 1 to 2 minutes.
2. Whisk in the sugar, a little at a time, then continue whisking until completely blended, about 1 minute more. Pour in the cream, milk, and vanilla and whisk to blend.
3. Transfer the mixture to an ice cream maker and freeze following the manufacturer's instructions.
Makes 1 Quart
This was super delicious and satiated my craving perfectly... It has been a hit in our house all week.
Labels:
Dessert recipe,
food,
ice cream recipe,
recipe
Sunday, February 21, 2010
February 21st - Chocolate Peanut Butter Brownies TO DIE FOR
I will forever be grateful to my friend, Kirstin, for forwarding this recipe to me. I am a huge fan of peanut butter and chocolate. And brownies, I love them! I haven't made brownies from a box since I was a kid because they really are easy to make from scratch and taste so good. I did 1 and a half of the recipe below and used a 9x13" pan and baked it for 45 minutes. Do not make theses unless you are prepared to eat half the pan... they are that good!
Peanut Butter Swirl Brownies
by Kim D. RecipeZaar
* 1/2 cup butter or margarine, softened
* 2/3 cup sugar
* 1/2 cup packed brown sugar
* 2 eggs
* 2 tablespoons milk
* 3/4 cup all-purpose flour
* 1/2 teaspoon baking powder
* 1/4 teaspoon salt
* 1/4 cup creamy peanut butter
* 1/3 cup peanut butter chip
* 1/3 cup cocoa powder
* 1/2 cup semi-sweet chocolate chips
1. In a mixing bowl, combine butter and sugars.
2. Add eggs and milk; mix well.
3. Combine flour, baking powder, and salt; add to creamed mixture and mix well.
4. Divide batter in half.
5. To one portion, add peanut butter and peanut butter chips.
6. To the other portion, add cocoa and chocolate chips; mix well.
7. In a greased 9-inch square pan, spoon chocolate batter into 8 mounds in a checker board pattern.
8. Spoon 8 mounds of peanut butter batter in between the chocolate batter.
9. Cut through batter with a knife to swirl.
10. Bake at 350F for 25-30 minutes or until toothpick inserted near the center comes out clean.
11. Cool on a wire rack.
Now eat! Yum!
And watch for smiles...
Labels:
baking,
cooking with kids,
Dessert recipe,
food,
recipe,
Thing-a-day,
vegetarian recipe
Friday, February 19, 2010
February 19th - Radio Interview & a Dutch Apple Pie Recipe
Today was a full and exciting day. I was interviewed for close to an hour by Tanya Cooper for a blog radio show called Susan and Friends. Tanya is the wife of the former manager of Victory Thrift Store (if you read my blog you know I talk about Victory often). Her husband wore many hats in the Canmore community and while I only met Tanya a handful of times, I liked her right away. It just goes to show that you never know how someone will impact your life after you have briefly met them. Anyway, Tanya alerted to my blog via mutual friends at Victory. She liked this blog and asked me to be on her show. If you are interested in hearing it, just go here. I look forward to being on the show again soon and to having some time to speak with Tanya personally. I am interested in how she became a radio host...
My lovely friend, Kim, watched Emmanuelle and her 11 month old, Grace, while I was on the radio. Quin was up at Norquay, thanks to Andre. After the show, we walked to Phil's for pancakes and eggs, yum (don't tell Q). It is always great to see Kim & Grace!
I started work on my piece for the upcoming Women's Art Show. I got it laid out and made a big dent in it. I am being secretive but will reveal more soon...
Tonight I made a spaghetti sauce for an awesome dinner with the family. It was fun to have a glass of wine and to cook while Andre chopped. He is so busy with work that we don't get to do this as often as I would like. I will post the spaghetti sauce recipe over the weekend as I need to type up the recipe and upload the photos (and I am too tired). For now, I will leave you with the recipe for the apple pie I made yesterday. We ate the leftovers for dessert.
Dutch Apple Pie
From a 1998 copy of Home Cooking
This is a great pie to eat right out of the oven or to bring to a party where the whole thing will get eaten. While it tastes fine reheated the filling makes the crust mushy after it sits for a day or two. It is sweet and next time I will cut the sugar amount. The topping and crust are delicious, very much like a crisp.
Crust and topping
- 2 cups all-purpose flour (I use unbleached)
- 1 cup packed brown sugar
- 3/4 cup butter, melted
- 1/2 cup quick-cooking oats
FILLING:
- 2/3 cup sugar
- 3 Tablespoons cornstarch
- 1 1/4 c water
- 3 c diced peeled tart apples
- 1 teaspoon vanilla extract
Combine first four ingredients; set aside 1 cup for topping. Press remaining crumb mixture into an ungreased 9 in pie plate; set aside. For the filling, combine sugar, cornstarch, and water in a saucepan until smooth; bring to boil. Cook and stir for 1 minute or until thickened. Remove from heat; stir in apples and vanilla. Pour into crust; top with reserved crumb mixture. Bake at 350 for 40-45 minutes or until crust is golden brown.
Labels:
Dessert recipe,
radio interview,
recipe,
Thing-a-day,
vegetarian recipe
Thursday, January 28, 2010
Pumpkin Cookies... Good Enough For Breakfast
My friend, Michelle, came over for dinner one Sunday evening with her kiddos. She arrived with fresh baked cookies. How she managed to make them with her two active kids (3 year old girl with energy to burn and 1 year old boy who has been walking since 9 months) I don't know. I know, I know, people ask me the same thing, but at least for now, my babe doesn't walk. Her son walks, runs, AND climbs! You can't take your eye off of him for a second. She never even sat down while eating my lasagna, she ate her whole plate while keeping him from near disaster. I am telling you all of this in the lead up to this cookie recipe so you know that you CAN find the time to make them. The day after Michelle's visit, while eating the last few cookies, Quin looked at me and said, "You should get this recipe from Michelle." Wise child...
These cookies are cakey and light. They have a nice combination of ingredients that you might normally not think about putting together. They are great for an energy pick-me-up. I have added them to my list of good nibblies to make for new nursing moms, who often can only grab quick, simple things to eat when their energy is waning...
Sweet Pumpkin Cookies
Adapted from Moosewood Restaurant New Classics
I use organic ingredients wherever possible
1 c. butter
1 c. natural cane sugar
1 c. pumpkin puree
1 egg
1 tsp pure vanilla
2 c. whole wheat pastry flour
1 tsp baking powder
1/2 tsp baking soda
1 tsp ground cinnamon
1/4 tsp ground allspice
1/2 tsp salt
1 c. toasted peanuts
1 c. raisins (I use CURRENTS)
1 c. chocolate chips (optional)
Preheat the oven to 375.
Cream together the butter and sugar, and then add the pumpkin, egg and vanilla. Mix until well blended. Sift together the flour, baking powder, baking soda, cinnamon, allspice and salt and then add to the mixing bowl. Stir well to form a soft batter. Stir in nuts, raisins and chocolate chips. Drop by rounded spoonfuls onto a cookie sheet, and bake for 10-15 min.
Labels:
baking,
cookies,
Dessert recipe,
food,
nursing,
vegetarian recipe
Friday, January 15, 2010
A Little French Canadian History Lesson - Pouding Chômeur Recipe
My husband is French Canadian. He is from outside of Ottawa, so he is Franco-Ontarian, but we did live in Quebec for awhile. In fact, our eldest daughter was born there, so she is actually Quebecois on paper. I was born in Minneapolis but my great grandfather on my father's side was French Canadian... you don't have to be French Canadian to enjoy this recipe, although if you aren't, you may have never heard of it. Read on for a brief history...
Pouding chômeur means pudding of the unemployed or poor man's pudding. Or as my husband's family calls it, which may or may not be politically correct, welfare pudding. It was created by Quebecois women, factory workers, in 1929, during the Great Depression. It used cheap, common ingredients, like flour, brown sugar, and water.
I must say this version is less than cheap with real maple syrup and a ton of butter. We used to live in Eastern Canada, where real maple syrup was cheap and available everywhere. In recent years there have been bad seasons and the price has gone up because it is more scarce. But, not as scarce and expensive as it is now that we live in Eastern Canada. An $8 can, 540 ml, is about $12 here. If you buy 12 cans in the East they are as little as $4.50 a can but here you can't buy in bulk. The cans weigh a ton, so having family ship them to us would be a bit ridiculous. So, we have come up with a way to ensure we never have to resort to Aunt Jemima. When friend or family come to stay with us, they bring use cans of syrup. It is their "toll" for staying with us, if you will. And we always buy 10 cans when we go home for a visit. It has worked well so far, I have only had to sell my blood twice to buy it here... ok, I am only kidding... but I probably would...
All this about syrup being scarce brings me to why I made pouding chômeur for the FIRST TIME the other night. To ration our syrup supply, we usually only use it on homemade crepes, pancakes, waffles, french toast, and with blueberries on our porridge. However, we have family coming this week! I checked our "stash" and since we still have 6 cans, I decided I felt ready to use some of our precious syrup in a recipe. In fact, the recipe ON the can. I don't usually try the recipes on the sides of boxes or cans, but I figured the maple people must have a good recipe for this French Canadian favorite. Plus, it is pretty darn easy. I was able to throw it together while cooking dinner, and it baked while we ate. I can't tell you how amazing the smell of maple syrup baking is. YUMMY! And you would have thought it was Andre's 5th birthday. He was giddy with anticipation. His mom called just before we took it out of the oven and he told her what I was making while practically beaming with pride. She wanted to know if it was her recipe... I will have to get it but she agreed the one on the can would probably be good. Andre took the pouding out of the oven and said it smelled and looked perfect. And it tasted amazing. Andre ate helpings that would not be considered healthy. And I just ate the last one while writing this. Trust me, this is worth trying. And PLEASE do not substitute fake maple flavored syrup (I don't think it would withstand the 5 minutes of boiling that is called for). If you don't have the real stuff, do a google search for a recipe that uses brown sugar. I used organic sugar, butter, and milk and unbleached flour.
Pouding chômeur de Grand-Mere Elmina
Off the side of a Quebecois can of maple syrup
Ingredients
- 1 1/2 c REAL maple syrup
- 3/4 c water
- 1 c sugar
- 2 c flour
- 1 c melted butter
- 2 tsp baking powder
- 1 c milk
Mix maple syrup with water and boil for 5 minutes. Combine flour, sugar, and baking powder with milk and butter. Spread dough into a tube or bundt pan (you can use a square or rectangular pan but the syrup may boil over while baking). Pour boiling syrup over dough. When the dough floats to the top of the syrup (about 5 minutes), place in 350 degree oven and bake until golden and toothpick in the center comes out clean (about 30 minutes).
Labels:
baking,
Dessert recipe,
food,
recipe,
vegetarian recipe
Tuesday, January 5, 2010
How To Use Up Your Leftover Holiday Cookies & Candy Canes? Make Ice Cream....
We do our best to consume all the holiday goodies that we make or receive, but there always seems to be an extra tin of Christmas cookies that are getting too hard to eat without dunking them in a hot beverage... and what to do with the 100 mini candy canes that were hanging on the tree? If you get to know me long enough you will find out why I am called "Princess Ice Cream". Pretty much everything in our kitchen is fair game for the ice cream maker. With a good base most anything can taste great as ice cream. If you have an ice cream maker you will find my recipes for chocolate chip candy cane ice cream, using an easy french vanilla base, as well as my Christmas cookie ice cream, using a sweet cream base, below. No ice cream maker? Just let a bowl or pint of your favorite vanilla soften, then stir in the crushed canes or cookies by hand and refreeze. Or use your blender to make a delicious shake.
Chocolate Chip Candy Cane Ice Cream
By Tiffany Teske
French Vanilla Base
I use organic ingredients wherever possible...
2 large eggs
1 cup of sugar
2 cups of whipping cream
1 cup 3.25% milk
2 1/2 teaspoons vanilla
Red food coloring (optional)
Chunky stuff to add to base...
3/4 to 1 cup crushed candy canes (I put mine in a ziploc and then beat them with a rolling pin)
1/2 cup semi sweet chocolate chips
Beat eggs with a whisk for one minute. Add the sugar and continue to whisk for 1 minute. Add the cream, milk, vanilla, and a couple drops of food coloring (if using) and whisk until combined. Freeze according to your ice cream makers instructions. Two minutes before the end of freezing, add you candy canes and chocolate chips.
Christmas Cookie Ice Cream
by Tiffany Teske
Sweet Cream Base
I use organic ingredients wherever possible...
2 large eggs
1 cup of sugar
2 cups of whipping cream
1 cup 3.25% milk
1 cup of an assortment of crushed Christmas cookie (use the same method as for crushing candy canes)
Beat eggs with a whisk for one minute. Add the sugar and continue to whisk for 1 minute. Add the cream, milk, and vanilla, and whisk until combined. Freeze according to your ice cream makers instructions. Two minutes before the end of freezing, add your crushed cookies.
Tada! Chocolate chip candy cane ice cream! I have a Cuisinart Pure Indulgence™ 2 Qt. Frozen Yogurt-Sorbet & Ice Cream Maker, which costs from $80 - $100 (in the US & Canada). It works great for the price. If you like frozen treats please keep an eye on my posts, I plan to feature a lot of ice cream, frozen yogurt, and sorbet recipes in 2010.
Labels:
Dessert recipe,
food,
ice cream recipe,
vegetarian recipe
Subscribe to:
Posts (Atom)