Showing posts with label handmade gifts. Show all posts

Thursday, November 17, 2011

2011 Kaleidoscope of Crafts at the Whyte Museum

Oh boy! What a week... probably the busiest week of the year for myself, my husband, and my daughter. For my husband, who is the GM of a ski resort, he is wrapping up projects for getting the season underway.


Quinlyn as a bumble bee...

For my daughter, she had her first ballet recital, with extra practices and two nights of performances. Isn't she sweet...

For me, I have been creating work for three gallery shows coming up in December. The last of that work must be sent off/dropped off on Tuesday. And, I have an art sale this weekend, another in early December, and I am going to have an open house at my home. Phew.

The upcoming art sale is called Kaleidoscope of Crafts, at the Whyte Museum of the Canadian Rockies, 111 Bear Street, in Banff. It runs tomorrow, Friday, November 18th, from 5:30 to 8:30 PM (the off to the Library Gala Fundraiser next door). The sale continues on Saturday from 10 AM to 4 PM.  Please come by if you can, it is a great place to find handmade goods for yourself or gift giving.


Be Still
Mixed media (wall hanging) 
by Tiffany Teske
$45


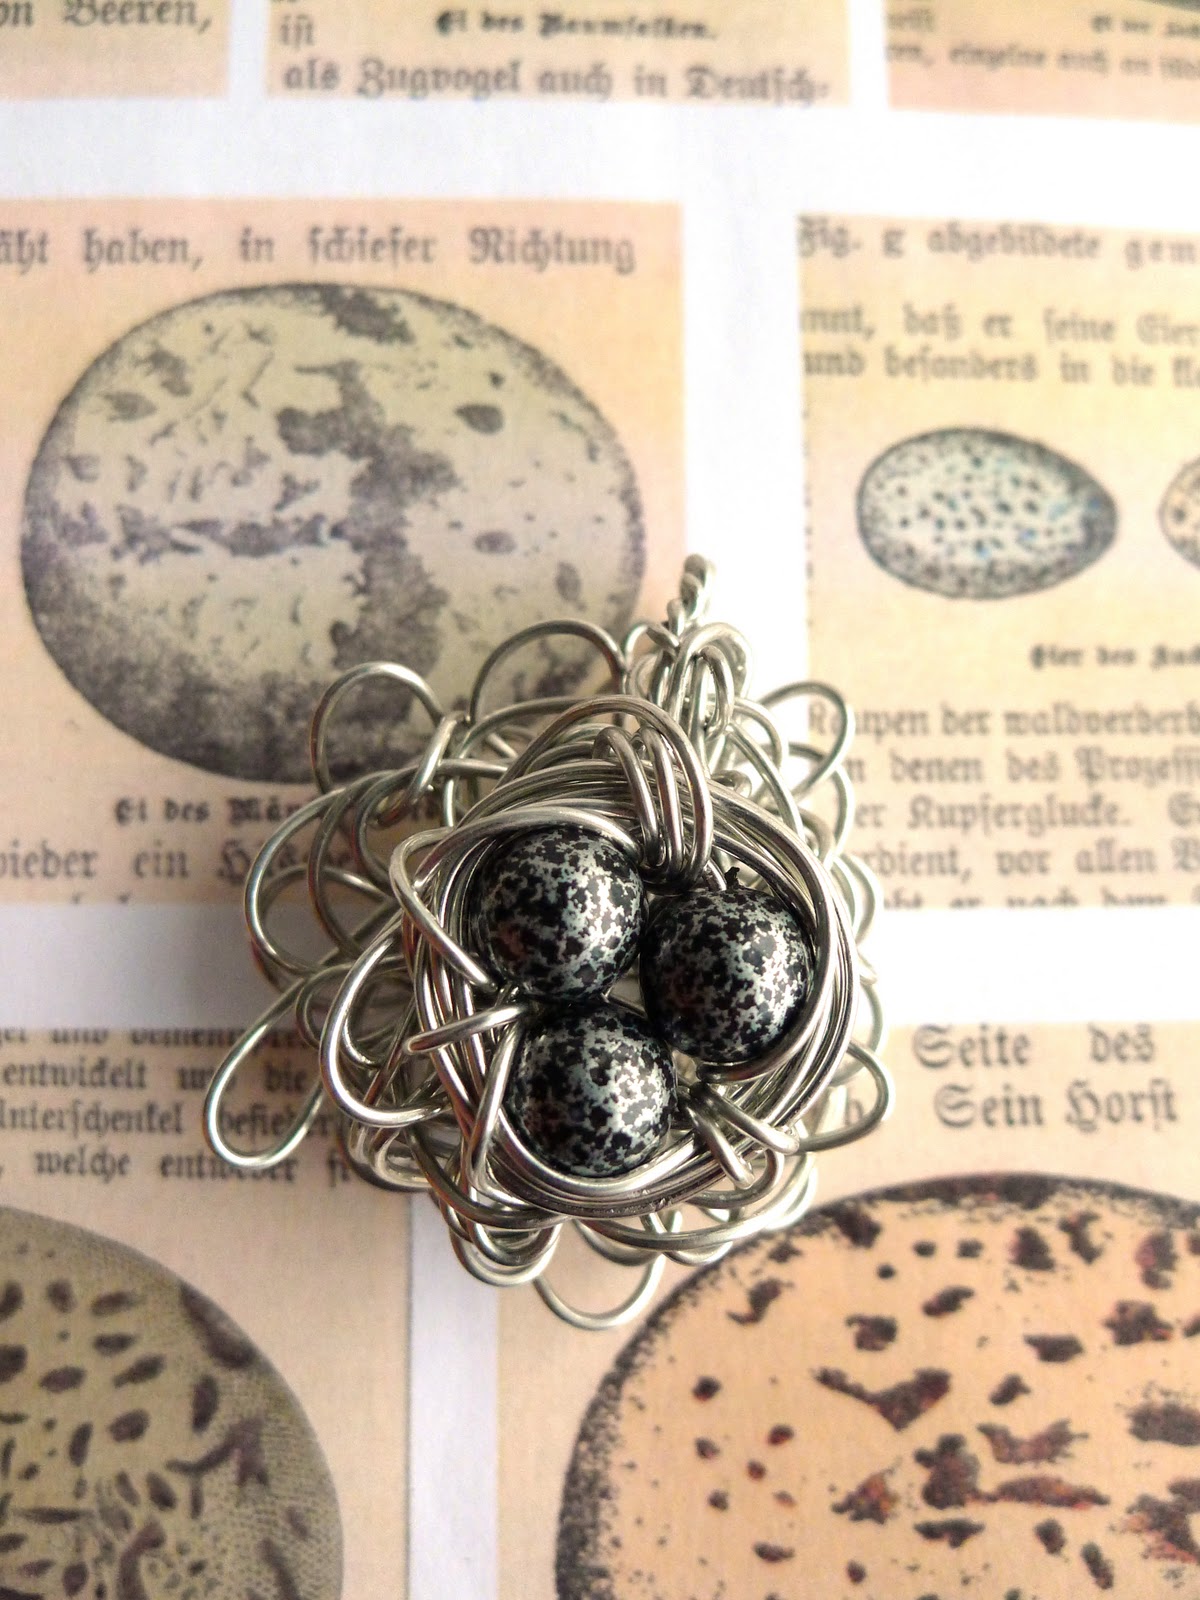
Bird nest pendant 
by Tiffany Teske
$30 (with chain)


You (are a beauty)
Mixed media (wall hanging) 
by Tiffany Teske
$45

Friday, October 28, 2011

Mountain Art & Craft Sale at The Banff Centre


Memories #1 
Encaustic Collage by Tiffany Teske

I have been gearing up all week for the 2011 Mountain Art & Craft Sale, this weekend, Saturday, October 29th, & Sunday, October 30th. This will be the second year I sell my work at this sale, which is in conjunction with the Banff Mountain Film & Book Festival. A great place to find unique Christmas items made by mountain artists from Alberta & British Columbia, the sale takes place in the RBC Lobby of the Eric Harvey Theatre. With close to 30 artists, you can find blown glass, paintings, fibre art, photography, clothing items and more, all made by hand. Come see me this weekend, if you can, and meet all the wonderful people who make this show a place that locals look forward to shopping year after year. Hours on Saturday are 11 AM - 7:30 PM and on Sunday from 11 AM - 5:30 PM. I will have encaustic collage, Polaroid transfers, silver spoon assemblages, bird nest & glass tile pendants, and magnets, available.


Glass Tile Ring by Tiffany Teske 


Ferns
Polaroid Transfer by Tiffany Teske

Bird Nest Pendant 
by Tiffany Teske 


Abundance
Spoon Assemblage by Tiffany Teske 

Wednesday, January 20, 2010

Part Two Baltic Amber Teething Necklace- How to Make One For Your Baby


I decided to make my daughter her amber teething necklace, which I first wrote about in post "Part One". If you don't want to make your own necklace there are several places you can buy one online. If you go to Etsy.com and search on "amber teething" many sellers pop up. If you would like to make one please follow the simple tutorial below. I bought my beads online from Amberizon. My beads came from Latvia and are good quality. It is possible to get fake glass beads if you don't have a reputable source. Amberizon has many kinds of beads to choose from as well as necklaces that are already made. I ordered raw baltic amber beads as these are said to have the strongest calming properties. The one ounce package contained enough to make one 12.5 inch necklace, with some left over beads to add to the length of the necklace as my daughter grows. The quality is great, the various colorings of the beads are beautiful, and the holes are quite uniform.
PLEASE NOTE: I ordered 1513, which from the photo looks like rusty rocks, but what I received are the beads you see in this tutorial. They do have a frosted unpolished look, but they vary in color and don't look like the photo on the Amberizon site...

How To Make an Amber Teething Necklace Tutorial

What you need:
1 oz of Baltic amber beads
1 magnetic barrel clasp
beading thread of your choice (I made this necklace twice before I opted for six strand embroidery thread because it is strong and makes good sized knots. Other people use silk thread or hemp)
beading needle
elmer's glue


Step One
Tie one end of your thread around the end of one part of your barrel clasp. Tie several secure knots. Glue the knots. I didn't glue the knots the first two times I made this necklace and both times the knots came undone at the clasp. When this happens, you have to retie the whole necklace because the thread is too short to just retie it to the clasp. Tres frustrating! If you know anything about crimp beads, as seen in this photo, you can use one, but in the end, I didn't.


Step Two
Slide a bead onto your needle, then down securely to the knots at the clasp, and knot behind the bead, then repeat until you have a necklace that is the length you want. Knotting after each bead serves two purposes; if the necklace breaks your beads will not fly all over the place and your child is less likely to choke on a bead.


The best way to get a tight knot, right against your bead, is to make your knot, then slide you needle halfway into the knot (see photo above), then pull the loose thread coming up from the knot tightly down against the needle against the bead (see photo below). Slide your needle out as you continue to tighten. You want your knot to sit firmly next to your bead but not pull into the bead. For more on basic beading using knots see this video.


Step Three
Repeat step two until you get to the length you want. Now you can tie on the other end of the barrel clasp securely to the end of the necklace and glue the knots. Once it has dried, put your necklace on your baby and admire it.

To Care For Your Necklace
Some people leave their child's necklace on all the time but I take my baby's off when I bathe her. Do not wash your necklace with soap, which will leave a residue, hindering the healing properties of the necklace.

Wednesday, December 30, 2009

Our Quaint Little Gingerbread House

We are still in full on holiday vacation mode around here. We are slowly ticking off the projects we have been too busy to get around to. It is hard work to get to all the fun projects we set our sites on, but someone has to do it, sigh... We hope that you, too, have had sometime to relax and rejuvenate over the holidays. There is still time to turn off the tv and work on something you have always wanted to.


This is what inspired us to make our own little gingerbread house. It is the Christmas card we received from Grandma Lise & Papa Paul. It IS inspiring...


I truly can not remember if I have ever made a gingerbread house. I am thinking that means I have not. I remember witnessing many wonderful gingerbread villages and displays but not having made one. While I am sure I can bake gingerbread, I decided that for this year, it would be less daunting to go for a kit. I am not a kit kind of girl, but I must say that since I was working with a three year old, it was nice to just open the package and have everything we needed right there, including the icing in a bag that I just snipped the end off of (it somehow went missing for this photo...).


A blank canvas...


My lovely assistant...


Our back wall...


One side...


And the front of our house, complete with happy gingerbread man (wouldn't you be happy to be cover with sprinkles?!).

This was so much fun and the results have inspired us to keep practicing and someday maybe we will build a village. Or at the very least have a little decorating party with our friends. Score one for the kit! And it was nice to finally have something to do with our stale bag of marshmallows...

Tuesday, December 29, 2009

Our Favorite Handmade Christmas Gifts

It is always nice when someone remembers you during the holidays. It is extra special when someone makes you something, whether it be food for nourishment, a clothing item to keep you warm, or a toy to feed your imagination. We were lucky to received many handmade items this year...


Handknit Gloves
I have no idea when Aunt Julie took up knitting, or if it is something she used to do and started to do again, but I am sooooooooo impressed! I have written here before that I leave knitting to the experts. These are beautifully made and one of our favorite color palettes. Thanks, Aunt Julie!


Coconut Bites
I have a weakness for coconut cake and these little bites are amazing! I have asked for the recipe, as we ate them all in a couple of days. Thanks, Annie!


Felt Baked Goods and Handmade Apron
I got these for Quin from a friend who makes them. Quin loves both the real kitchen and her play kitchen. I am completely enamored with felt food and plan to start making it. These are so well done and we have already had a birthday party and a dinner party where they took center stage. We will get a lot of use out of these. If you want to know more, please go to Anna Laura's Etsy shop. As you can see from the photo below they came in real baking dishes and were eco-wrapped in reusable tulle. The goodies will go well with my favorite gift that Quin received, a handmade apron. I could tell right when Quin opened it that someone had made it. Then, I found the business card in the pocket. I can't take my eyes off of it, it is so pretty hanging in our kitchen. If you are interested the only contact info I have for the woman is an email address. Leave a comment and I will get it to you... Thank you, Grampa Wally, Aunt Tillie, & Gramma Kiki!


Pendant Made from Poppa's Tie Tack
This is the most thoughtful and surprising gift I received. My mother's father, the only grandfather I ever knew, passed away in August. When we were in Minneapolis for the funeral, I did take some of the items in my grandfather's jewelry box, but have yet to decide what to do with them. My Aunt Jackie took one of his tie tacks and had it made into a pendant for me! It is very thoughtful and came with a touching handwritten note. I will keep this Tiger Eye pendant close to my heart, as she suggested, and the note will live with the pendant, and it will all be handed down to my girls. Thank you so much, Auntie!


Glass Tile Pendant Featuring Original Art
My friend and fellow artist, Serena, made both this pendant and the art work on it. It was a pleasant surprise in her very adorable Christmas card. I love art you can wear. If you like this, see her Etsy shop, HeavensEarth.


Eco Friendly Recycled Notebooks
My Secret Santa, a fellow team member on the Alberta Team for Etsy, sent me these wonderful notebooks. It was perfect timing as I need to make some goals for next year and I prefer writing on paper to typing on my computer. They are available from Lisa Smithson here. I am starting to feel like an advertisement, but I think it is pretty cool that I know so many people who sell their great work and I like to pass that info on. As a professional artist I know that word of mouth is a wonderful thing.


Cookies for Santa and His Reindeer
We gave mostly handmade gifts this year, but one of my favorite is the cookie plate and note that Quin put out for Santa. We kind of down play the whole Santa thing, with one visit to see him, and then mostly talking about him on Christmas Eve. Quin is three and a half and she is pretty balanced as far as knowing the holidays are for family and that we do get some gifts from Santa. She was so excited this year! It made my heart swell when she wanted to give something to Santa. And it was adorable on Christmas morning to hear her coming down the stairs behind me asking "Do you think Santa took all the cookies to share with his reindeer and Mrs. Claus?"

Thursday, November 19, 2009

Canmore Christmas Artisans’ Market 2009 at Canmore Collegiate High School


I am excited to be selling my photography and art at the Canmore Christmas Artisans Market this year. It is a wonderful way to do all of your Christmas shopping while supporting the handmade movement while not even leaving the Bow Valley!! I heard there are over 75 vendors this year... I will have items from $1 to $100, ranging from matted photographs and Polaroid transfers to magnets, pendants, pins, single and card sets, and postcards. There is something for everyone. Plus, if you come by my booth I will let you hold my little cherub baby :) Come and have some fun and read on for more details...

From the Canmore Events Calendar...
Canmore Christmas Artisans’ Market 2009
Saturday November 21 and Sunday November 22, 2009
10am to 4pm
"Treat yourself to something wonderful, or finish your Christmas shopping in a single day. Join over 60 artisans and artists from the Bow Valley and surrounding areas, as they present their beautiful, handmade creations. This year, the 14th annual Canmore Christmas Artisans’ Market will feature luscious art for the home, personal treats, and traditional crafts. We’ll have blown glass, turned wood and metal work. There will be a wide selection of pottery, jewellery and paintings. Indulge in chocolates, home made treats and luscious bath and body products. Snuggle up with cozy hats, slippers, gorgeous clothing, teddy bears and the cutest stuff for baby. From $5 to $1000, there’s something for everyone. Admission is $2, in support of the Canmore Preschool. Kids free. A light lunch is also available, featuring specialties from a number of local restaurants, along with hot drinks and the always popular bakesale table. We're at Canmore Collegiate High School, 1800 8th Ave."

Tuesday, October 13, 2009

Alberta Art Days - DIY with Linda Bodo at the Banff Public Library


I have a four month old baby. She is the most laid back little angel you ever could meet. Her big sis was much the opposite as a baby, although at the time, her being my first, I had no idea. However, I now know how different one baby can be from the next. I nursed both kids on demand. With Quin, I spent most of my time sitting down and nursing. I could not leave her with my husband even to grocery shop. I nursed her for 2 years and 3 months. Elle on the other hand put herself on about a 3 hour schedule from the get go. If she eats more often than that she spits it up. So, aside from growth spurs and occasional cluster feeding, I can leave Elle with Andre and Quin and from time to time I get to experience a bit of art and craft making outside of the house.


During the weekend of Alberta Art Days I took part in a FREE DIY workshop at the Banff Public Library (they offer all of their programming and library membership for FREE). The instructor, Linda Bodo, is from Edmonton. She has been compare to Martha Stewart but she had a reduce, reuse, recycle mentality. Her motto is "Repurpose, Recycle and Redefine your Leisure Time.” The projects she presented to us were mainly for the garden and entertaining (lots of good ideas for using wine corks!!). The project that we made during the class was a beautiful moss-lined hanging basket.


I wish I could find this project for you online. Linda has a great website that does offer many of her projects on it. Check it out for some inspiration. She gave each of us a copy of the spring 2009 issue of Enjoy Gardening, which has the hanging basket project on page 93. It may also be in her new book, Enjoy Life Outside, which features 15 of her outdoor projects.


I was so happy with my basket that I look forward to making some more in the spring to hang in our little back patio/garden. I will write a tutorial then, along with photos, but if you have any questions about it in the meantime feel free to leave a comment here or I would urge you to contact Bodo through her website. She is very approachable. I had a wonderful time at her workshop and hope to see her in Banff again. Or maybe on her estate, I hear it is gorgeous... I am sure it would be an awesome place for me, a photographer who loves flowers...

Tuesday, September 15, 2009

Another Handmade Gift to Cherish - A Quilt from Great Great Aunt Rosann


My mother recently sent a box of goodies for Quin and Emmanuelle. Most of the items for Quin were clothes and shoes for starting preschool. Quin was thrilled! I don't know what we would do without Grandma. Not that we don't have plenty of clothes but Grandma has good taste, loves to shop, and she buys new items that both Quin and Emmanuelle will be able to get some wear out of, while I go to the consignment or thrift shops and gladly take all my friends hand - me - downs. Quin enjoys all of it, and I have taught her to appreciate both the old and the new.


Anyway, I just went off on a tangent... back to the post. My mom had mentioned that my Great Aunt, Rosann, had given her a quilt to give me for Emmanuelle. Inside the box was this quilt. I loved it at first sight but fell even deeper in love when I read the note from Rosann. You can read it below... just click on the image to make it larger...


This quilt was made and ties by my Great Aunt Rosann, who is my children's GREAT GREAT Aunt, along with women who knew my Great Grandmother, Gerda, who was the GREAT GREAT Grandmother of my children. That is so awesome!! It is truly something to cherish. We will likely use this quilt everyday, as I am one of those people who thinks you should use your good stuff, not pack it away from the light of day. Not to mention that in the note Rosann says she hopes we "enjoy using it." This quilt will keep us warm, be used to make a fort, will have dolls wrapped in it, and in fact just yesterday it was on the floor on top of some other blankets and Quin was using it as a ship. She had all her little stuffies and doll friends on it, it was adorable. We were able to see Rosann at the funeral and to thank her in person for her thoughtful gift.

Saturday, September 12, 2009

Little Sapling Toys - A New Gift Favorite


Image by Little Sapling Toys

I dream of a world where all of my children's toys are made of wood or some other sustainable product that is non toxic. A world where there is no such thing as phthalates, lead paint, or any of the other awful things parents need to make sure is not in their kids' toys. And how are we supposed to know for sure they are not? I know that many large name brand toy companies have been recalling toys left and right, in fact the last few years are the worst on record for recalls. I don't trust these companies to tell the truth. And then there is the worry of whether or not the toys are safe as far as choking hazards or injury. I am not generally a worry wart but we are talking about TOYS that my kids play with. When did play time become so worrisome? I do not buy any name brand toys, but we have plenty of family members who do. I wish I could get them to understand the problem but they pretty much just roll there eyes and say I am over reacting... however, I know I am just better informed. There are many great websites out there that test toys for safety. One of my favorites is HealthyToys.org.


I always strive to buy handmade items. I often buy them on Etsy since I have a shop there and like to support those in the community. My youngest daughter is starting to teethe (both my husband and oldest had teeth at three months!). I recently got rid of all of our plastic teethers. They give me the creeps. Who would want to bite and suck on plastic? Maybe I am the only one who is sensitive to the smell of plastic but I certainly would not want it in my mouth. I wanted to find some nice wooden teethers. And as fate would have it, as it usually does, I happened to open an Etsy email about shops offering free shipping. This is where I discovered Little Sapling Toys, and I am so glad I did! As you can see from the photo above we ordered just in time...


I ordered a set of three grasping and teething toys, a square, circle, and triangle set. The price of $22 is quite reasonable especially with free shipping to Canada. But what really sold me was that Little Sapling Toys plants a tree for each item sold. Wow, that is incredible since they have had 1,080 sales to date.


I was already so impressed by the company when I ordered that I wrote them a little note about being excited to receive the teethers. They got back to me right away with a nice little note from Kimber. When the package arrived from Idaho, which it did very quickly, I liked everything about it, from the simple gift box, to the wood shavings for packing materials, to the little card with wood information and care instructions and an insert about planting a tree for each item sold.


My daughter liked her teether right away. She is quite little, just 3 1/2 months, so she is only able to hold the triangle right now, but we gave the circle to a friend's 6 month old and she can grasp it very well. Her mom was very happy we gave it to her as she said her husband "thinks all of her toys should be made of wood".


I can't wait to order more products from Little Sapling. They also have stackers, rattles, bowling sets, blocks, peg boards, storage containers, building sets, rocking horses, and driving toys. OOOOOOHHHHHHHHHH! So many gift giving possibilities. All finished toys use a local beeswax and organic jojoba oil finish but you can just leave a note at check out to receive an unfinished toy. If you have kids or give gifts to children and you worry about the toys on the market check out Little Sapling Toys for a great product and good buying experience. You can also check out their blog here...


(Just had to include this silly image of Emmanuelle getting the hang of her teether.)

Friday, August 21, 2009

Birthday Gifts You Can Make - Part One - Play Dough


I have been meaning to write this post for ages, and now that we are off to a birthday party tomorrow and we have been making these gifts the time is right...

We received an invitation to Aven's birthday party one day when we were out. When we walked up to the front door we saw a crayon colored invite scrolled around Quin's forgotten sunglasses, stuck in the door. What fun to find an unexpected invitation for "Casual Backyard Fun"! The thing that most struck me about this invite was the line that stated "Gifts are OPTIONAL & stickers, pencil crayons, or little Dollar store balls, etc. are very welcome - save yer $". This was such a nice and refreshing sentiment. Since we usually make the gifts we give, it made me feel that our effort will be accepted and appreciated.

So, today, we got to work. The first thing we made was play dough. We made two batches, since Quin was in need of some fresh dough. We hope Aven loves it as much as we do.

I was given this recipe by a friend who works in a day care and it brought back the days in high school when I worked in a day care center...


Play Dough
2 1/2 cups all purpose flour
1/2 cup salt
1 Tablespoon Alum Powder (I buy it in bulk at a health food store)
2 cups boiling water
3 Tablespoons cooking oil (vegetable)
food coloring

Mix dry ingredients. Add water and oil. Mix well until it forms a dough. Divide into however many ball you need for the number of colors you want. Knead dough balls until they no longer sticky and add food coloring according to the colors you want to make.

I usually make 4 - 6 colors. There are mixing charts on the back of the food coloring package. Here are some colors to get you started...

Pink - 1-2 drops of red
Orange - equal parts red and yellow
Purple - equal parts red and blue
Black - 3 drops red, 3 drops blue, 2 drops green
Brown - 2 drops green, 2 drops red, 6 drops yellow
Turquoise - 1 drop green, 3 drops blue
Lime - 1 drop green, 9 drops yellow

Here is an extensive chart from a cake decorating site here.

My goal is to experiment with nature dyes one day.

We like to make a rainbow of play dough colors for our special friends. We package them in reusable plastic containers that can be used again. We include a copy of the recipe so that the child and their parents can make more play dough. I am looking into glass containers we can give play dough in. I was thinking of canning jars...

Stay tuned for Part Two.

Sunday, August 16, 2009

Hand Knit With Love


Sometimes I wonder if I am the only young person on earth who really loves the hand knit sweaters that grandmothers and great grandmothers knit for new babies. The reason that I wonder is that people would bring them to my friend's consignment shop and she would either not take them or when she did put them on the floor they never sold. In the end I would buy them because I just love how soft they are, they were often brand new, and I knew that they were made with love, and how could I let them be given back to the consignor who didn't want them or to the charity where my friend donates the unsold clothes that people don't want back. I really do like to dress my child in these cozy creations that the women in these families made for their loved ones. My husband did point to the fact that they are old fashioned when I asked him why most people don't seem to like these items. I agree, but of course, that is part of why I like them. And they always, always looks cute once they are on a baby, and often, someone will ask me where I got them or if I made them. So, why not give these little treasures a second look when you see them at thrift stores and consignment shops? You may decide you love them, too. Just think, you will be putting something to use while keeping the energy of handmade going...