Showing posts with label thrifted. Show all posts

Wednesday, October 20, 2010

Vintage Finds - Embroidered Tablecloth


I have a weakness for handiwork, especially embroidery, especially linens (tablecloths, curtains, towels, napkins, pillowcases). I can't seem to pass them by. Someone took the time to stitch all of these stitches and make something lovely. I don't care if their stitches are perfect on the back. Or on the front. I am drawn to the fact that it was done by hand by someone who cared about it. Even if it was machine embroidered I don't mind as long as it was made by someone who was not mass producing them in a factory. This is one of my favorite tablecloths in my large collection. There is a bird on each corner. It fits my daughters' little tea table perfectly. Cheep, cheep...


Sunday, March 21, 2010

Making an Old Sweater New Again


I love hand knit sweaters, especially for kiddos. The bright colors, fun motifs, and love that go into the creation of them make me happy. The only issue I sometimes have are with the buttons; I never seem to like the ones the knitter chose and they often seem to be smaller than then the button holes so they pop open all the time. One UFO (Un-Finished Object) that has been in my sewing pile for a LONG time is this adorable sweater. Quin is now the perfect size for it but it was unwearable with the present buttons.


I started thinking about what kind of buttons I wanted a couple of weeks ago, then while in line at the local fabric store, Sugar Pine, I found them.


These yellow hearts are super cute and the orange embroidery floss makes them sing. Sweater - $6 + Buttons $3.25 = $9.25. I challenge you to take an item of clothing that you don't like and to change things about it that might make you love it. I tend to like anything I have personalized better then something I haven't. Now I have one more project down, and a delighted daughter to boot.

Friday, March 19, 2010

Tutorial - Camera Strap Cover - Revamp an Old Camera Strap Using Thrifted Upholstery Samples and Embroidery


You may or may not know that I hold two University degrees in photography (one as the major and the other as a minor to studio art). I am an artist, crafter, writer, and all around creative, but I usually say I am a photographer first when I am asked what I "do". Six months after I had my first child we moved across the country for my husband's job and I pretty much gave up my commercial photography business. I specialized in shooting black and white film images at the homes of my clients. I shot enough sessions that I would burn out motors and shutters so I would buy "new" used bodies for back ups. Last month, I started going through all of my analog camera equipment. I have 7 SLR bodies, from good working order to parts cameras, that I needed to test. I have gotten through 5 of them, with some of the results here. I love and miss shooting film and now that I know which cameras to keep, I will probably be doing more of it...

This brings me to the project. In the course of going through all my gear, I decided it was time to make my camera straps pretty. My recent sewing class has inspired me to find new sewing projects and a wide, boring, black neoprene camera strap volunteered to undergo a make over. This project can be adapted to your vision. The sky is really the limit on fabric and embellishments. You can even hand sew this project entirely if you don't have a sewing machine. If you don't have a camera strap you can find many boring and suitable candidates at the thrift store. I will walk you through a few simple steps and then off you go...

How-to Cover a Boring Camera Strap to Make it Pretty...

What you need...

- Wide camera strap
- Fabric, I used upholstery samples
- Sewing Machine and thread (or needle & thread to hand sew)
- Items for embellishment like buttons & embroidery thread


1) Using your camera strap to measure against, decide where to cut your fabric. My piece had some grommets I cut off. Here you can see I pinned the fabric up against the edge of the strap. You will need to make a tube around your strap that fits snugly. I think I only had about 1/2" of fabric beyond my strap on each side (so cut fabric 1" wider than strap).


2) If the ends of your fabric are not finished, finish them now. My sample had finished ends which I just turned under when I put my cover on. It was too short, however, to be used as one piece, so I did sew two pieces if it together. I didn't bother to line up the pattern because I knew I would embellish one end... I sewed the buttons where my obvious seam from joining the two pieces is.


3) You can embellish the top front side of your fabric (the part you will be able to see) now or at the end. I actually did all of my embellishing at the end, when my cover was already on, using a curved tapestry needle. I would suggest doing the embellishing before if you want to remove the strap (since I may have sewn through parts of the strap). I just embellished one end. I did it on the end because I knew that part would show while wearing my camera. If your hair is short you could embellish the whole strap, since it won't be hidden under your hair. I cut a flower and paisley from my fabric and appliqued them on, using embroidery thread.


4) Put wrong sides of fabric together, pin, and sew, using a straight stitch, reinforcing each end by front and back stitching. I used a 1/4" seam allowance. Turn your tube right side out.


5) Slide your cover onto your strap. If you already embellished, you are now done, If not, go ahead and do it now.


Voila! Now go, shoot something, and wear your camera with pride...

Sunday, March 14, 2010

Tutorial - How To Make Baby and Child Leg Warmers, and Adult or Child Arm Warmers With Thrifted Scarves

Warning: Lots of cute photos of kiddos to come... all images by Tiffany Teske


Baby Leggings


Child Arm Warmers


Baby Leggings & Child Arm Warmers


Adult Arm Warmers


Child Leg Warmers

I have had the idea to make these for several months now. I have been taking a sewing class, one of several I have taken over the years, and my favorite part about it is that I am given THREE UNINTERRUPTED HOURS to work on whatever I want. That is about how long it took me to make two pairs of baby leggings, for my babe and for a gift, and a pair of leg warmers for my daughter, who is almost 4 years old.


Front of Child Leg Warmers

I love to work with thrifted materials. Some are given to me and others I seek out at the thrift store, yard sales, and rummage sales. There are so many possible places to find fabrics that I rarely buy new fabric. I always keep an eye out for materials that I can use in the future, especially vintage prints. This allows me to amass a stash so that when I have time to work on something I just go "shopping" in my studio and I usually find what I am looking for. I also stockpile materials for when I teach recycled art and craft classes to adults and children.


Back of Child Leg Warmers + Cute Baby

The two scarves I used for these projects came from Victory Thrift Store. They normally sell scarves for $2 each but they often have a buy one, get one for 99% off sale. It cost me $2.03 for these scarves. They are very different from one another. Since I had never made these I didn't really know what to expect when sewing the scarves. I looked for stretchy scarves but all scarves are different. I spent a long time touching, stretching, and anticipating. The important factor is that they stretch out and then back into shape. They need to stretch enough to go onto the baby or child's leg and then to stay there. As mentioned in the title, if they are long enough these can also be used a adult arm warmers with no modifications.

How To Make Baby Legs, Child Leg Warmers, and Adult Arm Warmers With a Thrifted Scarf

This is a simple project for even a beginner. The only trick is selecting the right scarf. Read through all of the instructions for tips on this and rest assured this is an easy project that will leave you feeling accomplished in the end.

What you will need:
- a stretchy scarf
- a sewing machine (or Serger if you have one, I don't)
- coordinating thread
- needle for stretch fabrics
- pins
Optional items for embellishment such as vintage buttons, embroidery thread, ribbon...


One of my two scarves before I started cutting...


Now with the ends cut off and cut in half.


Zigzag stitch at the bottom and top of one legging. I didn't fold this edge over and stitch since this material wouldn't hold like that. I just stitched around near the top.

Step One
Decide on the length you want the leggings to be and then decide how to cut your scarf. It will completely depend on your scarf and your needs. You will need about a 1/4" seam allowance on each end. For my fuzzy rainbow leggings I was able to get two pair from the one scarf, meaning I cut four pieces from the full length and I used the full width. For my argyle ones I cut the scarf in half for one pair and I guesstimated on how tight I wanted them. I did end up cutting a bit of the width off, so I used 3/4 of the width. Where and how you cut will depend on the fabric. For the stretchy fuzzy scarf I needed to sew a line, using zigzag stitch at each end of a piece BEFORE I did any cutting because the knit fabric unraveled once cut. This is all I did at the top and bottom to finish those edges. For the argyle fabric I could cut without any fraying.

Try stretching the ends of the scarf to see if they are finished, they probably are if the scarf is knit. The way they are finished may make them too tight when folded in half, around the upper leg, so it is best to cut the ends of the scarf off in this case and re-sew a zigzagged line across the bottom and top of your two pieces, stretching a bit as you sew. If you have a serger, use it. I had my instructor serge the second pair of rainbow leggings so I could see if there was a difference in quality. I think hers are more durable but my sewing machine and zigzag stitch did fine. The only thing I can say about sewing such a "hairy" fabric is to keep a seem ripper handy for when you get stuck. You will never notice where you have used it in the end. I had smooth sailing with the argyle pair.


Piece with finished ends folded in half and ready to stitch up the side.

Step Two
Now that you have your pieces, you are ready to fold them in half, right sides together, and to zigzag stitch up the side. My knit scarf didn't have a right and wrong side.


Stitched

Step Three
Turn your fabric tube right side out. I am finished with the rainbow pair at this point. I need to stitch the top and bottom edges of the argyle pair. I folded the fabric, which stayed without pinning, in about a half inch, and zigzag stitched around, near the edge. They are now complete and can be worn as arm warmers or leggings (see photos below).


Finished top edge.


The same arm warmers as above, now on my daughter...


Embellish


Some Possible Materials

You can embellish these leggings/warmers whatever way you chose. The sky is the limit. I decided to use vintage buttons, embroidery thread, ribbon.

Threading the ribbon from the "wrong" side out...

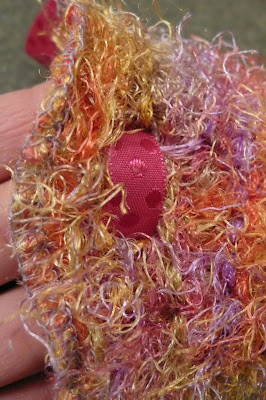
Because the rainbow leggings have such a loose knit I was able to thread the ribbon through them easily. I started in the middle of the front of each one (turning them so the seem would be inside the leg) and threaded from the inside to the outside, so there would be enough ribbon on the inside so that I could sew the button to it from the outside.


The "right" side of the legging with the ribbon coming out from the inside.


Front

Next I sewed the button onto the "hidden" part of the ribbon, using embroidery thread. In my mind, this is the front of the legging but of course could be the back...


Back

I continued to thread the ribbon in and out of the legging until I got to the middle part of the back. I then brought the two sides of the ribbon out the same hole and tied it in a bow. Voila!

If you have any questions or comments about this project please leave them here. I would love to know if I have inspired you to try this and to see your leggings on your blog. I will now leave you with a few more images of the leggings in action...


Friday, October 16, 2009

Better Ice... Just in Time for Winter


In the on going effort to rid our home of plastic, something that will probably never be completely accomplished, I looked to my freezer. We don't have an automatic ice maker, just one of those annoying white plastic cube trays that eventually will crack and be rendered useless. I decided to look for an alternative and while surfing the internet I was delighted to suddenly remember that when I was a child (born in 1973...) there was such a thing as metal ice cube trays. I found a few for sale but for about $20 on average. I decided to keep my eyes peeled and found two at a local sale of all things vintage (more on this amazing sale soon...) for 50 cents each! They are so cool. And so sleek. And so functional, and obviously built like tanks because they are still around. I made the first batch of many lovely cubes to come. My hubby beat me to the fun part of pulling the lever and breaking up the cubes, but I will be sure to do it next time. He says they work like a charm...

Monday, March 16, 2009

AlterNation - Wicked Book Deal


Ok, so it just dawned on me that I could write the next four posts on current books I am reading, and I just wrote the last post about a book. This blog could be called Art Food Books & Motherhood... but that would just be getting too long wouldn't it?


I wanted to bring to your attention a wicked deal on a book that I have not read but will soon have in my hands. I opened my Craft Daily Newsletter yesterday, and the first blurb was about the book Alter Nation by Shannon Okey and Alexandra Underhill. It is a must have for anyone who likes to "transform, embellish, and customize" their clothes. This is something I used to do, way back when, and something I would like to do again, now that my sewing machine and I are back on speaking terms. Now that I am a mom, the ultimate goal would be to do this with kids clothes, but I am getting ahead of myself... This book presents 30+ project ideas for you to try. Shannon and Alexandra are currently offering signed copies of their book for $8.00!! BUT WAIT! Use the code, craftzine, at check out (Paypal or Google) and you will received $1.50 off! AND SHIPPING IS FREE!!!!!!! So, of course, being a DIY book junkie, I had bought a copy of this book before I even knew what happened. I have received a nice email from Shannon, and the book will be on the way soon. I can't wait to get it in my hot little hands, and to let you know more about it.


Have I peaked your curiousity? You can check out the Alternation Blog for more info as well as Stitch Cleveland, where Shannon has a studio. This post about the book has some great images from the book, which illustrate how you can transform your thrift store finds.

AlterNation - Wicked Book Deal


Ok, so it just dawned on me that I could write the next four posts on current books I am reading, and I just wrote the last post about a book. This blog could be called Art Food Books & Motherhood... but that would just be getting too long wouldn't it?


I wanted to bring to your attention a wicked deal on a book that I have not read but will soon have in my hands. I opened my Craft Daily Newsletter yesterday, and the first blurb was about the book Alter Nation by Shannon Okey and Alexandra Underhill. It is a must have for anyone who likes to "transform, embellish, and customize" their clothes. This is something I used to do, way back when, and something I would like to do again, now that my sewing machine and I are back on speaking terms. Now that I am a mom, the ultimate goal would be to do this with kids clothes, but I am getting ahead of myself... This book presents 30+ project ideas for you to try. Shannon and Alexandra are currently offering signed copies of their book for $8.00!! BUT WAIT! Use the code, craftzine, at check out (Paypal or Google) and you will received $1.50 off! AND SHIPPING IS FREE!!!!!!! So, of course, being a DIY book junkie, I had bought a copy of this book before I even knew what happened. I have received a nice email from Shannon, and the book will be on the way soon. I can't wait to get it in my hot little hands, and to let you know more about it.


Have I peaked your curiousity? You can check out the Alternation Blog for more info as well as Stitch Cleveland, where Shannon has a studio. This post about the book has some great images from the book, which illustrate how you can transform your thrift store finds.

Tuesday, August 19, 2008

Click Here Radio Program TOMORROW

I just got off the phone with Mitchell Caplan, the host of Click Here, an interview based radio show on CHUO-FM89, that focuses on the arts and community issues in Ottawa, Ontario, Canada. He has a spot on his program tomorrow, and he would like me be his guest. We will talk about Wanderlust, the show I currently have up at D'OMMA Gallery. I have been on his program before, I think it was back in 2005, for the Red Salon Artists first show. Mitchell has a great voice and is very good at what he does. I am excited to speak with him again. I didn't ask him how he heard about the show. I have not had time to do much PR but I did send an announcement to Art Engine in Ottawa yesterday, I am glad I did. I will be on starting at 3:20 PM Calgary time or 5:20 PM Ottawa time, tomorrow, Wednesday, August 20th. To have a listen go here and click on Listen Live or Listen Now.

Tuesday, July 15, 2008

Wanderlust


This is the first mixed media piece in my series called Wanderlust, which is a solo show I am having at Ottawa Gallery D'OMMA in August. I also got the artist statement written today...

Artist's Statement for Wanderlust:

Long before talk of fossil fuels and the environmental footprint of travel dominated the news, people have had the need to explore their surroundings and beyond. This wanderlust is practical for some, while for others it is about adventure, curiosity, and a need to have new experiences. The reason that people travel, both now and in the past, are many. I seek to explore these reasons in my newest body of mixed media work. Using recycled materials, including Polaroid transfers made for past exhibitions, I have created a series of collages on 12 1/4" by 12 1/4" thrifted record album jackets. As someone who suffers from a serious need to roam and to learn new things, the concept of wanderlust appeals to me. As someone who is currently grappling with the present state of our world and how best to explore it while keeping my enviromental impact to a minimum, I am presenting an alternative to actual travel for the viewer. My hope is that these works will provide you with a green way to wander, by using your imagination in collaboration with my visuals.

To learn more about my commitment to create art using only recycled and thrifted materials please go to my other blog.

REDUCE REUSE RECYCLE UPCYCLE REPURPOSE THRIFT CREATE