Tuesday, April 28, 2009

Feature Article in PhotoEd Magazine


I have long been a fan of PhotoEd Magazine. I was first alerted to this publication when my friend and fellow photographer, Angela Marklew, was featured in their book arts issue. I have submitted to them twice, and the first time I had one of my Polaroid transfers featured in their Reader's Gallery. I blogged about it here.

The second time I submitted, they were looking for portfolio submissions by photographers who were working in historic processes. I contacted Felix Russo, the magazine's publisher, and asked if Polaroid processes would be considered. He was looking for photographers working in all alternative processes and asked me to submit some of my tranfer work. I sent him two bodies of work, my Seeing Double Polaroid Spectra Series, and Personally Created Iconic Memories (which I need to upload to Picasa or Flickr...). Six images from Iconic Memories were selected to appear in the magazine and I was asked to write about the series. I received both a contributor's credit on the magazine's masthead, as a writer, and then had my article in the contents and in the magazine.

No matter how many times I have seen my work in print, as a professional photographer, it is always exciting. I am thrilled to be in full color, across two pages, of this wonderful Canadian publication. And especially to be in THIS issue. It is the 25 issue, called Photography Revisited. It features many talented photographers working in processes from albumen printing to cyanotype toning to pinhole and toy camera photography. I have read about half way through the issue, and I can't wait to get online to check out even more of these artists' work.


Here is Mr. Russo's editorial for this issue:
"With this issue we celebrate a milestone, our 25th issue — a good time to reflect on what photography is and why photographers are fascinated with their art of choice. PhotoEd has always considered that photography is not a singular activity with a uniform approach. In fact, one of the lures of photography is the almost infinite paths that it offers to anyone setting out on a journey of photographic exploration. The sum total of all photographic discoveries, inventions, and processes are available for you to discover. The relation of past processes and present practices is symbiotic—mutually beneficial. Encompass the entirety of photography and you will be rewarded with many rich experiences. Thank you for taking PhotoEd along on your journey and for your support over the years.

The fall 2009 issue of PhotoEd will be a survey of post-secondary colleges, universities, and professional schools offering an education in photography. Consider having your school featured in this issue. Students attending these schools are welcome to submit their portfolios. The photographic universe is expanding at an accelerating pace and education will be your ticket to this new world."

If you are a student, what are you waiting for? Get together your best work and submit to PhotoEd....

I am a photographer for exactly the reason Mr. Russo talks about in his editorial. Photography doesn't present just one option, it is compilation of all things within its history. The options are unlimited, the possibilities endless. It is never the same. I am obsessed with photography. It is my passion. I am so grateful to be able to turn my passion into something that speaks to others.

Sunday, April 26, 2009

National Pinhole Photography Day


Detail #3 by IMRE BECSI

Yippee!! I have to admit, in all of my time as a student of photography, which started in high school, went through two university degrees, and now I teach, I have never made or used a pinhole camera. It is on my list of things to do... which is what I love so much about photography, there are so many possibilities when it comes to processes. Anyway, I want to get into pinhole photography. And since I am such a Polaroid addict, I think I will either buy a Polaroid pinhole camera or make one. When I was researching for this post, I found several very helpful and generous how-tos on making a Polaroid pinhole camera. Check them out, and if you make one, and use it, sent me some photos so I can blog about you.


How to Make a Polaroid Pinhole from Make Magazine.


How to Make a Pinhole Polaroid Camera by DuChamp on Flickr.

Pimp My Polaroid on Silverbased Blog.

Where to Buy A Polaroid Pinhole Camera (Daylab).

A Polaroid pinhole can use Fuji instant films.

Here are some wonderful images I found online made with Polaroid pinhole cameras... Just click on the info below each photograph to be taken to that person's website or blog.


Dandelions By Adrian Hanft


Pinhole 24 by Moominsean


By Katier


By Cecil Rimes


Fish Market by Marcelo Saraiva

I hope you are inspired! Now go, make some images...

Thank You, My Friend!


Oh, Robyn! The Lovely Robyn has once again caught me completely off guard and sent me something wonderful and generous in the mail. She is so kind and I really owe her at this point. She, like me, is an inspiration junkie, which is actually the name of her blog. I didn't even have a name for what I was until I met her. We are like two peas in a pod in many ways, too bad she lives in Illinois, instead of right next door.

So, one day, I was reading Robyn's blog, or maybe I was in her Flickr, and I saw one of her works of mail art that struck a nerve right away. It is this piece you see here, "I Have Everything I Need". My daughter had this beautiful way of declaring, "We have everything we need", usually in a very practical way, as we are readying to walk out the door, but I also swear that sometimes, she is uttering it in a wise way, in the same way that Robyn's piece is meaning it. I told Robyn I loved this piece, and wanted to know how much it is. She never responded. I meant to keep checking to see if she listed it in her Etsy shop, and did once or twice, not there, but then, being a mom and all, kinda had it slip from my mind. Although, once, I did email her about it again. Anyway, last weekend, when my father was visiting, my daughter, grandpa, and I went to collect the mail. Q reached into our PO Box, and lo and behold, Robyn's card was there. Q was all excited about it, and held if for the blocks we walked to have tea and cookies at a local shop. I was sure to put it away in a safe place in my book bag as soon as I was able, since Q is about to turn three, and sometimes isn't all that gentle... but boy does she love your work, Robyn, she gets all excited when she gets to hold it. Thank you, thank you, my friend. With friends like you, we have everything we need...


PS I asked Robyn's permission to post this personal note above. I LOVE everything about snail mail, the personal thought, the handwriting, the postmark. Robyn wrote such a thoughtful note. The part about "making people" made me teary! Click on the image to make it larger...

Saturday, April 25, 2009

Thank You, My Friend!


Oh, Robyn! The Lovely Robyn has once again caught me completely off guard and sent me something wonderful and generous in the mail. She is so kind and I really owe her at this point. She, like me, is an inspiration junkie, which is actually the name of her blog. I didn't even have a name for what I was until I met her. We are like two peas in a pod in many ways, too bad she lives in Illinois, instead of right next door.

So, one day, I was reading Robyn's blog, or maybe I was in her Flickr, and I saw one of her works of mail art that struck a nerve right away. It is this piece you see here, "I Have Everything I Need". My daughter had this beautiful way of declaring, "We have everything we need", usually in a very practical way, as we are readying to walk out the door, but I also swear that sometimes, she is uttering it in a wise way, in the same way that Robyn's piece is meaning it. I told Robyn I loved this piece, and wanted to know how much it is. She never responded. I meant to keep checking to see if she listed it in her Etsy shop, and did once or twice, not there, but then, being a mom and all, kinda had it slip from my mind. Although, once, I did email her about it again. Anyway, last weekend, when my father was visiting, my daughter, grandpa, and I went to collect the mail. Q reached into our PO Box, and lo and behold, Robyn's card was there. Q was all excited about it, and held if for the blocks we walked to have tea and cookies at a local shop. I was sure to put it away in a safe place in my book bag as soon as I was able, since Q is about to turn three, and sometimes isn't all that gentle... but boy does she love your work, Robyn, she gets all excited when she gets to hold it. Thank you, thank you, my friend. With friends like you, we have everything we need...


PS I asked Robyn's permission to post this personal note above. I LOVE everything about snail mail, the personal thought, the handwriting, the postmark. Robyn wrote such a thoughtful note. The part about "making people" made me teary! Click on the image to make it larger...

Wednesday, April 22, 2009

Happy Earth Day! A Kid's Craft Project and a Couple Children's Book Recommendations....

Today, it was FREEZING here... especially since yesterday was extremely springlike. Our Earth Day saw flurries. Oh well, I keep saying it is not really spring here until June...


I taught an Earth Day craft to an enthusiastic group of kids, ages 6-12, at the Banff Public Library this afternoon. The book that originally inspired our craft today is called "Seeds, Seeds, Seeds" by Nancy Elizabeth Wallace. This wonderful books tells the story of a young bear, whose grandfather sends him 5 seed projects in the mail. Each project is dedicated to several pages of the book. I would love to teach a whole afternoon that is just centered around this book. The projects include making seed identification cards, watching how a seed germinates over time using illustrations on cards, planting a seed, making a bird feeder, and making a frame covered with beans and seeds. The book is recommended for ages 4-8 but could be adapted to all ages.


Our project involved decorating mat board with seeds. I photographed each child at the beginning of the hour, and Tonya, one of the librarians who was also my lovely assistant (thanks, Tonya!) for the class, ran them to Banff Camera where they were printed while she waited.

Project Materials
- Mat board with window
- Decorative paper
- White glue
- Raffia
- Poppy Seeds, Sunflower Seeds in the shell, and Pumpkin Seeds
- Photo corners
- Photo

1) Select a piece of decorative paper and a mat. Using the mat as a template, draw around it, then cut out a piece of paper the same size as the mat board.

2) Put glue on three sides of the back of the mat board, flip over the paper so that the colored side is glued to the back of the mat (so that you could see the color through the window).

3) Take a couple of strands of raffia, twist the ends, cover them in glue, and stick them between the paper and mat board, on the side that is not glued together. Now glue the edge together.


4) Now, it is time to work on the design. Using glue in a squeeze bottle it is very easy to create your design. The large seeds can be glued right on. The poppy seeds are sprinkled onto the glue, then the excess is tapped of the back. I work over a shoe box lid when sprinkling the seeds and then tapping. I use a small dish to hold the seeds and to sprinkle from. It is easy to repeatedly pick up the box top and return the seeds to the dish during the process.


5) Put the photo corners on the edges of the photo, and lick, or if self adhesive, remove the backing.

6) Center photo and stick down. Voila!


The kids did a great job. I am always struck by the variety of designs that come from kids in the same group using the same materials. It is amazing!


The book that we read while our glue was drying is called "June 29th, 1999" by David Weisner. It is about a girl who sends her seeds up to outer space to see what will happen. She reports to her class what she is hoping and soon GIANT vegetables start landing in the area. It is only once vegetables she had not planted start to arrive that she realizes these must not be her experiments... I will leave the surprise ending for you to discover. The illustrations are lovely and the language is wonderful!

Happy Earth Day!!

Tuesday, April 21, 2009

Super Cute Bums

Ok, just a quicky post tonight, as I am super tired, and was gently reminded by my midwife today that I need to be "taking care of myself". I do, I do, but I am a night owl by nature and love to stay up until the wee hours. Of course, it was easier back before I had a little one. I can't complain about her, though, she does sleep until at least 8 AM, and even until 9 AM a few days a week, which people tell me is "not normal". Normal IS relative...


Anyway, I said I would be short. This is an image that I made for one of my favorite portrait clients in Ottawa, when I was back there this past summer. She gave me permission to post it here. She has order it as a 16x24" gallery wrapped canvas print for her home. I can't wait to see it someday. Can anyone resist little bums?! And as she reminded me, I will soon have two bums to photograph...

Ikea Does Away With Plastic Bags in Their Canadian Stores!!

I JUST received this in my inbox. I am going to post the complete email. Good for them! I know a few small local businesses that have tried this, and you would be amazed at how consumers react. I hope that now that such a large retailer has taken this step, that others will follow, and someday everyone will just have to bring their reusable bags with them. We can do it, it is a simple but effective change.

(Click on the image to make it larger for easier viewing...)

Monday, April 20, 2009

Yummy, Pumpkin Pancakes!


We make a lot of fun breakfast foods in this house. Crepes, waffles, and pancakes top the list. I am always game to try new recipes. This time I was inspired by a can of organic pumpkin that has been in the cupboard for awhile. I LOVE Vegetarian Times Magazine, so I flipped to the back of some in my stack, because they have all the recipes for that issue on a page, according to which meal or category it falls into. I was excited to find this recipe. I didn't make the yummy Honey Raspberry Syrup that goes with them, but plan to next time. If you don't received Vegetarian Times, fear not, they have a great website, where you will find this recipe, along with the syrup recipe. Enjoy!

Pumpkin Pancakes with Honey-Raspberry Syrup


Ingredient List

Serves 6
Honey-raspberry syrup
1 lb. frozen raspberries, divided (4 cups)
½ cup honey

Pumpkin Pancakes
1 cup all-purpose flour
1 cup whole-wheat flour
1½ tsp. baking powder
½ tsp. baking soda
½ tsp. ground cinnamon
½ tsp. ground ginger
¼ tsp. salt
3 large eggs
¹⁄3 cup honey
1½ cups low-fat milk
1 cup pumpkin purée or canned pumpkin
½ tsp. vanilla extract

Directions
1. To make Honey-Raspberry Syrup: Place 3 cups frozen raspberries and 1/2 cup water in saucepan. Bring to a boil, cover, and simmer 5 minutes, or until berries are soft. Mash in pan until smooth. Strain berry mixture through sieve into separate saucepan. (You should have 1 to 1 1/4 cups.) Stir in honey, and return mixture to a boil. Remove from heat, add remaining 1 cup frozen raspberries, and cover to steam and thaw whole raspberries. Set aside.
2. To make Pumpkin Pancakes: Whisk together flours, baking powder, baking soda, cinnamon, ginger, and salt in bowl.
3. Beat eggs and honey in separate bowl. Whisk in milk, pumpkin purée, and vanilla extract. Stir egg mixture into flour mixture with spatula or wooden spoon.
4. Coat nonstick skillet or griddle with cooking spray, and heat over medium-high heat. Ladle 2/3 cup batter onto skillet for each pancake. Cook 3 minutes, or until bubbles begin to form in center of pancakes. Flip, and cook 2 to 3 minutes more, or until pancakes are browned on both sides. Serve warm with Honey-Raspberry Syrup.
Nutritional Information

Per : Calories: 413, Protein: 11g, Total fat: 4.5g, Saturated fat: 1.5g, Carbs: 87g, Cholesterol: 109mg, Sodium: 407mg, Fiber: 9g, Sugars: 49g

Sunday, April 19, 2009

Daily Quote - Agnes de Mille


Sidewalk art images by Tiffany Teske, shot in Canmore, Alberta, 2008, Artist unknown

"Living is a form of not being sure, not knowing what next or how. The moment you know how, you begin to die a little. The artist never entirely knows. We guess. We may be wrong, but we take leap after leap in the dark."
Agnes de Mille


I really like this quote. I agree. Artists pounce on their ideas, working on them even when they can't explain why. And they should not have to explain. Being interested enough in the idea is enough. I often worry that I can't explain my work well enough. I have a friend who can write about her work in such a perfect, eloquent, artist statement fashion. I can write but I can't seem to put my feelings into words about my work without a lot of effort. I am going to try to stop worrying about it, since I am not a worrier at heart, and just keep creating.
~ Tiffany

Saturday, April 18, 2009

It IS Almost Spring BUT...


... I just found these images in a photo folder from earlier this year and thought I should post them before old Jack Frost goes a packing...


Thursday, April 16, 2009

Self Portraits with My Babes


Images by Tiffany Teske

I took these images of my 2 1/2 year old daughter and my blossoming belly, which contains another little girl, whom we can't wait to meet. I love having the time to spend with my girl. To photograph her, and myself in the process. Here is an image of the Polaroids developing...

New Shower Curtain Liner, Oh Joy!

I have been researching shower curtain liners for quite awhile now. It has been a mini obsession, one that I find has taken too much thought. PVC is the standard material for vinyl shower curtain liners, and it is one of the worst common household toxins, which becomes evident the minute that you take one out of the package. As a pregnant mom with a small child, both of whom spend a lot of time in the bathtub, I have been looking for an alternative. I would love to have a hemp shower curtain, which I am mostly finding available from sites in the states, although as usual, if I want to pay more I can get one in Canada. They seem to run about $45US. However, I like my cloth shower curtain. So, I need a liner. Nylon, polyester, EVA... Found a nylon one at the local Bay, but it is still $30. With many guests visiting our home this month, and the smell of the old liner starting to get to me, I finally read somewhere that Ikea has not used PVC in their liners for over 10 years. We happened to be in Calgary the other day to take my in laws to the airport. We swung into Ikea, and for $1.99 CAD I purchased a PEVA "Nackten" clear shower curtain liner. I took it out of the package today, in the garage so it could do some off-gassing outside of my home, and I must say it doesn't smell. This is a good sign... I am still not totally keen on a plastic liner that will end up in a landfill at some point, even if I am good about cleaning it, but for the price and the time being, this is a solution I am happy with. If I decided to go with something in the future I will post about it here. And if you have found something that works great for you, while also being good for your home, wallet, and the environment, I would love your comments...

Tuesday, April 14, 2009

Pasta Again?


I have to admit, as a vegetarian since the age of 13 (that's 22 years), I have eaten a lot of pasta. So much so that I almost quit eating it all together for awhile. But, I have a friend whose husband is from Italy, she met him while studying art in Italy (awwww, so romantic), anyway, she reheated some leftover pasta for me for lunch once, and I realized how good it can be when cooked properly. I had gotten sick of trying a pasta recipe that seemed to have yummy ingredients but then it was flavorless. Hers was sooooooo good, using very simple, yet fresh ingredients. Anyway, this is not her recipe, in fact, I am not sure how "authentic" it is, but it is really good. It comes from good 'ol Martha, who does have some hit and misses on her food site, but this is a winner... Now off to ask my friend for her favorite recipe, which I will post here soon...

Spaghetti with Garlic and Chili
From the MARTHA STEWART website

Ingredients

Serves 4

* 1 pound spaghetti
* Coarse salt and freshly ground pepper
* 1/4 cup extra-virgin olive oil, plus more for serving
* 1 clove garlic, crushed
* 1 small red chile pepper, halved, or pinch of crushed red-pepper flakes
* Zest of 1 lemon
* 1 lemon, halved
* 1/2 cup coarsely chopped fresh basil
* Freshly grated Parmesan cheese, for serving *(Don't use for a vegan meal)

Directions

1. Bring a large pot of water to a boil. Generously salt water and return to a boil. Add spaghetti and cook, according to package directions, until al dente.
2. Drain spaghetti, reserving 1/2 cup pasta-cooking liquid, and return pot to stove. Add olive oil, garlic, and chile or red-pepper flakes; cook, stirring, over medium-low heat, 3 to 4 minutes. Add spaghetti and stir to coat. Add zest, lemon juice, basil, and reserved cooking liquid, if desired. Season with salt and pepper and stir to combine. Remove from heat.
3. Remove garlic and chile pepper, if using, and discard. Divide pasta evenly between 4 serving plates; serve immediately with cheese and drizzle with olive oil, if desired.

Monday, April 13, 2009

Easter Weekend, SO FUN!


We had a really great Easter weekend. Quin and I made onion skin dyed eggs, as you can see in the post below. We were visited by friends who are as close as family for dinner on Saturday night, and we have had Andre's parents here with us since the 3rd. Andre made a great dinner of tenderloin from a local butcher, Valbella Meats, with all the fixings on Saturday night. I am a vegie, so none for me, but I was happy to see everyone enjoying their Alberta beef. My hubby is great in the kitchen!


The "Easter Bunny" brought Quin this cute little wooden doll family, in a plush Easter Basket my mom gave her last year.


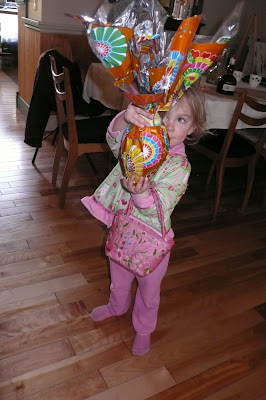
I also found this beautifully wrapped Italian chocolate egg at Mountain Mercado Cafe in Canmore. This is the first year that Q has really "gotten" the whole holiday thing, which makes it a lot of fun. Although, we don't like to go overboard, and this day was full of overboard when it came to chocolate. The two photos below are worth a thousand words, when it comes to how good chocolate covered cream puffs are...


We did find a way to fit a lot of fun Easter crafts in along with the chocolate... And to have a lovely day surrounded by friends and family in our wonderful community of Banff. Since my eyelids are closing I will resort to captions for the rest of this post...


PAPER BUNNY DOLL CARD FROM GREAT GRAMMA MEME


EASTER BONNET WITH FELT APPLIQUES THAT WE PUT ON OURSELVES, DIY EASTER BONNET KIT


COOKIE DECORATING AT EASTER BRUNCH AT THE JUNIPER


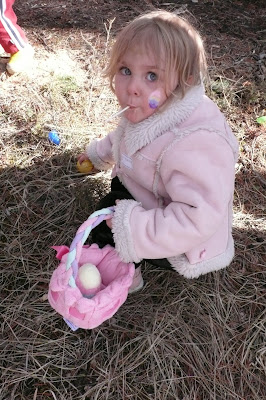
FACE PAINTING AT THE AWESOME YWCA EASTER PARTY


MAKING BUNNY EARS AT THE YWCA


HANGING WITH BUDDY "E"


HUNTING FOR EGGS AT THE YWCA


ONE OF MOMMY'S FAMOUS BATHROOM SELF PORTRAITS AT THE JUNIPER


EASTER FAMILY PORTRAIT OUTSIDE THE JUNIPER