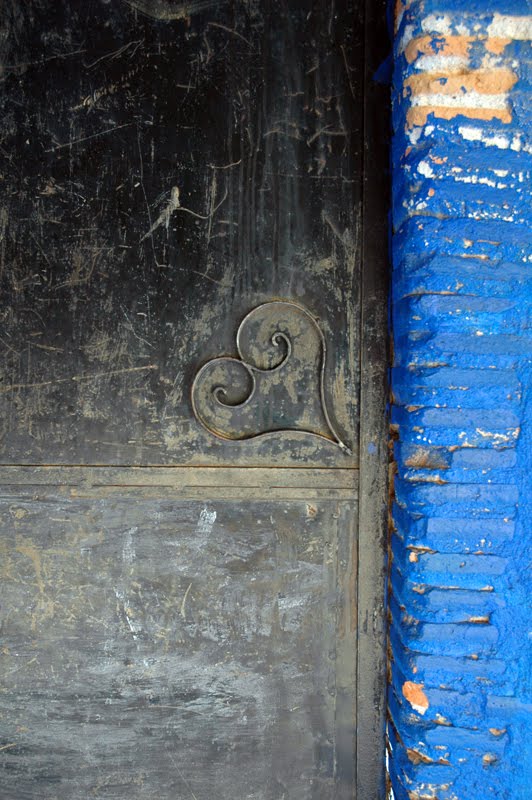
Friday, March 25, 2011

New Work - Always Dream Big - Mixed Media Collage & 365 Days With Kiddos - #30 - Teach Your Kids to Dream BIG!!


I have had so many wonderful opportunities lately. I have always been one to dream big. I think it is a very important message to share with my children. My father and his sister were both very instrumental in teaching me that I could achieve anything I sent my mind to, as long as I also worked hard. Many people talk about how it is possible to live your dreams, but then they will not do the work to make their dreams happen. Challenges and set backs do occur, but what is important is to push on, with more determination.


Good things can happen when you set your mind to it. We all have bad days, but it is getting up after falling down that is important. Most things happen when the time is right, forcing something that is not ready to be won't make it happen. But continuing to put in the time and effort almost always pays off in the end. I am a dreamer. I also live in reality, knowing that if opportunity doesn't knock, I need to build a door. This post is for all the hard working dreamers out there...

Always Dream Big
Mixed media collage using gift wrap, handmade paper, wire, beads, vintage sheet music, text & illustration, acrylic paint, & found twig
By Tiffany Teske
Approx 8x10
$100
Please contact me if you are interested...

Thursday, March 17, 2011

Weekly Recipe - Happy St Patrick's Day Vegan Irish Stew & Sweet Guinness Quick Bread


I have not written a weekly recipe in so long that maybe I should call this feature the "Monthly or Longer Recipe"... I do apologize! Life has been handing me some amazing opportunities lately and, as usual, some challenges. I am the mom to two little ones, so my time is always too short for all the things on my plate. We are ALL busy, so this is no excuse, I just wanted to catch all of you up on my lack of posting.

So, Happy St Paddy's Day! My grandmother's father, Ira Stewart, was from Ireland. He was married to Gerta, from Sweden. They moved to Minnesota and were farmers. My grandmother, Harriett, has wonderful stories about growing up on a farm but she moved to the city as soon as she could and left the farm days behind her. Ira, was my great grandfather, and he was, well, a rather abrasive guy, until it came to me. He lived until I was 5 or 6 years old, and loved to hold me on his lap and to talk with me. I have fond memories of the small apartment he and my great grandmother lived in at a nursing home. My great grandmother used to pass me sugar cubes under the table and I would pop them in my mouth and suck on them until they melted. Today, I remembered my family...

I am not exactly sure how Ira would feel about the fact that I have been a vegetarian for 24 years. I adapted this traditional Irish Stew to make it vegan. Both of these recipes are great during the winter months, not just on St Paddy's Day.


Vegan Irish Stew
Makes 6 - 8 servings
Prep Time 15 minutes
Cook Time one hour

Ingredients
~ 4 cups vegetable broth
~ 4 cups water
~ 2 medium yellow onions
~ 3/4 cup pearl barley (rinsed)
~ 1/2 teaspoon salt
~ 1 1/2 lbs potatoes with skins (waxy, not russets)
~ 1 14 oz can of chickpeas (also known as garbanzo beans)
~ 3 large peeled carrots
~ 1 - 2 celery stalks
~ 2 tablespoons tamari
~ 1/4 teaspoon thyme
~ 1/4 teaspoon rosemary
~ fresh ground black pepper to taste

Directions
Cut all the vegetables into large chunks. In a large pot combine water, vegetable broth, barley, onions, and salt. Bring to a boil and cook at medium heat for about 15 minutes. Add in the potatoes and cook for another 15 minutes. Add the carrots, chickpeas, celery, tamari, and spices and cook for another 30 minutes on low. Enjoy with Irish soda bread or the Guinness bread below...


Guinness Quick Bread
Makes one loaf
Prep time 10 minutes
Cook time 50 minutes

Ingredients

~ 1 1/2 cups non-bleached all-purpose flour
~ 1 cup whole wheat pastry flour
~ 1 teaspoon baking powder
~ 3/4 cup brown sugar
~ 1 teaspoon cinnamon
~ 1 12-ounce Guinness (that leaves some of the pint for drinking...)
~ 1 cup walnuts, chopped
~ 1/2 cup raisins

Directions
Preheat oven to 350F. Combine all ingredients and pour into greased loaf pan. Bake 50 minutes. Serve right out of the over with butter or room temperature.

Tuesday, March 8, 2011

New Work - "The Circle" - Mixed Media Collage on Canvas

The Circle
By Tiffany Teske
Mixed Media Collage with Vintage Elements
16x20"
$150 (for a limited time)

I have been busy, busy, busy creating new work lately. It feels GREAT! I created this piece for a local art show called Home Grown. It is my 4th year being a part of this well attended show that brings together artists with our community.


This piece, like so many I create, started with a concrete plan that soon changed COMPLETELY. I love having a starting point, then seeing how far away from that it gets. I started with a 16x20" canvas that I bought at the thrift shop, already painted a nice springy shade of yellow-green. I have been wanting to try a new technique a week and for this piece I used bubble wrap as part of the layered background, as well as large stamping on just part of the piece. I like how both turned out.


The tree is made from a vintage map. The birds are illustrations from a vintage book. And the buttons... vintage (shocking, I know!). The title is The Circle. The text is from a vintage dictionary and it reads Life, Death, and Circle. It is about the Circle of life (and death). The tree represents death, the birds represent life, and the buttons, well, circles. The palette is not one I work with a lot but I grew to love the yellow with brown, black, white, and pink accents.


This piece is currently for sale in the show for $150. I plan to raise the price if it doesn't sell in the show since it is worth more than $150 but I wanted to give people the opportunity to buy this at a special price this month, in celebration of local art and the coming of spring...

Sunday, February 20, 2011

Photography Feature - Hearts

Well, Valentine's Day may be over until next year but I wanted to post some of the heart photographs in my collection. I used to find hearts to be too cute but now I love them. And I look for them around me and then capture them, in an attempt to collect them. Is there a particular thing that you are drawn to photograph? If so, please share it in the comments. Enjoy!

All Photographs by Tiffany Teske


Sunday, February 13, 2011

365 Days With Kiddos - #29 - Decorate for Valentine's Day - More Free Vintage Downloads


We are decorating for Valentine's Day today. Quin and I need to make her Valentines and I need to work on the heart book mark project I am teaching at the After School Club tomorrow so we are in full swing with preparations for the Day of Love. While we are at it, I thought we should print out a couple of my vintage valentines, on card stock in a larger size, for wall and door decorations. We may be a little behind, since tomorrow is the big day, but on card stock these should hold up for years to come. Why not start adding to your decoration collection? Just right click on the images, add them to your computer, print them out, cut them out, and hang them up. You can also use them for card exchange Valentines, by reducing the size and laying them out on one sheet, then printing and cutting out.


If you would like to look for your own free downloads on the web, you can thank my friend, Maureen, who posted a ton of links on my Facebook Page. To find them you can go to the post on the wall that has a link to my vintage Valentine blog post.

Friday, February 11, 2011

365 Days With Kiddos - #28 - Make Valentine Cards Using My Vintage Valentine Download Freebie


I love Valentine's Day! It has always been my second favourite holiday (my first is Thanksgiving). I didn't grow to embrace the symbol of the heart until a few years ago, but now that I like it, I oooohhh and ahhhh over it and any creative projects that include it. Sometimes I miss the boat on holiday projects because time moves so fast and I don't always plan ahead. I tend to think of a holiday the week it happens. But, not this year! Several weeks ago I got out an album of vintage Valentines that I bought for a steal at an antique shop near my father's cabin this past summer. They are adorable! I will have to upload several of them this week as a Vintage Finds post...

This week I needed to select a valentine for my daughter's upcoming preschool Valentine's Day party. I also needed to prepare for a card making workshop I was teaching at a local senior residence. I decided on the card above for both. Because this is a four fold card all the needs to be done is to print it out on a 8.5x11" sheet of paper and then to fold it. This card is special in that the net that the boy is "catching" the winged heart in is a cut out. The way I scanned the flat card you can see exactly where the net needs to be cut out. Once the holes are cut, a piece of tulle, or origami mesh, or even recycle net fruit bag can be glued in, then the card can be folded to hide everything except for the net in the cut out. My little gift to you is this card at hi resolution, ready to be printed for your own Valentines. Just right click on the image, save it to your computer, then print it out in colour. You can make these your own unique cards by using shaped scissors to cut a decorative edge around the outside of the card. Your kiddos can do this and they can help to glue in the mesh and to fold the cards. If you would like to make envelopes for your cards you can find an amazing array of free templates at Minkwood Designs.

Sunday, February 6, 2011

365 Days With Kiddos - #27 - Make Paper Puppets from a Children's Book


My kids don't watch a lot of TV. I try to make sure they have lots of opportunities to use their imaginations. They have been to a couple of puppet shows, thanks to the Banff Public Library and preschool. They also own more books than most children I know.


Recently, on a snowy day, I was going through these books, trying to cull a few from the collection. There is no shortage of things I could do with the ones that are in good shape; some could be passed on to friends, some could be sold to the second hand book store, and some could go to the thrift store. But what to do with the ones that are in bad shape? My toddler and I volunteer at a local thrift store a few times a week while my eldest is at preschool. We organize their books. I know for certain they do not need anymore damaged books that people could not bear to get rid of but that the store has to ultimately throw away. My kids are pretty respectful of their books, but some books I find at rummage sales and thrift stores I bring home unaware of the full extent of damage inside. We read around crayon and marker scribbles, bent pages, and stickers. We try to repair ripped pages and loose covers. But some books, namely pop up books and books that contain flaps can be a bit of a bummer when they are wrecked.


On this day, I was specifically inspired to find a use for a Spot book that was missing important pieces that conceal part of the page until you lift them up. More than half of these pieces were ripped out when it came to us. I mulled it over and remembered a cookie tin full of colored Popsicle sticks that I have also been wanting to use. The Spot book had heavy weight card stock pages, which once glued to Popsicle sticks could make great... PUPPETS! I also grabbed a heavy weight Kindermusik song book with simple illustrations that I had repaired on a couple of occasions but that refused to staying together. Voila! Time to get crafty with the cooped up kids... what a fun project for a winter storm day!


Make Puppets from Old Books

By Tiffany Teske


Materials

~ Books with card stock pages (or as a variation on this craft you can use thinner book pages glued to poster board or card stock and then cut out)
~ Scissors
~ Popsicle sticks
~ White glue (PVA is better than school glue because it won't wrinkle the paper)


Directions
1) Select the images you want to cut out of your book, remembering that you can probably only cut out an image from one side of the page.
2) Rip out the pages you will use.
3) Cut out the images. For young children who are learning to cut it is not important for them to be precise. For older kids, they can cut on the lines that are provided around the images. We didn't stick to a plan, some of the images we used are cut out on the lines and for some of them we cut out a whole scene rather than just a piece. We also cut out the title of the books so we could use them as the titles when we started out puppet show.
4) Glue your Popsicle sticks to your pieces. I am out of PVA glue so we used school glue which has more water in it and it will wrinkle even card stock if used too heavily, which is normal for young children. If you only have school glue you can minimize wrinkling by using a brush to apply the glue, sparingly. The point here is fun for your kids, not professional puppets. We didn't put Popsicle sticks on all of our pieces because my daughter wanted to use some of them like paper dolls.
5) Throw a blanket over a table and have a puppet show!


I am always happy to hear from readers who have made this craft, either on their own, or because they were inspired here. Please leave a comment if you have something to share!

Thursday, February 3, 2011

"UFOs on display at library" Rocky Mountain Outlook Article About My Current Show "Decidedly Undecided"

UFOs on display at library
Feb 03, 2011 12:33 pm | MICHELLE MACULLO

submitted
BUCKET STUDY #2 by Tiffany Teske

January was a busy month for Banff photographer and artist Tiffany Teske.

Rarely one to say no, even with little notice, she jumped at the opportunity to host the February art show at the Banff Public Library Art Gallery. With little more than a month to pull off an exhibit, operating on a-few-minutes-here and an-hour-there schedule, she did what she does best – making visual magic out of what she calls UFOs – unfinished objects.

“A lot of people in crafts and arts would know what that is,” she said.

The past four weeks were a blur, and now that she’s playing catch-up, she’s wondering how it is she is no longer considered a scorpio, given the recent astrological decision detailing the misalignment of the stars to their signs.

“I’m flabbergasted,” she says in disbelief. “There’s no way I’m not a scorpio.”

But perhaps there is some truth up in the sky.

Unlike a scorpio, Teske was ambivalent about a name for her exhibit. And then it dawned on her.

During February, Teske presents Decidedly Undecided, a rich blend of new and revamped photography, mixed media and mosaic pieces on display at the Banff Public Library Art Gallery. An opening reception with the artist in attendance takes place on Saturday (Feb. 5) from 7-9 p.m.

Most impressive pieces in the show include Cold Heart of the Sun, Balance and Bucket Study #2.

Teske says her career choice was deliberate and made for a number of reasons, the least being money. And while she’s had the opportunity to follow more traditional artistic paths with a meatier paycheque, she’s comfortable with who she is and what she does. And she has a good support network to boot.

“I make it work,” she said. “There’s a statistic out there that says most artists quit by the time they’re 40. My husband won’t let me quit.

“It’s who I am. It’s my sanity. When I don’t do it I get stressed out.” Teske uses her house as an informal gallery, displaying many of her efforts, those of her friends and pieces acquired through art trades. While her skills and interests have evolved since she first picked up a 110 camera at the age of seven, she’s a firm believer that her past has provided her with the foundation for continual inspiration, and a constant supply of artwork for her walls.

“I’m not old enough for a retrospective,” she says. “But I’m proud of all of it.”

The majority of the show’s pieces are for sale. For more information on Teske or her artwork, email tiffany@oldesage.com or visit her blog at www.tiffanyteske.com.

Decidedly Undecided is on display until Feb. 28.

Friday, January 28, 2011

365 Days With Kiddos - #26 - Teach Your Kiddos (and Yourself) To Laugh in the Face of Frustration

Emmanuelle, after "The Cocoa Incident"...

I have bad days... yes, it is true. We all do. Sometimes, I feel like maybe I present too rosy a picture of my life on this blog. I am an energetic person and I like to be upbeat, optimistic, and positive. But, of course, I am not always this way. I get frustrated, angry, and impatient. I am better about this, in a way, now that I have kids, but I am also tested on a much more frequent basis than before I had kids. I had all the patience in the world when I was a portrait photographer who mostly worked with pregnant moms, babies and kids. That's because they weren't MY kids. I remember thinking I would be infinitely patient with my own kids. Um, hmmmmm, am I? It depends on the day and the situation. I do think I am learning patience, but sadly, I can be less patient with my own kids than with those of others. Before kids I thought I would usually be on my best behavior, in control of my emotions, the bigger person, the shining example for my own kids. Hahahahaha! I think a few people did point out to me that it was a nice thought but...

This brings me to one of several trying incidents in our house this week. And to the fact that I sometimes surprise even myself...

Quin had asked me for cocoa. It was a good day for it so I set to work. The milk was heating on the stove, the Cocoa Camino was open and had a spoon in it, and all I needed were the marshmallows. I climbed onto the step stool, and reached for the bag on the highest shelf in the cupboard and then lost my grip. The next few moments were in slow motion, like in a movie, as the full bag of marshmallows dropped from up high directly down onto the end of the spoon that was in the cocoa container. The spoon flipped up, somehow sending the entire can of cocoa powder flying 6 feet to the left, dumping DIRECTLY onto the forehead of poor Emmanuelle who was innocently minding her own business. It beaned her on the head with a clatter and covered her in the cocoa that had not already spilled onto the stove top on the way to her head.


She was completely startled, not to mention covered in cocoa; her eyes, her nose, her mouth, her shoulders... She started screaming because she was scared, she was inhaling cocoa powder, and, well, it hurts to be knocked on the head with a can. Quin was now shrieking because of the loss of the precious cocoa and the fact that there was a huge mess (she and my mother share a fondness for order..). I rushed over to dust off my baby and to try to soothe her. At the same time, I was telling Quin it was OK. This is where I would normally have started muttering about the huge mess I now had to clean up on the stove, the floor, and the baby.


I would have normally started removing Emmanuelle's clothes, told Quin not to move because of the mess on the floor, and basically started feeling sorry for myself because of the added chore. But do you know what? Now that Emmanuelle was clearly ok, I looked around, and I started laughing. And I kept on laughing, even when Quin looked at me like I was crazy (and it was a genuine laugh NOT a crazy laugh). And because she was looking at me like that, I realized that I NEED to show her how to laugh at a situation like this. I NEED to laugh at myself and these types of incidents more often. I NEED to teach my kids that set backs and unforeseen challenges are not always a big deal and that laughing can instantly make you feel better, much better than yelling or feeling sorry for yourself.


Emmanuelle, Miss Happy-Go-Lucky, whose first inclination is to smile about anything, understood right away. She bent down and started writing with her finger in the powder, then she showed me her finger.


Seeing this, Quin started to loosen up, and I explained to her that sometimes we have to laugh at ourselves and at situations that are out of our control. I explained that not everything should be taken so seriously. I finished making the cocoa, complete with marshmallows, and I even gave a little to little Emmanuelle, who deserved it. The three of us laughed, and talked, and drank cocoa, BEFORE we cleaned up the kitchen.

Tuesday, January 25, 2011

Weekly Recipe - Heidi Swanson's Multigrain Waffles


Yum, yum, yum, yum, yum, yum... that pretty much sums up these waffles. We eat these whenever we have the time for a leisurely breakfast. The batter comes together in a snap. I received this recipe in my inbox, right about the time I had started lamenting that our white flour waffles were good but not good for us. I know that this recipe is a keeper because my kids and husband like it BETTER than our white flour waffles. It is by Heidi Swanson of 101 Cookbooks where you can find TONS of healthy recipes. She has also written her own cookbooks, Super Natural which is amazing and Super Natural Everyday will be released soon. Since I have not received permission to repost Heidi's waffle recipe here on my site, I am going to just give you the link to the recipe on her site. Here it is... I just want to make note that if you don't have buttermilk, you can substitute by adding 1 T lemon juice per cup of milk. The hint of lemon flavor is lovely! Enjoy :)