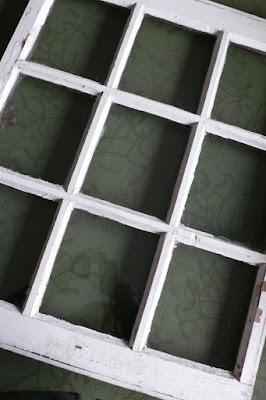
Phew, after all the fun of Polaroid Week, all the blog posting, and the opening of my current solo exhibit, I needed to take a break. But, I promised one more Polaroid framing craft. Here it is... a couple of days late...

My neighbor recently opened a hair salon and she needed art. She came over one night to flip through my MANY Polaroid transfers and made a pile of the ones she liked. We started talking about how she wanted to display them... matted? Framed? Something creative? She remembered she had an old multi pane window she had brought home from the family farm. I own a mat cutter, I custom cut all of my mats, and I have PLENTY of scrap mat. I aim to use recycled items in my work so I was excited to create a unique photo gallery out of scrap mat and an old window. I love working on new projects and am confident enough to jump in with both feet even when I am not sure what to do. It all worked out this time and what I learned I will now pass along to you...

How-to Turn an Old Window Frame into a Polaroid Transfer Photo Gallery
What you will need:
- Polaroid transfers or Polaroids or whatever photos you want to use
- Archival mat board
- An old window frame
- UV resistant spray
- Newspaper
- Boot/Shoe tray (optional)
- Photo mounting tape or corners for affixing the images to the mat or you can use low tack masking tape if you don't care about it being archival. You will also need masking tape for taping the mats into the frames.
- Old wallpaper
- Spray glue (I use 3M Super 77 Multipurpose Spray Adhesive)
- Two screw eyes
- Wood glue
- Picture framing wire
1. Select your images. Lay them out on the boot/shoe tray on newspaper and spray them with UV Resistant spray (I use Kryon Gloss) according to the instructions on the can.

2. Clean your window frame to the extent you would like to. We liked that our frame was rustic and worn so aside from a quick wash we used it as is. In the end even the old paint splotches on some of the panes of glass enhanced the over all look of things.
3. Cut the outside of your mats to fit in the window panes and cut the mat window to the correct dimensions for the transfer. I would love to give an online tutorial on mat cutting but since it completely depends on what type of mat cutter you own, I can't. Cut your mat according to how you mat cutter works or Google "How to Cut a Window Mat" and you will find some information on how to do it simply with an Exacto knife and ruler. I use archival mats as other types will eventually ruin your images, since the acid will eat away the parts it touches, sometimes within mere months.

4. Using photo tape, or corners, or masking tape, tape your images onto your mat. (I used masking tape, which is not archival, because my friend may remove the images at some point. She didn't want me to use a permanent method to affix them but wanted to make sure they would stay put in the frame. Sometimes photo tape loses its grip and images can shift out of the photo corners...)


5. Fit your mats into the panes so they rest flat against the glass. Using masking tape, tape the mat into the frame. It is ok for the masking tape to be on the mat, even though it is not archival. Continue taping row by row, checking the front from time to time to see how things look.


6. I like to give the back of the frame a nice finish by covering it with old wallpaper I buy it at the thrift store. It is another way to reduce, reuse, and recycle. I used spray glue to attach it to the back of the frame (and I always try to spray this glue outside). This stuff is STICKY so if you don't have someone to help you you can put clothespins on the bottom edge of your wallpaper, hold the top edge with one hand and hold the spray can in other.


7. In order to hang your frame, measure out and mark where you want the screw eyes to be inserted. For added strength, I like to put wood glue on the threaded ends of the screw eyes before screwing them in. You do not need to drill holes first, just take the pointed end of the screw eye and start screwing it in. If your wood is very hard you can tap on the head of the screw eye with a hammer to get it set into the wood before turning.

8. Measure out your picture framing wire, leaving enough extra so that you can wrap the ends around the wire, after passing it through the screw eye head. For added strength, you can thread the wire through the screw eye head twice, by looping the end back through after the initial pass. Wrap the loose ends back on each other.


Et voila! You are now ready to hang your photo gallery on the wall. Whoot whoot!


Done and hanging on the B-Towne Salon wall. Thanks to Brooke for the chance to display my work in a new way.
No comments:
Post a Comment