You may like my blog if you like art, photography, crafting, sewing, upcycling, cooking, baking, reading, traveling, thrift store finds, parenting, kid's activities, writing, the environment, natural living, activism, and more... I am dedicated to living an artful & creative life, each & everyday.
Monday, June 28, 2010
The Miss Match Diptych Project
Sunday Morning
Top Tiffany Teske
Bottom Kristi Jackson
As part of the Female Photographers of Etsy (fPOE), I have known about the Miss Match/fPOE diptych project for some time now. Talented photographers who sign up for a week, are given a partner and a theme, and the women make their photographs, then pair them together. The first time I participated my partner was Kristi Jackson of Life Through the Lens. Our theme was Sunday Morning. My image is at the top. I shot it through a two inch hole in the door of a building in the ghost town of Rowley, Alberta, while camping on the same weekend this image was due. Kristi shot her family's pairs of shoes, one for each member, lined up and ready to head out to church.
Still
Left: Tiffany Teske
Right: g(ART)en / Gordana
My second foray into the project, my wonderful partner was Gordana, of g(ART)en. My image is of the hands. I love how Gordana made a story with our images. A "dark fairytale" as one person commented...
Covet
Left: Serinissima
Right: Tiffany Teske
My third time participating in the project my lovely partner was Galia, whose blog is called Through the Looking Glass... Lightly. My image is of the cupcakes, taken at my oldest daughter's birthday. The word we were trying to portray was "covet" which is a tricky one. I think our images tell the story.
For more of my photography, I have a blog called i heart polaroid...
Thursday, June 24, 2010
A Lovely Little Summer Lunch - Kale & Red Cabbage Salad with Tamari Pumpkin & Sunflower Seeds
It is always nice to spend a leisurely afternoon with friends. A couple of weeks ago, my kiddos and I were invited to friend's home for food, laughter, and some good old backyard fun. Jane, opened her lovely home to us all, and served us a wonderful salad for lunch (the kiddos had Annie's bunny pasta, well, maybe the mommies had some, too...). I have since made it at home with raw sunflower and pumpkin seeds, which is how Jane served it. Below you will find the recipe, along with a little photo collage of Jane's art studio with work in progress and a peak at some of the things that inspire her. Just click on it or the one above to see the images larger... Enjoy!
(Aren't the colors beautiful?!)
Kale & Red Cabbage Salad with Tamari Pumpkin & Sunflower Seeds
Ingredients
- 1 bunch kale, chopped
- 3 cups carrots, grated
- 1/2 head red cabbage, thinly sliced
- 1/2 cup tamari pumpkin seeds (see how to make below)
- 1/2 cup tamari sunflower seeds
- 1/2 cup flax or hemp oil or olive oil
- 1/3 cup Bragg Liquid Aminos
- 5 Tbsp balsamic vinegar
- 1 tsp oregano, dried
Directions
Wash kale and chop. Be careful to rinse the leaves to remove dirt and grit.
In a cast iron skillet, over medium heat, stir sunflower and pumpkin seeds. Remove from heat when they're toasted golden brown. While the skillet is hot, add in a few drops of tamari, which will sear onto the seeds. Remove and let cool.
In a large bowl, combine chopped kale, shredded carrots, sliced cabbage and tamari seeds. Set aside.
In a small bowl, whisk together oil, Bragg Liquid Aminos (or Maggi or Soy Sauce or Tamari - but Braggs is definitely tastiest), vinegar and oregano. Refrigerate for 30 minutes or more to let the flavours blend together. Pour over the kale mixture. Toss until evenly coated and chill for at least 2 hours before serving.
This salad keeps well refrigerated for 2 - 3 days.
Number of Servings: 8
All Images by Tiffany Teske
Labels:
art,
cooking,
food,
friends,
recipe,
recipe vegan,
vegetarian recipe
Tuesday, June 22, 2010
African Fruit Salad - A Lesson in Geography, Food, & Fun
My four year old has been cooking since she could stand on a step stool next to me. We try to make several things a week, both for the fun of it, and to have healthy, good things around to snack on. Thanks to a well stocked pantry, some of our cooking sessions are impromptu, while others are planned. A few weeks ago, Quin picked a book at the library called Desserts from Around the World. It is a book for older kids but is quite suitable for small children and their parents. The first chapter has the most words and shares different parts of the world and the desserts that are common in each. Quin and I both enjoy curling up with a cookbook and dreaming of what we will make so we looked at a few recipes and their photos before bed each night.
Because we had a large box of mangoes that needed to be used, we decided to make the African Fruit Salad. We also had the bananas and pineapple on hand, but we made a special trip to the store to find a papaya. We actually had to go to two stores as part of this adventure and in the end I bought a not-quite-ripe papaya because it was all they had. For tips on selecting mangoes, pineapple, papaya, and other tropical fruits check out this great link. Quin loves to try new foods, and has not had fresh papaya since I was making her baby food. I recommend a fruit salad as a good way of introducing new fruits to kids.
Africa, on a vintage globe
This is also a good recipe to pair with a geography lesson. We have a vintage globe, which is not the best for showing Quin specific countries, but which she loves to play with so it engages her. It is fine for talking using to show her the continents. We were also able to talk a bit about how in parts of Africa, as in most parts of the world, including Canada, that there are people who are hungry and who need our help. I don't get very political with my small children but I do think it is important to talk about all we have, so we can be grateful for it, and so we can decide how we can help others who are in need.
African Fruit Salad
From the book, Desserts from Around the World
Ingredients
~ Two bananas, sliced
~ One mango, chopped
~ One papaya, seeded and chopped
~ One pineapple, chopped
Directions
Slice and chop all of the fruit into bite sized pieces, combine in a bowl, and serve. If you want to make this ahead of time, do not add the banana. The other fruit will keep 1-2 days when refrigerated. Just add the banana when you are ready to eat it.
"YUM, Pineapple!"
Labels:
cooking with kids,
Dessert recipe,
food,
recipe,
recipe vegan,
travel,
vegetarian recipe
Saturday, June 19, 2010
Monster Puke Bubble Bath - A Good Homemade Birthday Party Gift for a Boy (or a Girl)
Quin, my daughter, likes to make the birthday gifts that she gives to her friends. I used to be somewhat unsure about giving handmade gifts at a birthday party but I have since learned that most of my friends and their children really appreciate them. I know that my kids have more toys than they know what to do with, so it is always nice when they receive something unique and made just with them in mind. One of our standbys is play dough. What kids doesn't love it? Some moms that I know don't like it, because it can be "messy" when it dries up but you can always use it outdoors. You can find my recipe here. Crayon cakes are another favorite which you can find out how to make here. For more ideas you can look for the label "gifts you can make" on the right hand side of my blog, midway down...
Recently, Quin went to the party of a fellow preschool classmate and we wanted to make him something different. We decided that a four year old boy would probably like the idea of foaming monster puke bubble bath. Quin herself loved the idea. I found the recipe on Craftbits.com. I liked that the ingredients could be customized to our liking and the the ingredients were mostly natural. In the end, when Quin tried our bubble bath, it was not very foamy but did make the bath tub a nice green. I think it is because I used hand soap as my liquid soap when I should have used liquid dish washing soap.
Monster Puke Bubble Bath
Originally on Craftbits
Ingredients
1 cup of Olive oil
1/2 cup of Liquid soap (dish washing soap)
1/4 cup of Honey
1/2 tsp of Green food coloring
1 tbs of Peppermint fragrance or extract (I used peppermint essential oil so I used 1/2 teaspoon plus a few drops. I just wanted enough for a good scent.)
Directions
Mix all the ingredients together. We put ours in a recycled plastic peanut butter jar and had more than enough leftover for our own test run in the bath. We made a paper label to go over the PB label, put on some monster stickers, then attached a circle of recycled fabric and a plastic monster toy to the lid with hemp cord. Voila!
It was a hit with the recipient :)
Tuesday, June 15, 2010
Quick and Yummy Ahi Tuna Marinade
I am taking a little break from birthday party posts, although I do have some fun things to share from some recent birthday parties we have gone to. Soon...
Time for a recipe. A fish recipe. My husband recently brought home some ahi tuna, also known as yellowfin tuna. We eat fish about three times a month in our house. I have not eaten red meat or pork since I was 13, or poultry since I was 19. I have had two healthy pregnancies, without eating any of these and I look to nuts, legumes, eggs, cheese, yogurt, whole grains, and occasionally soy or fish for protein. Fish can be very nutritious and are packed with great nutrients such as omega-3’s, B vitamins, and lean protein. However, many fish are contaminated with toxins, such as mercury which can adversely affect brain development and the nervous system. There is a lot of conflicting information out there about what fish is safe to eat and in what quantities. All tuna generally has mercury in it, much of it in high levels. I have been told by a health care professional that a pregnant or nursing mom should not eat more than 3 6 ounces servings of ahi a month. All this to say, it is good to be knowledgeable about the fish you chose to eat. You can talk with your naturopath or MD about it. A reliable internet source for safe fish can be found on the Environmental Working Group's Website.
So, on to the marinade I made for the ahi my hubby brought home.
Asian Marinade for Ahi Tuna
By Tiffany Teske
This is enough for one 6 - 8 oz steak.
Ingredients
~ 1 Tbsp sesame oil
~ 1 Tbsp soy sauce (substitute 1 teaspoons of wheat-free tamari for gluten-free diets)
~ 1/2 Tbsp of grated fresh ginger
~ 1 small clove garlic, minced
~ 1/2 teaspoon lime juice
Directions
Mix all ingredients together. Coat the fish with the marinade, cover, and put in the fridge for an hour or more. Cook the fish by whatever method you prefer.
Labels:
cooking,
fish recipe,
gluten free recipe,
pregnancy,
recipe
Monday, June 14, 2010
A Week of Birthday Posts - #5 - Birthday Party Food
Food, glorious food. Hehehe! We love it around here. And party food is oh so fun to research, decide upon, and prepare. I have found that for kids' birthday parties it is best to keep it simple. My children are adventurous eaters but that doesn't mean all of their friend are. In fact, my daughter, and all the moms, were the only ones who really liked my homemade strawberry rhubarb lemonade. It never even crossed my mind that most of the kids would find it way too tart...
I made a better decision on the healthy snack part of the party. After the kids made a craft, I served fruit and dip. I never realized that strawberries and mini marshmallows would be such a sell! The berries were organic and so deliciously sweet that they didn't need any special preparation. I just washed and hulled them, slid them onto a frilly toothpick, and kept them from sliding off with a single mini marshmallow. Every single one was eaten. The dip on the other hand, again something my daughter likes, was not a huge hit with some of the kids. I had made it during a cooking class I taught for older kids (ages 6 - 9) where it was well received. See what you think...
Honey Fruit Dip
Ingredients
~ 1 cup plain yogurt
~ 1 Tablespoon honey
~ Brown sugar to sprinkle on top
~ Fruit
Directions
1. Mix honey into yogurt.
2. Sprinkle brown sugar on top.
3. Dip strawberries, grapes, banana slices, whatever fruit you like, into the dip and enjoy!
And what would a party be without cake? Since we had other food and snacks I decided to go with mini cupcakes. This way the kids could eat one or two and get to chose exactly what they wanted.
My friend, Alannah, owns my favorite bakery and she is amazing with mini cupcakes. I am blown away by the array of flavors and her attention to detail. They are all beautiful!
Happy birthday, Quin! We can't believe how quickly you are growing. You are a wonderful daughter, friend, sister... We love you!
Saturday, June 12, 2010
A Week of Birthday Posts - #4 - Birthday Party Food and Little Touches
This is post number four in the series on my daughters' birthdays. This one has some cheery photos of handmade details from my four year old's tea party.
As an artist, I pay attention to visual details. I love color and so do kids. My daughter Quin's birthday had a tea party theme, which she chose. In the past couple of years we have attended a princess and pirate party, an art making party, a dancing party, and recently we sadly could not attend a fun crazy hair/make your own pizza party.
Of course, not all parties have a theme but I am always game to work within a theme, so a tea party it was. Each child's place was set with a real tea cup from my collection. They drank fresh squeezed lemonade from them.
I don't go crazy with party decor. I do wish I had had the time to make a cheery banner but we focused on the table. Quin LOVES balloons so we made sure there were a few on her chair. I love the orange polka dot one :)
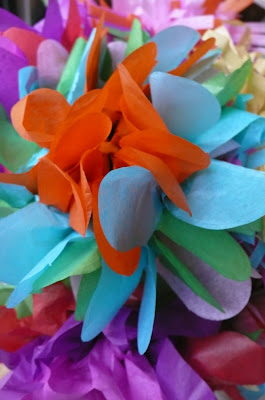
Colorful tissue paper flowers make me swoon. I stayed up until 2 AM making one for each guest to wear on their wrist as a corsage. And I don't say that like it was work, I love making them so it was fun. I will write a post someday on how to make them, but you can always google it. There are many good tutorials out there. The kids were tickled with their flowers. I showed them to Quin when she came down for breakfast and they made her day! The ones that were not taken home are still on our dining room table and I gaze at them throughout the day and remember the party fun. We made play dough for favors but these made great additional favors for the kids who remembered to take them home.
Tissue paper flowers in a vase...
...became corsages on the day of the party.
One important element, along to napkins, plates, and balloons that I purchased were the party hats, or tiaras. I am going to make each of my kids a birthday crown, something the like the one my friend, Serena, made for her little guy, but it was not to be this year.
We couldn't have a birthday party without a craft...
The kids made bejeweled butterfly place mats. I folded construction paper in half and drew a template on one side of the paper, then had them cut out the butterfly along the drawn lines.
Voila, a blank canvas butterfly, that they covered in jewels.
Only one more birthday party post, stay tuned! Number five will include recipes...
Thursday, June 10, 2010
A Week of Birthday Posts - #3 - Colorful Party Favors for Kids
Our daughter turned 4 this year. I still can't believe it! She is growing up so fast and it is really amazing to see her change and grow. We had a fun time planning and creating for her birthday party. She was able to help with almost everything. We decided to make the party favors she gave her friends. We often make and give play dough as a homemade birthday gift and it is always well received by both parents and kids. For the favors we decided to make play dough, one ball each of six colors per kiddo, in a goody bag tied with metallic ribbon. Each child was also sent home with a lollipop.
I will re post the play dough recipe here so you can make some of your own...
Homemade Play Dough
By Tiffany Teske
Ingredients
2 1/2 cups all purpose flour
1/2 cup salt
1 Tablespoon Alum Powder (I buy it in bulk at a health food store)
2 cups boiling water
3 Tablespoons cooking oil (vegetable)
food coloring
Mix dry ingredients. Add water and oil. Mix well until it forms a dough. Divide into however many ball you need for the number of colors you want. Knead dough balls until they no longer sticky and add food coloring according to the colors you want to make.
Here are some colors to get you started...
Pink - 1-2 drops of red
Orange - equal parts red and yellow
Purple - equal parts red and blue
Black - 3 drops red, 3 drops blue, 2 drops green
Brown - 2 drops green, 2 drops red, 6 drops yellow
Turquoise - 1 drop green, 3 drops blue
Lime - 1 drop green, 9 drops yellow
As for the lollipops, I put a rolled up washcloth the bottom of a vintage flower pot, covered it with jelly beans, and stuck in the lollies, with a bit of metallic ribbon wrapped around each stick.
Sunday, June 6, 2010
A Week of Birthday Posts - #2 - Two Summer Time Organic Lemonade Recipes
Every year at the same time the strawberries are suddenly half the price they were in the winter, I can get organic lemons by the bag, and fresh rhubarb is available. All of this coincides with my husband and daughters' birthdays. One of the special things I like to do for them is to make fresh lemonade. It is worth all of the effort and it is fun for my daughter and I to make together. Plus, it is always a hit with both adults and kids at a kid's birthday party, so this year we served it at my daughter's tea party. I would like to thank my friend, Jano, from Maine, for the following recipes, which I adapted to be organic and I have had in my collection for years.
Fresh Squeezed Lemonade
Recipe by Jano
This recipe is perfect for kids, who seem to find the second version a bit to tart and pulpy.
Ingredients:
~ 1 cup fresh organic lemon juice (about 6 average sized lemons)
~ 3/4 cup organic natural cane sugar
~ 4 cups water
Directions:
1. Squeeze your lemons. There are several ways you can do this; by hand; using a juicer; or my favorite method which is to use a metal lemon squeezer, like I have in the photograph at the end of this recipe. There is nothing like having the proper tool for a job, and for lemonade this IS the one...
2. Bring sugar and water to a boil. When the sugar dissolves reduce the heat and simmer a minute or two more.
3. Add lemon juice. Let cool. Refrigerate. Enjoy!
Strawberry-Rhubarb Lemonade
By Jano
Ingredients:
~ 1 cup fresh organic lemon juice (about 6 average sized lemons)
~ 2 1/2 cups chopped rhubarb
~ 3/4 cup organic cane sugar
~ 4 cups water
~ Zest from one organic lemon
~ 1/2 t organic vanilla
~ 1 1/2 - 2 cups organic strawberries, chopped, plus 2-3 whole strawberries
Directions:
1. Squeeze your lemons.
2. Heat water, rhubarb, sugar, dash of lemon zest, and vanilla. Bring to boil. When sugar dissolves, reduce heat and simmer for 5 minutes, covered. Add chopped strawberries and boil again for two minutes, covered.
3. Cool mixture. Blend in food processor or blender. Add zest and lemon juice and blend. Pulse in whole strawberries if you want some fresh chunks.
4. Taste - adjust sweetness. Refrigerate. Serve.
Labels:
beverage recipe,
birthdays,
cooking with kids,
kids,
recipe,
vegetarian recipe
Wednesday, June 2, 2010
A Week of Birthday Posts - #1 - My Strawberry Banana Baby's First Birthday Cake
"A whole cake?! What is going on here? Do you REALLY want me to eat this?!"
Both of my daughters and my husband have birthdays in the same week (lucky me, I am in November). This means there was a lot of cooking, baking, crafting, and party throwing going on last week. I will be posting some photos, how-tos, and recipes to share with you during the coming week.
Emmanuelle, our baby, turned ONE last week! A very exciting time which has included three new teeth (bringing the total to 7), walking her first steps, and surprising us with new skills every time we turn around. For her first birthday cake, I wanted something that was healthy or at least healthier than something from a big store. Our oldest daughter was given a super sugary, very blue frostinged cake for her first, by my mother, and Andre and I were smuggly thrilled when she wouldn't eat it. For Emmanuelle, who is a big eater, I wanted something delicious and free from colorings. I decided that a strawberry banana cake would be awesome. I searched the internet and was surprised that I could find reference to a couple of them, but no recipes... I decided to cobble together several recipes and try to make my own. I decided to make a banana honey cake and to frost it with a cream cheese butter strawberry frosting. It was a hit! ESPECIALLY with ME. YUM YUM... This cake is amazingly moist and soooooo delicious.
Banana Honey Cake with Strawberry Cream Cheese Frosting - Baby's First Birthday Cake
by Tiffany Teske
Banana Honey Cake
Makes 2 8" square cakes
Ingredients
~ 1 c honey
~ 1 tsp soda
~ 1 c organic oatmeal, uncooked (quick or old-fashioned)
~ 3/4 c organic unsalted butter (omit sea sale below if using salted butter)
~ 1/2 c natural sugar
~ 2 organic eggs
~ 1 c mashed bananas (I used 4, three that were pretty ripe, one frozen one that was thawed, the riper the better)
~ 1 1/2 c whole wheat pastry flour
~ 3/4 tsp baking powder
~ 3/4 tsp sea salt
Directions
1. Bring honey to a boil in medium-sized saucepan. Add oats, the pour 1/2 teaspoon
of the soda over oats and stir to combine. Cover and let stand 10
minutes.
2. Beat butter until creamy. Gradually add sugar, beating until fluffy.
Blend in eggs. Add oats mixture and bananas then blend well. Sift together
flour, remaining 1/2 teaspoon soda, baking powder and salt. Add to
creamed mixture and blend well.
3. Pour batter into 2 greased 8-inch square cake pans. Bake in preheated 350 F degree oven for 35 to 40 minutes. Cool on wire rack about 10 minutes. Remove from pans and let cool. Frost.
Quin blowing out her sister's birthday candles...
Strawberry Cream Cheese Frosting
Approx 2 cups
Ingredients
~ 6 ounces cream cheese, softened
~ 1/4 cup organic butter, unsalted, softened
~ 1 cup icing sugar (For the baby cake I only used 1/4 c icing sugar)
~ 1/2 cup mashed drained fresh strawberries
Directions
1. Blend together the cream cheese and butter using an electric mixer on low speed until combined.
2. Add sugar, gradually, and the mashed strawberries; blend frosting again on low speed until the sugar is incorporated, 1 minute.
3. Increase mixer speed to medium and blend frosting until fluffy, 30-45 seconds more. You can add as much sugar as you like for the spreading consistency you want.
Emmanuelle, loving her first birthday cake... (No, she didn't eat it all, she ate less than 1/4 of it, which is a lot for a babe!
Labels:
babies,
baking,
birthdays,
Breakfast recipe,
Dessert recipe,
family
Subscribe to:
Posts (Atom)